Difference between revisions of "Tutorials/Connecting to the Internet"
Jump to navigation
Jump to search
m |
m (edit) |
||
| Line 3: | Line 3: | ||
|- | |- | ||
|width=25% align=left bgcolor=#C3D9FF|← '''[[Sugar_Creation_Kit/sck/Introduction_to_Sugar_Interface|Introduction to the Sugar Interface]]''' | |width=25% align=left bgcolor=#C3D9FF|← '''[[Sugar_Creation_Kit/sck/Introduction_to_Sugar_Interface|Introduction to the Sugar Interface]]''' | ||
| − | |width=50% align=center bgcolor=#C3D9FF|'''[[Downloads | + | |width=50% align=center bgcolor=#C3D9FF|'''[[Downloads|Downloads]]''' |
|width=25% align=right bgcolor=#C3D9FF| '''[[Sugar_Creation_Kit/sck/Drag-Drop|Drag-Drop from 2nd USB]]''' → | |width=25% align=right bgcolor=#C3D9FF| '''[[Sugar_Creation_Kit/sck/Drag-Drop|Drag-Drop from 2nd USB]]''' → | ||
|} | |} | ||
| Line 56: | Line 56: | ||
|- | |- | ||
|width=25% align=left bgcolor=#C3D9FF|← '''[[Sugar_Creation_Kit/sck/Introduction_to_Sugar_Interface|Introduction to the Sugar Interface]]''' | |width=25% align=left bgcolor=#C3D9FF|← '''[[Sugar_Creation_Kit/sck/Introduction_to_Sugar_Interface|Introduction to the Sugar Interface]]''' | ||
| − | |width=50% align=center bgcolor=#C3D9FF|'''[[Downloads | + | |width=50% align=center bgcolor=#C3D9FF|'''[[Downloads|Downloads]]''' |
|width=25% align=right bgcolor=#C3D9FF| '''[[Sugar_Creation_Kit/sck/Drag-Drop|Drag-Drop from 2nd USB]]''' → | |width=25% align=right bgcolor=#C3D9FF| '''[[Sugar_Creation_Kit/sck/Drag-Drop|Drag-Drop from 2nd USB]]''' → | ||
| − | | | + | |} |
Revision as of 20:17, 8 December 2011
| ← Introduction to the Sugar Interface | Downloads | Drag-Drop from 2nd USB → |
- Boot one of the many flavors of Sugar
- Sugar on a Stick (SoaS) USB-stick
- Soas CD
- Sugar-emulator
- Sugar-Desktop with GNOME3-shell or another Desktop
- a VirtualBox Appliance of SoaS
- XO-1 or XO-1.5 One Laptop per Child (OLPC) Laptop
- Click the Downloads link in the Top/Bottom blue bar for more information about Sugar and how it is used
- Use your Browser <=== Back arrow to return to this page
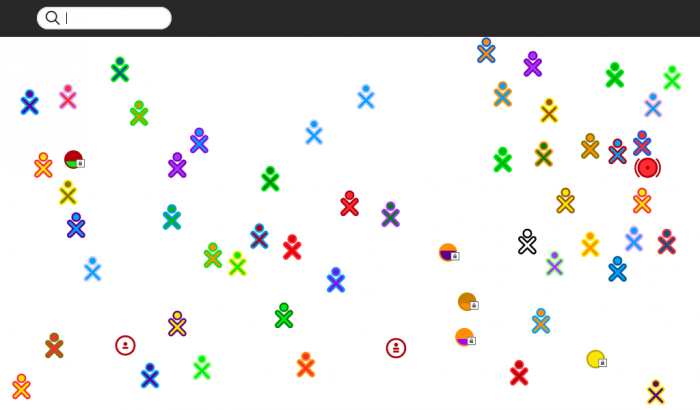
- Hit the F1 key to switch to the Jabber Network "Neighborhood" View
- You are the XO in the center.
- Hover on it and the same drop-down menu will appear as in f3
- All the other XO figures are other users on the jabber network
- Their name will be displayed if you hover over each one.
- Sugar uses 3 classes of connections:
1-)You should see 3 circles with a filling:
- Circle with a dot;Circle with a dot and underscore;Circle with a dot and 2 underscores.
- These are Ad-Hoc connections.
- That let sugar connect users locally with no Internet Connection
- Sugar is connected to AD-Hoc network 3; circle with a ( O )and 2 underscores
2-)There should be other unfilled colored circles (with or without a lock symbol)
- These are Wireless Access Points
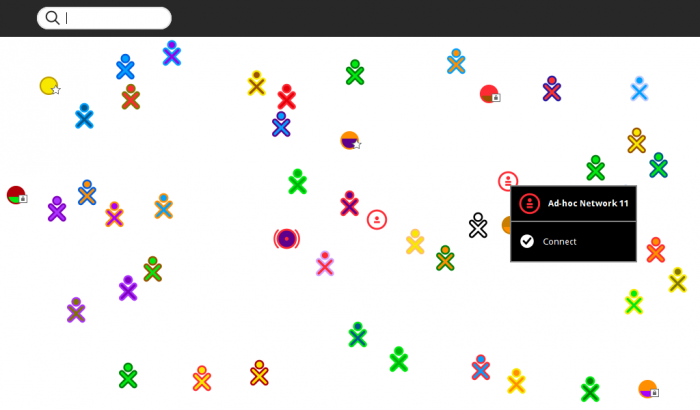
- You can click on any of these circles and sugar will try to connect to it.
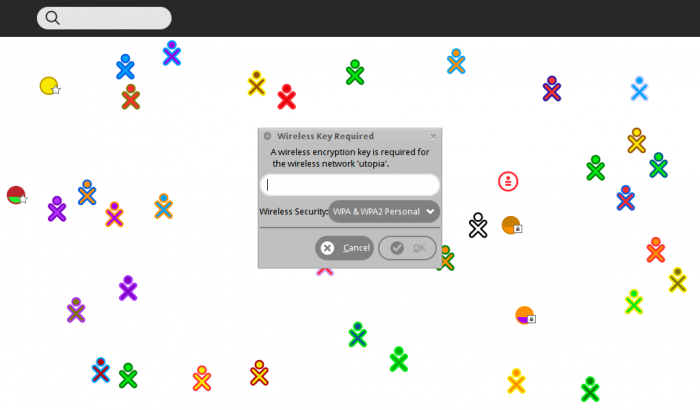
- A drop down menu will appear; asking for password if the AP requires a password; and a selection to "Connect"
- These will be missing if there is no working wireless Hardware in your equipment
- Or there is no Wireless Access Point in Range
3-)If you are plugged in to a cat-5 wired network connection
- you will be automatically connected to the internet when you boot sugar
- There will be no indication of this connection from Network Manager.
- XO-1 and XO-1.5 have no wired connection only wireless (1 or 2 above)
- hit f3 and return to the main screen
- You are now connected to the Internet or Ad-Hoc Network


