Documentation Team/User Manual/Connecting to the Internet/lang-es
Puede hacer su conexión a internet a traves de la vista de Vecindario. Su estado de conexión actual se muestra en la vista hogar. (La XO fue diseñada para acceder por wireless porque en el mundo desarrollado, la wireless es más rápida, mas confiable y la manera menos costosa de conexión.
Paso 1: Vaya a la vista de Vecindario
Haga click sobre el boton de Vecindario ![]() (Un circulo con 8 puntos), lo encuentra en la esquina superior derecha del teclado, para ir a la vista de Vecindario. Desde aqui puede conectarse a un punto de acceso wifi y ver, si esta conectado a una red mesh o Jabber o si hay otros usuarios Sugar.
(Un circulo con 8 puntos), lo encuentra en la esquina superior derecha del teclado, para ir a la vista de Vecindario. Desde aqui puede conectarse a un punto de acceso wifi y ver, si esta conectado a una red mesh o Jabber o si hay otros usuarios Sugar.
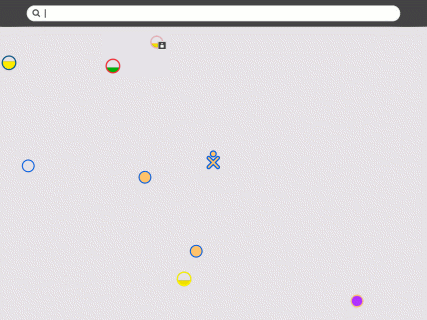
Verá esta pantalla
 .
Su usuario Sugar se representa con el Icono XO, en el centro de la pantalla.
Paso 2: Seleccione un punto de acceso
Su árbol de redes XO (puntos portal) estan representados por circulos del mismo color que su usuario Sugar. Las redes (Puntos de acceso) son representadas por circulos de otros colores.
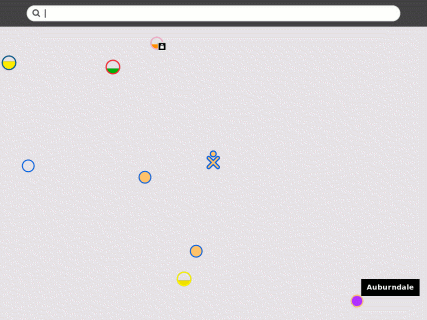
Al apuntar a los circulos copn el mouse se abre una ventana que identifica la red: Un punto de acceso es identificado por su nombre (ESSID); un punto portal es identificado por el número de canal (1, 6 o 11). También puede buscar un punto de acceso por el nombre en la barra de busqueda que está en la parte superior de la pantalla.
La intensidad de la señal se indica por el nivel de llenado del circulo. Las redes que son cerradas y requieren contraseNa para ingresar se identifican con un candado en la parte inferior del circulo.
Paso 3: Activar una conexión
Para activar una conexión o red mesh, ubique el mouse dentro del circulo que corresponde con su punto de acceso seleccionado y haga click. (Para hacer “click”, presione una vez sobre el botón derecho del mouse que tiene una x en el frente.) mientras el XO esta tratando de establecer una conexión, el interior del circulo va a parpadear. una vez que la conexión esta establecida, el exterior del circulo va a volverse blanco, si por alguna razón la conexión falla, el centro del circulo dejara de parpadear, y el borde conservara su color original. algunas veces es necesario probar varias veces antes de que la conexión se establezca.
Si tu no especificas una red, Sugar intentara conectarse a un red mesh simple, permitiéndote colaborar con otros usuarios de sugar, pero no acceder a internet.
si el access point requiere una clave, usted sera avisado, recuerda que diferentes tipos de access point requieren diferentes tipos de claves: este seguro de que selecciono el tipo correcto en el menú expansible que se le presenta.
algunos access points (como apple extreme®) solo funcionaran con un valor hexadecimal. Si tu tienes un password o passphrase, ve al conversor hexadecimal para obtener la clave hexadecimal . si estas usando un apple extreme, tu necesitas fijar "shared key" muchos otros access points prefieren la configuracion "open key" cuando usan WEP
Paso 4: chequeando la conexion
haz click en el simbolo Hogar, ![]() (un circulo con un punto en el centro) lo encontraras en la parte superior izquierda de el teclado, ve a la vista de hogar para revisar tu conexion inalambrica.
(un circulo con un punto en el centro) lo encontraras en la parte superior izquierda de el teclado, ve a la vista de hogar para revisar tu conexion inalambrica.
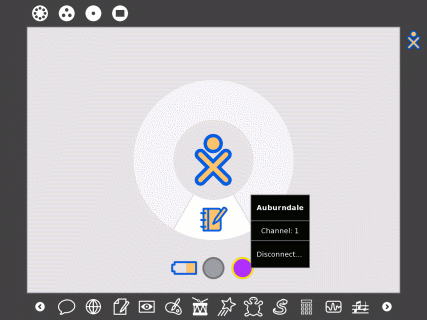
maneniendote sobre el icono circular, encontraras detalles acerca de el estado de tu conexion.
para mas informacion acerca de como conectarte, por favor ve la Support page in the OLPC wiki.

