Difference between revisions of "Downloads"
(Clarify instructions, add details) |
(livecd-iso-to-disk does not erase 'all' content unless the --format option is used.) |
||
| Line 36: | Line 36: | ||
|valign=top| | |valign=top| | ||
# '''Prepare''': Use this script http://bit.ly/livecd-iso-to-disk to create a bootable image.<br>(Run {{Code|chmod +x livecd-iso-to-disk.sh}} after you download the script to make it executable.) <br>You should have the isomd5sum package installed so that the script can verify the download.<br><br> | # '''Prepare''': Use this script http://bit.ly/livecd-iso-to-disk to create a bootable image.<br>(Run {{Code|chmod +x livecd-iso-to-disk.sh}} after you download the script to make it executable.) <br>You should have the isomd5sum package installed so that the script can verify the download.<br><br> | ||
| − | # '''Download''': [http://spins.fedoraproject.org/soas/#downloads Download] the Sugar-on-a-Stick iso.<br><br> | + | # '''Download''': [http://spins.fedoraproject.org/soas/#downloads Download] the Sugar-on-a-Stick .iso file.<br><br> |
| − | # '''Load''': Insert a USB stick of 1 GB or greater capacity | + | # '''Load''': Insert a USB stick of 1 GB or greater capacity. Execute, as the '''root''' user, in the directory where you downloaded the script, in <u>one</u> command with arguments, the following: |
#:{{Code|./livecd-iso-to-disk.sh --reset-mbr --overlay-size-mb 300 --home-size-mb 175 --delete-home --unencrypted-home '''/path/to/source'''.iso /dev/sd'''?'''1}} | #:{{Code|./livecd-iso-to-disk.sh --reset-mbr --overlay-size-mb 300 --home-size-mb 175 --delete-home --unencrypted-home '''/path/to/source'''.iso /dev/sd'''?'''1}} | ||
| − | #: where '{{Code|'''?'''}}' in the final parameter represents the target bootable device node, such as {{Code|sdb1}} or {{Code|sdc1}}, etc. and /path/to/source is the location and name of the | + | #: where '{{Code|'''?'''}}' in the final parameter represents the target bootable device node, such as {{Code|sdb1}} or {{Code|sdc1}}, etc. and /path/to/source is the location and name of the .iso file. You can use the df command to get the device node name.<br><br> |
# '''Boot''': Insert the USB stick into a USB port on your computer. Set the option to "boot from USB" in your computer's <abbr title="Basic Input/Output System">BIOS</abbr> setup, and then start up the computer. | # '''Boot''': Insert the USB stick into a USB port on your computer. Set the option to "boot from USB" in your computer's <abbr title="Basic Input/Output System">BIOS</abbr> setup, and then start up the computer. | ||
|} | |} | ||
Revision as of 11:16, 3 May 2011
| <imagemap>
File:Download-circle.png rect 58 6 109 51 MS Windows rect 146 28 195 85 GNU/Linux rect 146 128 200 181 OLPC XO rect 60 154 111 212 virtual machine rect 5 77 50 133 Apple Mac OS X rect 86 76 128 133 Are you new to Sugar? desc none </imagemap> |
|
Are you new to Sugar?
The easiest way to get started is to use Sugar on a Stick. Basic instructions are found below. A more detailed Sugar-on-a-Stick Creation Guide is also available. (If you already use GNU/Linux, you may want to install the Sugar packages available from your distro.)
MS Windows

 |
|
Detailed installation instructions for Windows and booting instructions are available. There is also a guide to exploring Sugar on a Stick.
GNU/Linux
GNU/Linux users may want to install the Sugar packages on their favorite distro, apart from Sugar on a Stick.

|
|
Detailed installation instructions for GNU/Linux and booting instructions are available. There is also a guide to exploring Sugar on a Stick.
Apple Mac OS X
DRAFT: These instructions are incomplete. Please help with testing and documentation. In the meantime, we recommend the Virtual Machines instructions below.
|
|
Alternative installation instructions for Mac OS X. Also, these older installation instructions and booting instructions may be consulted.
There is also a guide to exploring Sugar on a Stick.
Advanced users
|
|
Do you have an OLPC XO?

|
|
Do you use GNU/Linux?
| Select your favorite distribution |
| ||||||||||||||
| Or try a Live USB version of Sugar | or, for brave pioneers, v5 alpha with Sugar 0.92.1 and Fedora 15 (Lovelock) |
Virtual Machines on all platforms
 |
VirtualBox Appliances ← recommended |
|
|
If you run into problems, you may want to consult the Talk:VirtualBox page for help.
Are you a developer?

|
Learn how to get setup on the Supported systems page.
Some additional references you may find useful: |
Are you preparing a deployment without Internet access?
|
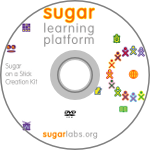
See Sugar Creation Kit |
Are you looking for Sugar Activities?
| Visit the Sugar Activity Library | <imagemap>
File:Sugarlabs_mainpage_02.png rect 14 14 38 47 Calculate rect 74 15 107 44 Chat rect 137 16 171 43 Implode rect 201 14 238 46 Distance rect 265 12 298 47 Etoys rect 11 79 41 108 Moon rect 74 78 106 110 Paint rect 140 78 170 109 Pippy rect 201 80 235 108 Read rect 266 82 298 107 Record rect 11 143 41 172 TamTam Synth Lab rect 75 146 105 169 Terminal rect 142 140 166 173 Turtle Blocks rect 201 144 235 171 WikiBrowse rect 269 142 299 173 Write default Sugar Activity Library desc none </imagemap> |