Sugar on a Stick/Linux/Installation
8 GB f30 soas USB with persistence
updated Jan 30 2019
- fat format marked bootable (Used gnome disks)
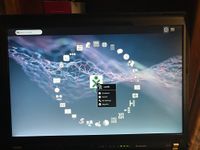
*changed background to show persistence worked after reboot

Terminal output
[satellit@localhost ~]$ cd Downloads/rawhide
[satellit@localhost rawhide]$ su
Password:
[root@localhost rawhide]#
[root@localhost rawhide]# livecd-iso-to-disk --reset-mbr --overlay-size-mb 2000 --home-size-mb 2000 --delete-home --unencrypted-home Fedora-SoaS-Live-x86_64-Rawhide-20181212.n.1.iso /dev/sdb1
[root@localhost rawhide]# livecd-iso-to-disk --reset-mbr --overlay-size-mb 2000 --home-size-mb 2000 --delete-home --unencrypted-home Fedora-SoaS-Live-x86_64-Rawhide-20181212.n.1.iso /dev/sdb1
Verifying image...
/home/satellit/Downloads/rawhide/Fedora-SoaS-Live-x86_64-Rawhide-20181212.n.1.iso: 7c45a5171c275ba9185273b7936aa5f7
Fragment sums: 326fafe823b9f5462d8b71baade13d333b817887c1b1a7e24b347f5f9e71
Fragment count: 20
Supported ISO: no
Press [Esc] to abort check.
Checking: 100.0%
The media check is complete, the result is: PASS.
It is OK to use this media.
Copying LiveOS image to target device... squashfs.img
898,441,216 100% 201.98MB/s 0:00:04 (xfr#1, to-chk=0/1)
Syncing filesystem writes to disc.
Please wait, this may take a while...
Setting up /EFI/BOOT Updating boot config files. Initializing persistent overlay... livecd-iso-to-disk --reset-mbr --overlay-size-mb 2000 --home-size-mb 2000 --delete-home --unencrypted-home Fedora-SoaS-Live-x86_64-Rawhide-20181126.n.0.iso /dev/sdb1livecd-iso-to-disk --reset-mbr --overlay-size-mb 2000 --home-size-mb 2000 --delete-home --unencrypted-home Fedora-SoaS-Live-x86_64-Rawhide-20181126.n.0.iso /dev/sdb12000+0 records in 2000+0 records out 2097152000 bytes (2.1 GB, 2.0 GiB) copied, 393.404 s, 5.3 MB/s Initializing persistent /home 2000+0 records in 2000+0 records out 2097152000 bytes (2.1 GB, 2.0 GiB) copied, 549.836 s, 3.8 MB/s Formatting unencrypted home.img mke2fs 1.44.3 (10-July-2018) Creating filesystem with 512000 4k blocks and 128000 inodes Filesystem UUID: 01095cb1-d795-4435-8283-2f3c2868160e Superblock backups stored on blocks: 32768, 98304, 163840, 229376, 294912
Allocating group tables: done Writing inode tables: done Creating journal (8192 blocks): done Writing superblocks and filesystem accounting information: done
tune2fs 1.44.3 (10-July-2018) Setting maximal mount count to -1 Setting interval between checks to 0 seconds Installing boot loader... Target device is now set up with a Live image! [root@localhost rawhide]# livecd-iso-to-disk --reset-mbr --overlay-size-mb 2000 --home-size-mb 2000 --delete-home --unencrypted-home Fedora-SoaS-Live-x86_64-Rawhide-20181126.n.0.iso /dev/sdb1livecd-iso-to-disk --reset-mbr --overlay-size-mb 2000 --home-size-mb 2000 --delete-home --unencrypted-home Fedora-SoaS-Live-x86_64-Rawhide-20181126.n.0.iso /dev/sdb1
16 GB USB persistent
[root@localhost rawhide]# livecd-iso-to-disk --reset-mbr --overlay-size-mb 4086 --home-size-mb 4086 --delete-home --unencrypted-home Fedora-SoaS-Live-x86_64-Rawhide-20181123.n.1.iso /dev/sdb1
fat
bootable (in gnome-disks)
These are the steps for installing Sugar on a Stick on a USB/SD device.
This page is transcluded to various installation instruction pages.
- Download the latest Sugar on a Stick .iso file.
- Install the livecd-tools package to obtain the installation script and the SYSLINUX boot loader. Use this command to obtain the installer:
sudo dnf install livecd-tools - Insert a USB stick of 2 GB or greater capacity into your computer.
- With root user permissions at a terminal or console command line, use the command
sudo df -Thorsudo blkidto get the USB device node name. - (Items in angle brackets, such as <MyAccount> are descriptive placeholders.)
- (The
/run/media/<MyAccount>/path is the standard mount point for removable media./media/<MyMountPoint>is common on other operating systems.) - (Additional disk drive partitions may be listed on your computer.)
- The mount point (Mounted on), Filesystem, Size, and LABEL should help you identify what you want.
- Unmount the USB device filesystem:
umount /run/media/<MyAccount>/<MyUSBdiscMountPoint>- (The
/run/media/<MyAccount>/path is the standard mount point. Other operating systems may use/media/<MyMountPoint>.)
- (The
- (You should have the isomd5sum package installed so that the following installation script can verify the download.)
- Load: Execute the following installation command, as the root user, in one command line with many options:livecd-iso-to-disk --reset-mbr --overlay-size-mb 500 --home-size-mb 500 --unencrypted-home /path/to/downloaded.iso /dev/sd?1
- The '
?' in the final parameter represents the target USB device scsi drive node, such assdb1orsdc1, etc., and/path/to/downloaded.isois the location and name of the .iso file. - The operating system will occupy ~960 MB, and the overlay and home size arguments, 500 and 500, were selected to fit in a 2 GB device. These may be adjusted depending on your preferences and device capacity (see LiveOS image). On a 4 GB device, one might use 1000 and 1600 for the size arguments.
The installation transcript should look something like the following:[<user>@<system> <working directory>]$ sudo livecd-iso-to-disk --reset-mbr --overlay-size-mb 500 --home-size-mb 500 --unencrypted-home /<path to>/Fedora-SoaS-Live-x86_64-29-1.2.iso /dev/sdc1 Verifying image... /<path to>/Fedora-SoaS-Live-x86_64-29-1.2.iso: 7641738bb0493f4a521af3a694e4f4ae Fragment sums: 7c5f6e26254ca7438da4d5b28a72a9f38711e3bb34b2748e177533ef5c25 Fragment count: 20 Supported ISO: no Press [Esc] to abort check. Checking: 100.0% The media check is complete, the result is: PASS. It is OK to use this media. Copying LiveOS image to target device... squashfs.img 905,187,328 100% 374.66MB/s 0:00:02 (xfr#1, to-chk=0/1) Syncing filesystem writes to disc. Please wait, this may take a while... Setting up /EFI/BOOT Updating boot config files. Initializing persistent overlay... 500+0 records in 500+0 records out 524288000 bytes (524 MB, 500 MiB) copied, 0.448825 s, 1.2 GB/s Initializing persistent /home 500+0 records in 500+0 records out 524288000 bytes (524 MB, 500 MiB) copied, 0.415686 s, 1.3 GB/s Formatting unencrypted home.img mke2fs 1.44.3 (10-July-2018) Creating filesystem with 512000 1k blocks and 128016 inodes Filesystem UUID: 8fc0d8be-5c67-46a8-b621-6bd62bad3267 Superblock backups stored on blocks: 8193, 24577, 40961, 57345, 73729, 204801, 221185, 401409 Allocating group tables: done Writing inode tables: done Creating journal (8192 blocks): done Writing superblocks and filesystem accounting information: done tune2fs 1.44.3 (10-July-2018) Setting maximal mount count to -1 Setting interval between checks to 0 seconds Installing boot loader... Target device is now set up with a Live image! - The '
- Boot: Insert the USB stick into a bootable USB port on your computer. Set the option to "boot from USB" in your computer's BIOS setup, and then start up the computer.
[<user>@<system> <working directory>]$ sudo df -Th
Filesystem     Type      Size  Used Avail Use% Mounted on
rootfs         rootfs     20G  5.5G   14G  29% /
devtmpfs       devtmpfs  1.6G     0  1.6G   0% /dev
tmpfs          tmpfs     1.6G  788K  1.6G   1% /dev/shm
tmpfs          tmpfs     1.6G  1.3M  1.6G   1% /run
tmpfs          tmpfs     1.6G     0  1.6G   0% /sys/fs/cgroup
tmpfs          tmpfs     1.6G     0  1.6G   0% /media
/dev/loop0     iso9660   959M  959M     0 100% /run/soas
/dev/sdc1      vfat      2.0G  2.0G   53M  98% /run/media/<MyAccount>/<filesystem label>/
[<user>@<system> <working directory>]$ sudo blkid
/dev/sda1: LABEL="Fedora29" UUID="45e12f4a-51f2-463e-a33b-a6c0f157ab77" TYPE="ext4" PARTUUID="000b2340-04"
/dev/sdc1: LABEL="LIVE" UUID="D2AC-5056" TYPE="vfat"  PARTUUID="000056b3-01"
/dev/loop0: UUID="2018-10-25-00-02-47-00" LABEL="Fedora-SoaS-Live-29-1-2" TYPE="iso9660" PTUUID="3299e5ae" PTTYPE="dos"
- To create more Sugar Sticks on other 2 GB or greater USB or SD devices, while running Sugar on a Stick, one may run the Terminal Activity, and execute this command as the root user:livecd-iso-to-disk --reset-mbr --overlay-size-mb 500 --home-size-mb 500 --delete-home --unencrypted-home /run/initramfs/livedev /dev/sd?1
- Replace
/dev/sd?1with a new device node for the second USB/SD device that you want to load with Sugar on a Stick.
- To create more Sugar Sticks on other 2 GB or greater USB or SD devices, while running Sugar on a Stick, one may run the Terminal Activity, and execute this command as the root user: