Sugar on a Stick/Windows
Jump to navigation
Jump to search
Introduction
This page is designed to help you to put your Sugar on a Stick image on a thumbdrive using Microsoft Windows. If you have questions, trouble or feedback, please let us know on the Sugar on a Stick talk page. If you can improve these instructions, please edit the page and do so!
with Microsoft Windows
 There are three ways to do this:
- 1. Burn a CD-ROM disc, boot from it, then run the script, livecd-iso-to-disk
- Use Windows 7 built-in Disk Image Burner or a free utility, like ImgBurn, to write the downloaded Sugar on a Stick .iso file onto a blank CD.
- Insert a USB flash drive (or SD Card Notes) with 2 GB or more of free space into your computer.
- Boot your computer with the CD-ROM disc. You probably need to press F1, F10, F12, Esc, or a similar key as the computer starts up in order to set the boot source for your computer to the CD-ROM device.
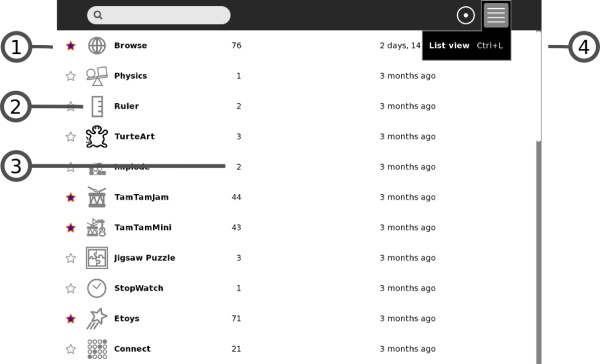
- A successful boot will take you into Sugar on a Stick. You can From there, open the Terminal Activity,
 , from the Home list View.
 - Switch to run commands with 'root' user permissions by entering
su -on the command line. - Change the working directory, by entering
cd /run/initramfs/live/LiveOS - Verify the USB/SD scsi drive node name (such as sda, sdb, etc.) and partition (such as 1, 2, etc.) for your USB/SD device. It would look like, for example,
/dev/sdb1.- The
df -Thcommand shows your device filesystem on a device node, for example, /dev/sdb1, mounted on a directory mount point, such as /run/media/liveuser/<USBdeviceManufacturer>
- The
- Unmount the USB device filesystem with this command:
umount /run/media/liveuser/MyUSBdiscMountPoint, whereMyUSBdiscMountPointisSanDiskin the dropdown example, above. - Execute this command line: (Substitute the
/dev/sd?1, below, with the node name you determined in step 7, above.)./livecd-iso-to-disk --reset-mbr --overlay-size-mb 500 --home-size-mb 900 --delete-home --unencrypted-home /run/initramfs/livedev /dev/sd?1
(The 500 and 900 size values, above, are suitable for a 2 GB USB device. For a 4 GB device, one might use 1000 and 1800 megabytes instead.)
- Shutdown the physical machine.
- Reboot your computer from the newly-installed Live USB with Sugar on a Stick.
You should see something like the following:
[root@localhost ~]# df -Th
Filesystem          Type      Size  Used Avail Use% Mounted on
/dev/mapper/live-rw ext4      2.9G  2.1G  773M  74% /
devtmpfs            devtmpfs  2.0G     0  2.0G   0% /dev
tmpfs               tmpfs     2.0G   72K  2.0G   1% /dev/shm
tmpfs               tmpfs     2.0G  632K  2.0G   1% /run
tmpfs               tmpfs     2.0G     0  2.0G   0% /sys/fs/cgroup
/dev/sr0            iso9660   670M  670M     0 100% /run/initramfs/live
tmpfs               tmpfs     2.0G   32K  2.0G   1% /tmp
varcacheyum         tmpfs     2.0G     0  2.0G   0% /var/cache/yum
vartmp              tmpfs     2.0G     0  2.0G   0% /var/tmp
/dev/sdb1           vfat      3.8G  4.0K  3.8G   1% /run/media/liveuser/SanDisk
The installation transcript should look like the following:
[root@localhost LiveOS]# ./livecd-iso-to-disk --overlay-size-mb 1000 --home-size-mb 1800 --unencrypted-home /run/initramfs/livedev /dev/sdb1
Verifying image...
/dev/sr0:   86396857ba250ac9622e2cced37242c0
Fragment sums: 9b844726affc45a47d6ddf73ba13d88c8f6f6fff2cbcf55476ebe3bbc4a4
Fragment count: 20
Press [Esc] to abort check.
Checking: 100.0%

The media check is complete, the result is: PASS.

It is OK to use this media.
Copying live image to target device.
squashfs.img
    632,832,000 100%    5.63MB/s    0:01:47 (xfr#1, to-chk=0/1)
osmin.img
          8,192 100%    0.00kB/s    0:00:00 (xfr#1, to-chk=0/1)
Updating boot config file
Initializing persistent overlay file
1000+0 records in
1000+0 records out
1048576000 bytes (1.0 GB) copied, 193.866 s, 5.4 MB/s
Initializing persistent /home
1800+0 records in
1800+0 records out
1887436800 bytes (1.9 GB) copied, 592.395 s, 3.2 MB/s
Formatting unencrypted /home
mke2fs 1.42.8 (20-Jun-2013)
Filesystem label=
OS type: Linux
Block size=4096 (log=2)
Fragment size=4096 (log=2)
Stride=0 blocks, Stripe width=0 blocks
115200 inodes, 460800 blocks
23040 blocks (5.00%) reserved for the super user
First data block=0
Maximum filesystem blocks=473956352
15 block groups
32768 blocks per group, 32768 fragments per group
7680 inodes per group
Superblock backups stored on blocks:
	32768, 98304, 163840, 229376, 294912

Allocating group tables: done
Writing inode tables: done
Creating journal (8192 blocks): done
Writing superblocks and filesystem accounting information: done

tune2fs 1.42.8 (20-Jun-2013)
Setting maximal mount count to -1
Setting interval between checks to 0 seconds
Installing boot loader
Target device is now set up with a Live image!
- 2. Use Fedora Live USB Creator
- (This installation method is NOT recommended for LONG-TERM usage of Sugar on a Stick!! Catastrophic data corruption may occur when the USB stick gets full! See why.)
- Download the Live USB Creator from Fedora.
- Insert a USB flash drive (or SD Card Notes) with 2 GB or more of free space into your computer.
- Launch Live USB Creator.
- Select the 'Browse' button to 'Use existing Live CD' and find the downloaded .iso file image on your system.
- Adjust the Persistent Storage slider. This enables you to save changes to the system and additional Sugar Activities onto the device.
- Select your flash drive as the target, and click the Create Live USB button.
- Wait for the process to finish, then close the Live USB Creator program.
- Stop your flash drive with the Safely Remove Hardware and Eject Media notification area icon dialog, and eject it.
- See a screenshot tutorial for this.
- See a video of an earlier version of this process.
- 3. Launch a virtual machine with the Sugar on a Stick .iso file, then run the script, livecd-iso-to-disk
- Download and install VirtualBox (for example; you could do something similar with another vm).
- Create a new virtual machine.
- Choose Linux for the Operating System and Version Fedora (64 bit) if available, or Fedora, on systems lacking 64-bit functionality.
- Attach the Sugar on a Stick .iso file as a CD in the Storage Section
- Insert a USB storage device into your physical computer and enable the VirtualBox USB controller. Then add a filter to recognize the inserted device in the USB section of the VirtualBox machine setup.
- Start the new virtual machine.
- Verify that the USB device is recognized in the running virtual machine.
- Your device appears in the hover box for the USB stick icon in the virtual machine bottom frame.
df -Thshows your device filesystem on a device node, for example, /dev/sda1, mounted on a directory mount point, such as /run/media/<AccountName>/<USBdeviceManufacturer>
- Continue from step #4 in the Burn a CD-ROM disc section above.
- Shutdown the virtual machine.
- Reboot your physical computer from the newly-installed Live USB with Sugar on a Stick.
You should see something like the following:
[root@localhost LiveOS]# df -Th
Filesystem          Type      Size  Used Avail Use% Mounted on
rootfs              rootfs    4.0G  2.5G  1.5G  63% /
devtmpfs            devtmpfs  1.6G     0  1.6G   0% /dev
tmpfs               tmpfs     1.6G   84K  1.6G   1% /dev/shm
tmpfs               tmpfs     1.6G  1.2M  1.6G   1% /run
/dev/sr0            iso9660   509M  509M     0 100% /run/initramfs/live
/dev/mapper/live-rw ext4      4.0G  2.5G  1.5G  63% /
tmpfs               tmpfs     1.6G     0  1.6G   0% /sys/fs/cgroup
tmpfs               tmpfs     1.6G     0  1.6G   0% /media
varcacheyum         tmpfs     1.6G     0  1.6G   0% /var/cache/yum
tmp                 tmpfs     1.6G   40K  1.6G   1% /tmp
vartmp              tmpfs     1.6G     0  1.6G   0% /var/tmp
/dev/sda1           vfat      3.7G  2.1G  1.7G  56% /run/media/liveuser/TOSHIBA
Notes
A Secure Digital (SD) card may not be marked as a bootable device. To check this, use these instructions at a Linux terminal or console:
- Check the disk partition table for a device, such as
/dev/sdc,
sudo fdisk -l /dev/sdc<----that's a lowercase letter 'L' for the list option.
parted /dev/sdctoggle 1 bootquit
You should see something like the following:
$ sudo fdisk -l /dev/sdc

Disk /dev/sdc: 4012 MB, 4012900352 bytes
124 heads, 62 sectors/track, 1019 cylinders, total 7837696 sectors
Units = sectors of 1 * 512 = 512 bytes
Sector size (logical/physical): 512 bytes / 512 bytes
I/O size (minimum/optimal): 512 bytes / 512 bytes
Disk identifier: 0x0000a9c7

   Device Boot      Start         End      Blocks   Id  System
/dev/sdc1   *          62     7834071     3917005    c  W95 FAT32 (LBA)
The asterisk, * , under the Boot column indicates that the partition is bootable.
If it is missing, then execute the commands here: