Difference between revisions of "Tutorials/Installation/Install & use liveusb-creator"
< Tutorials | Installation
Jump to navigation
Jump to search
m (tutorial completed) |
|||
| Line 1: | Line 1: | ||
==Installing and using [http://wiki.sugarlabs.org/go/Sugar_on_a_Stick/Installation#with_Microsoft_Windows liveusb-creator from sugar-terminal]== | ==Installing and using [http://wiki.sugarlabs.org/go/Sugar_on_a_Stick/Installation#with_Microsoft_Windows liveusb-creator from sugar-terminal]== | ||
*Boot Sugar | *Boot Sugar | ||
| − | *Start Sugar-Terminal from the '''( | + | *Start Sugar-Terminal from the '''(f3) home''' screen. |
[[File:Terminal-1.png|600px]] | [[File:Terminal-1.png|600px]] | ||
*Install liveusb-creator from root terminal | *Install liveusb-creator from root terminal | ||
Revision as of 10:14, 19 February 2012
Installing and using liveusb-creator from sugar-terminal
- Boot Sugar
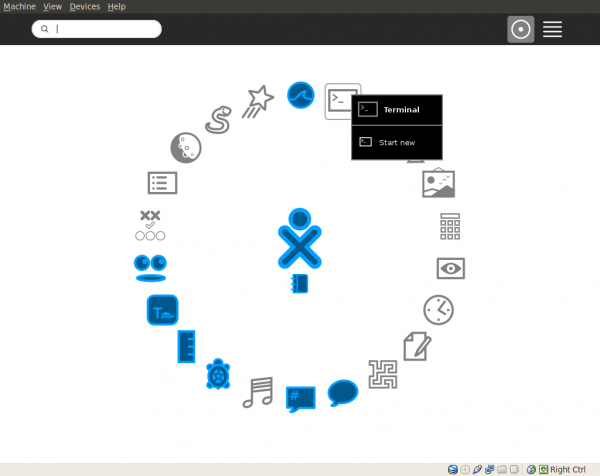
- Start Sugar-Terminal from the (f3) home screen.
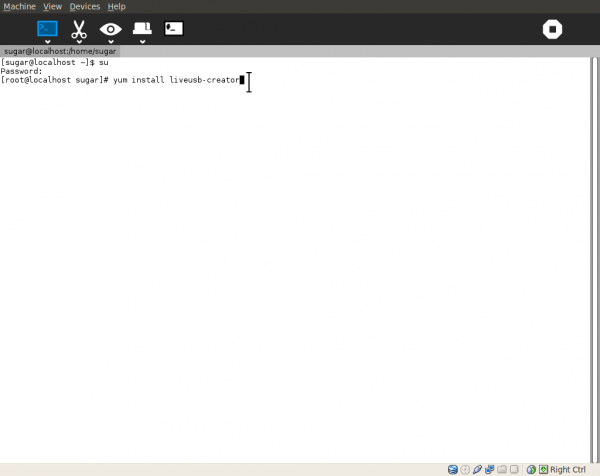
- Install liveusb-creator from root terminal
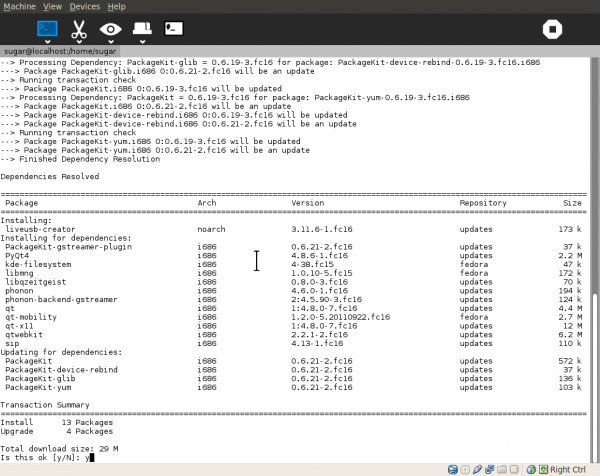
- Install files
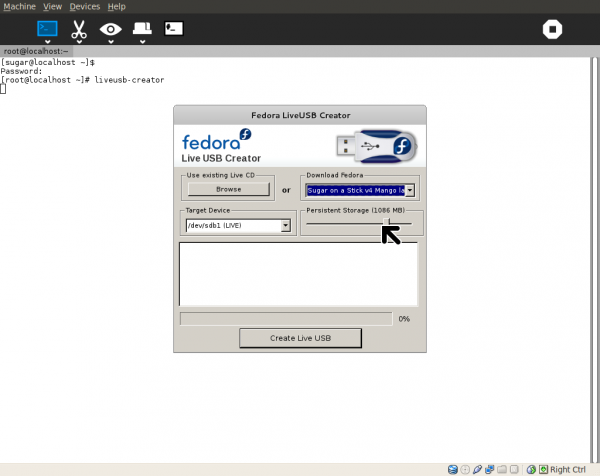
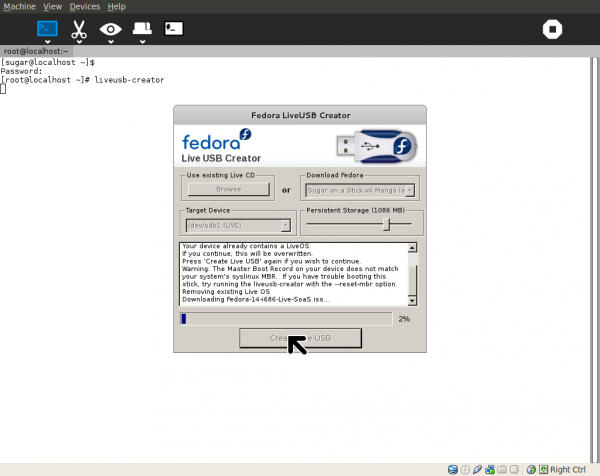
- liveusb-creator running in f16 sugar-terminal
- Note command that started it in terminal window command line
- Target Device shows inserted USB-stick
- NOTE: Stick should be fat16/32 and labelled LIVE (IN CAPS)
- Persistent Storage is set by sliding cursor.
- Do not use more than 1080 as Target USB-stick is fat formated and the size available is limited.
- liveusb-creator downloading an .iso file
- from the Download Fedora drop down menu
- after Create Live USB is clicked with mouse
- You can alternatively click Browse and select a different fedora.iso to install.
- It must have been downloaded to sugar prior to this step
- Congratulations you have just built a sugar-liveusb
- To exit: right-click on right top corner of liveusb-creator
- a pop up window will allow you to close it.
- Exit sugar and reboot from the new Live USB
