Difference between revisions of "Tutorials/Installation/Install SoaS in VirtualBox-f18"
< Tutorials | Installation
Jump to navigation
Jump to search
| Line 22: | Line 22: | ||
===Start Installer=== | ===Start Installer=== | ||
| − | + | {{Note/note|If you select: Test this media & and install Fedora (the default) there will be 4 minute or longer wait as file checking is done There is no indication it is happening}} | |
| − | + | {{Note/note|Install Fedora (top line) has no delay.}} | |
| + | |||
:[[File:F18-10-grub-install.png|800px]] | :[[File:F18-10-grub-install.png|800px]] | ||
:[[File:F18-11.png|800px]] | :[[File:F18-11.png|800px]] | ||
Revision as of 15:36, 4 December 2012
Install with Anaconda f18 in VirtualBox
- This install is used when you want to install a fedora 18 desktop to a hard-disk; Virtualbox HD or a 8 GB USB.
- A similar but simpler installer is entered in booted Live CD's using the command liveinst in root sugar-terminal(su) or other root terminal.
- this differs from the installer on fedora 17 or older versions
- http://wiki.sugarlabs.org/go/Tutorials/Installation/Install_SoaS_in_VirtualBox
- anaconda NuUI installer is NEW and has bugs:
- A major feature of f18 is the development of newUI a new anaconda.
- Sample Install to Virtualbox 4.2.4 using F18 Beta DVDx86_64


Settings In Virtualbox


Start Installer


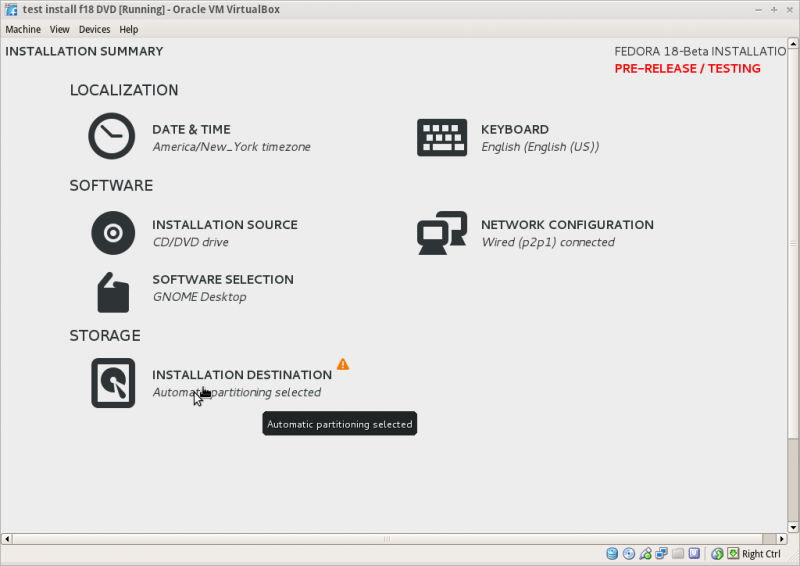
Anaconda main Hub
- When it finishes:
- Click on each section (spoke) to change or set
- click [Done] to return to main Hub

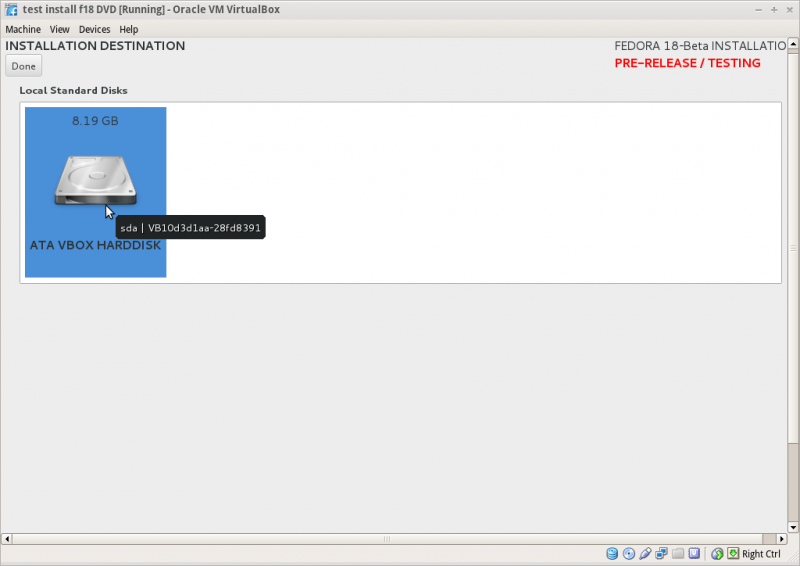
Storage (Disk Selection) then [DONE]
- To format the disk or reclaim space click on [Continue] right bottome to installer
- NOTE: Disk selection filters out non-selected Disks and makes them invisible to the installer
- A booted dd USB will show on initial selection screen DO NOT Select it.
- Example:2 Disk LVM install
SKIP this section if not using 2 Disks
- Error if disk too small (8 GB) for Development and Creative Workstation +

- 2 30 GB disks in VirtualBox
- Select both disks

Reclaim Space
- Seems to necessary to select Partition type first
[+] partition scheme drop down box click > [+]
- Standard Partition
- BTRFS
- LVM (default)

- [ ]"I don't not need help: Let me customize disk partitioning"
Skip the next section if Customize partitioning is not selected
- Option to let user [+ -] partitions:
Customize partitioning


- Returns directly to Anaconda Main Hub
- Note: bootloader defaults to "first" disk
- Of those disks initially selected
Reclaim Space-continued
- If Customize is not used
- [Reclaim space]
- Reclaim Disk space window
- shows disk partitions with drop down boxes - default is Preserve click on Preserve; get dropdowns Preserve; Shrink; Delete
- select your choice
- Note in latest anaconda (18.34-1) the selections are now located on the bottom line of the reclaim window.
- http://dl.fedoraproject.org/pub/alt/qa/20121201_f18-smoke2/

- Do this for each partition shown.
- When finished [Reclaim space] returns to main Hub

- Click [Done] to return to main hub
Software Selection and [Done]
- select left column (Environment) and right Column (Add-ons)
- Gnome-desktop is default
- scroll down left collumn and select sugar-desktop

- Wait for software checking

Network Configuration and [Done]
- recognizes wired DHCP connections if present
- Wireless will show up if wlan0 is visible and supported
- [Configure] to set up either connection.
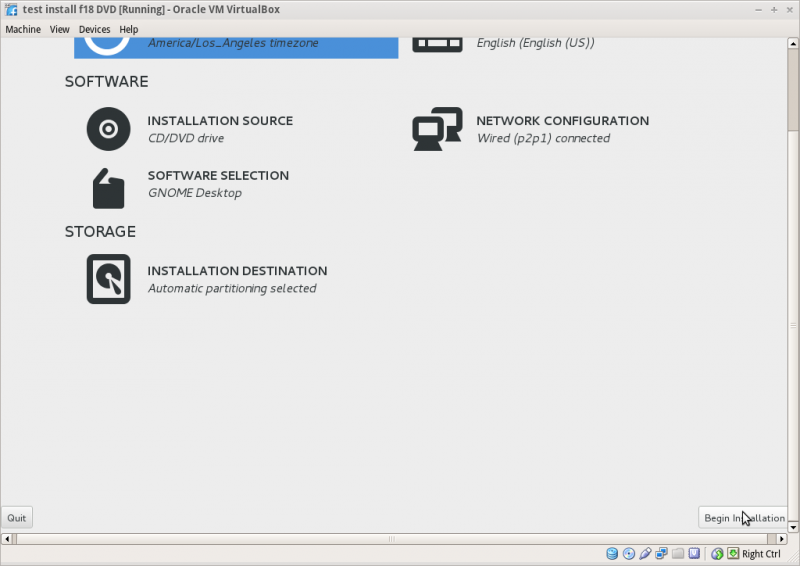
Time Zone select and [Done]

Begin Installation
- Appears when all warnings for unfinished spokes are gone

Root Password
- Appears after install begins

- enter password on both lines and hit [back] 2 times
- Wait for [Reboot] when install is completed
Remove CD/DVD in VirtualBox/Settings/Disk settings and start your Virtual Machine
HINT: export this virtual machine before running it to save it before it runs Firstboot.
- this can be later imported for use by another user.