Uploads by Almira Cayetano
This special page shows all uploaded files.
| Date | Name | Thumbnail | Size | Description | Versions |
|---|---|---|---|---|---|
| 17:29, 17 May 2012 | Yardstick - Figure 9.jpeg (file) |  |
89 KB | Because the YardStick activity comes hand-in-hand with the ScorePad activity, the activity should be able to send the rubric to the ScorePad activity. To be able to do this, in the view page of a specific rubric, click on the export button. The rubric you | 1 |
| 17:28, 17 May 2012 | Yardstick - Figure 8.jpeg (file) |  |
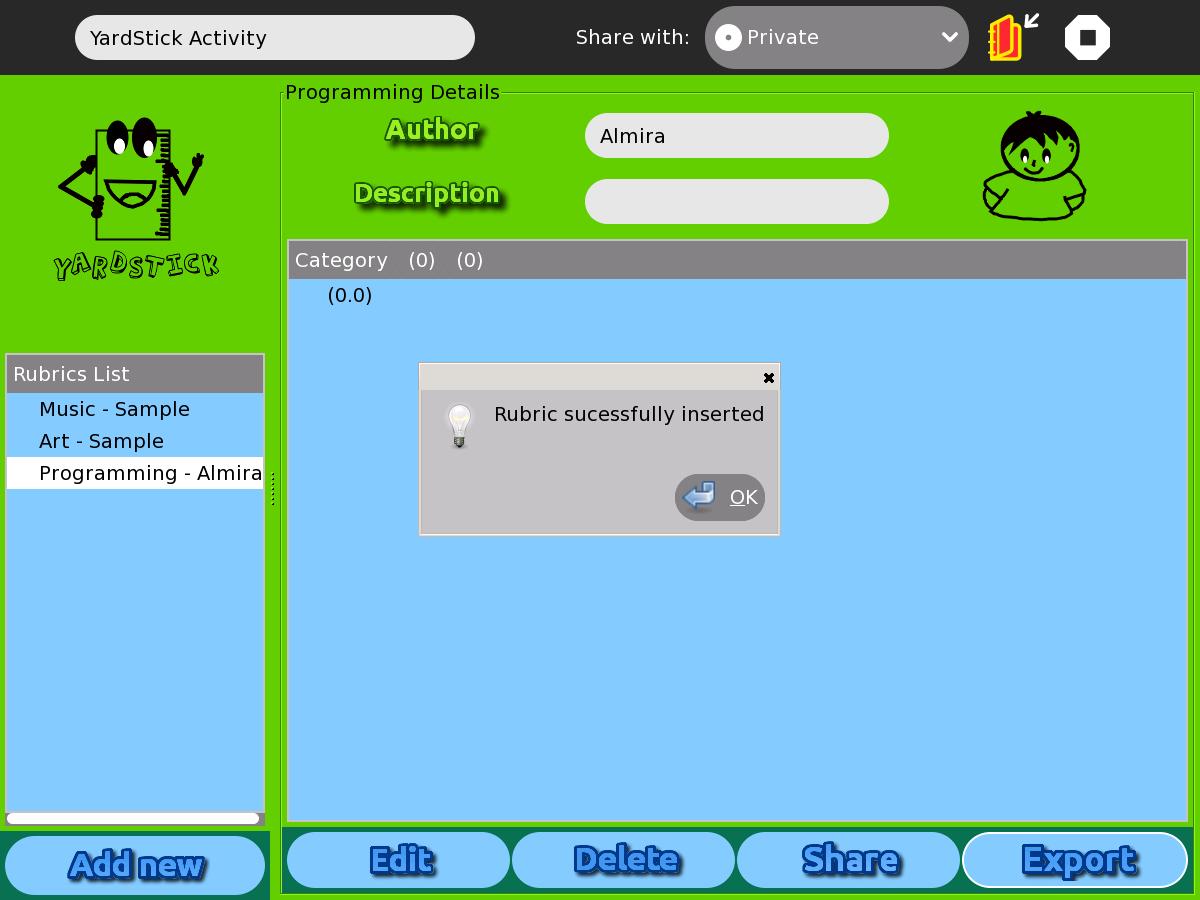
133 KB | Figure 8 shows the pop-up window after clicking the “Delete” button. To delete a specific rubric, click the name of the rubric on the “Rubrics List”. Then click on the “Delete” button. This will permanently remove the rubric on the database of | 1 |
| 17:27, 17 May 2012 | Yardstick - Figure 7.jpeg (file) |  |
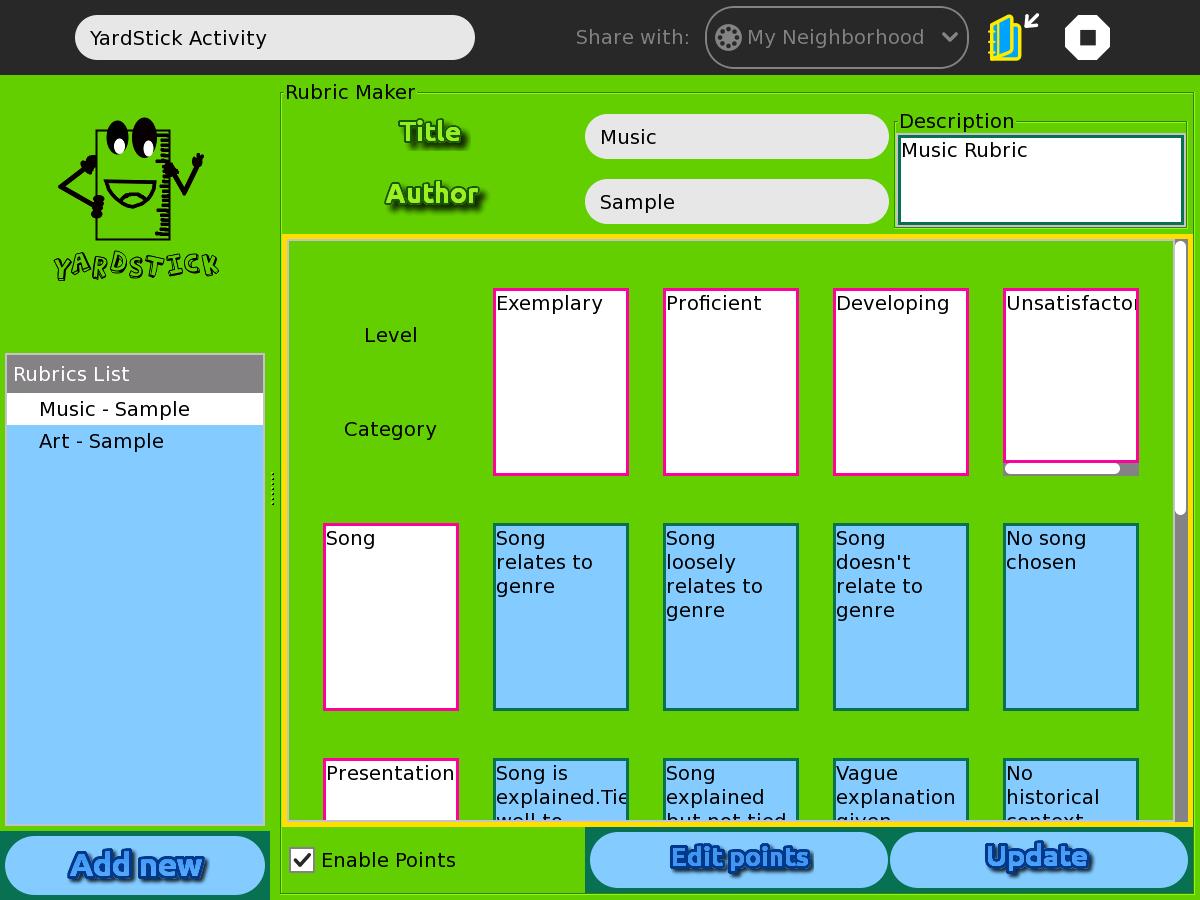
90 KB | Figure 7 shows how to add numerical weights in a rubric. At the left side, we can see the levels of the rubric. At each level, the user needs to assign specific points for that level. Then for each category, the user needs to add the percentage of that ca | 1 |
| 17:24, 17 May 2012 | Yardstick - Figure 6.jpeg (file) |  |
124 KB | Figure 5 shows how to enable points in the YardStick activity. This way, the user has the freedom to have a final numerical grade after the peer assessment. | 1 |
| 17:23, 17 May 2012 | Yardstick - Figure 5.jpeg (file) |  |
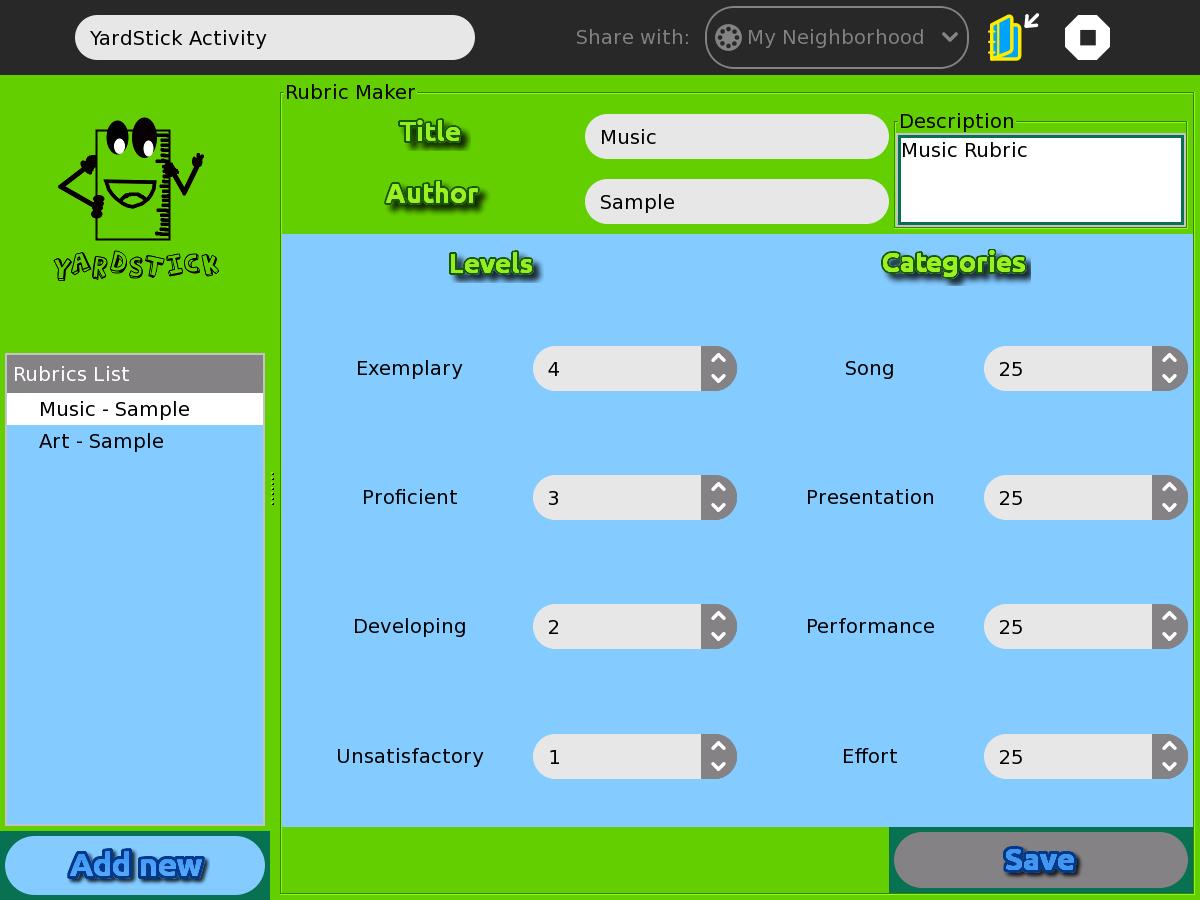
124 KB | After clicking the “Edit” button from the view page in Figure 3, the activity will direct you to the page where you can edit the rubric. Looking at the lower part of Figure 4, the user has the option to assign numerical grades to each criterion. Check | 1 |
| 17:21, 17 May 2012 | Yardstick - Figure 4.jpeg (file) |  |
132 KB | The user can view a specific rubric by selecting a rubric through the “Rubrics List” in the left- hand side of the activity. Figure 3 shows the page of the “view rubric” functionality. From this page, the user can edit, delete or send the rubric t | 1 |
| 17:19, 17 May 2012 | Yardstick - Figure 3.jpeg (file) |  |
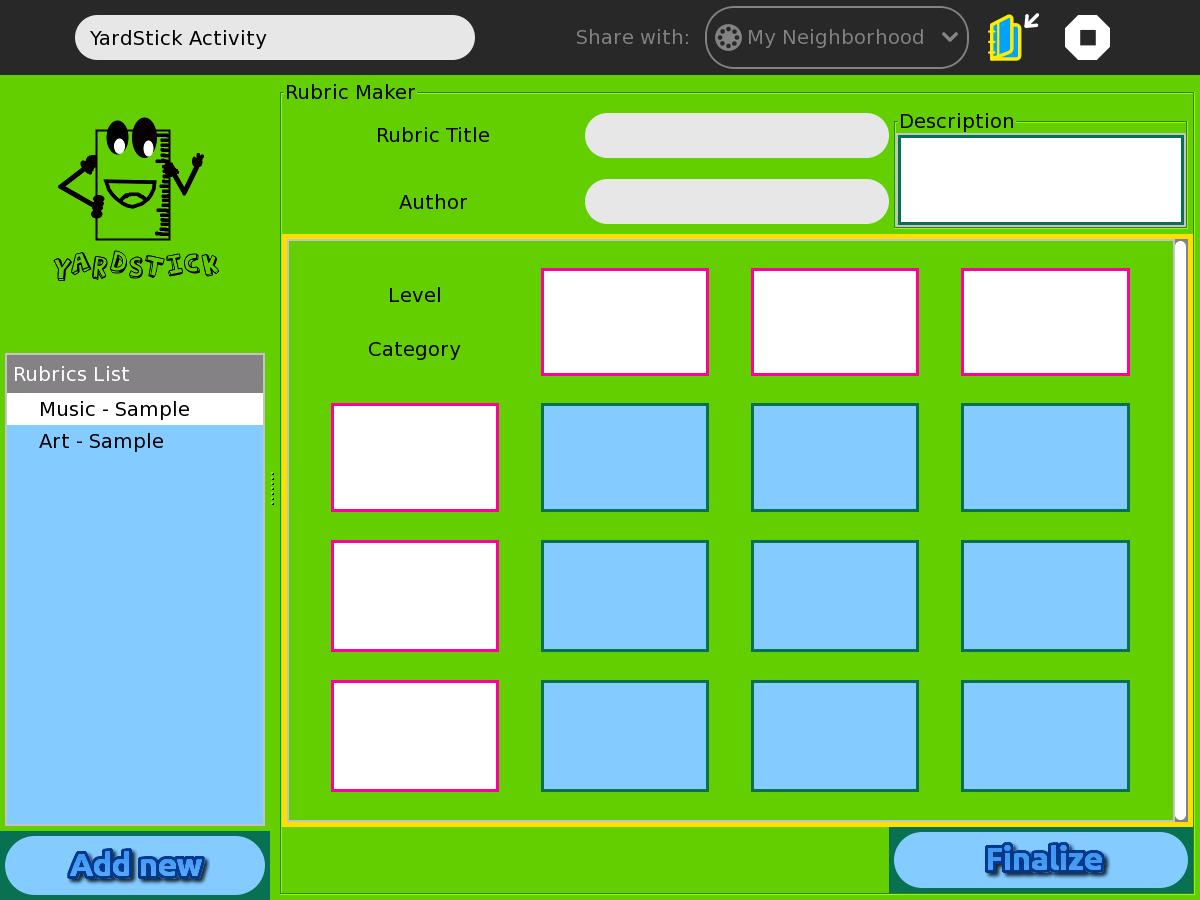
98 KB | Figure 3 shows the page where the user needs to build the rubric. The activity will ask for a rubric name, rubric author, description, levels (in the columns) and categories (in the rows). The user also needs to describe each level in each category. This | 1 |
| 17:16, 17 May 2012 | Yardstick - Figure 2.jpeg (file) |  |
61 KB | In adding a rubric, you need to press the “Add New Rubric” button at the lower left-hand side of the activity. The first step is to indicate the number of levels and categories. To do this, use the “spin box” provided in the page. Use the arrow po | 1 |
| 17:11, 17 May 2012 | Yardstick - Figure 1.jpeg (file) |  |
66 KB | Figure 1 User interface of the YardStick activity. | 1 |
| 16:57, 17 May 2012 | Figure8.jpeg (file) |  |
114 KB | A rubric cannot be deleted if it is still used by a project. | 1 |
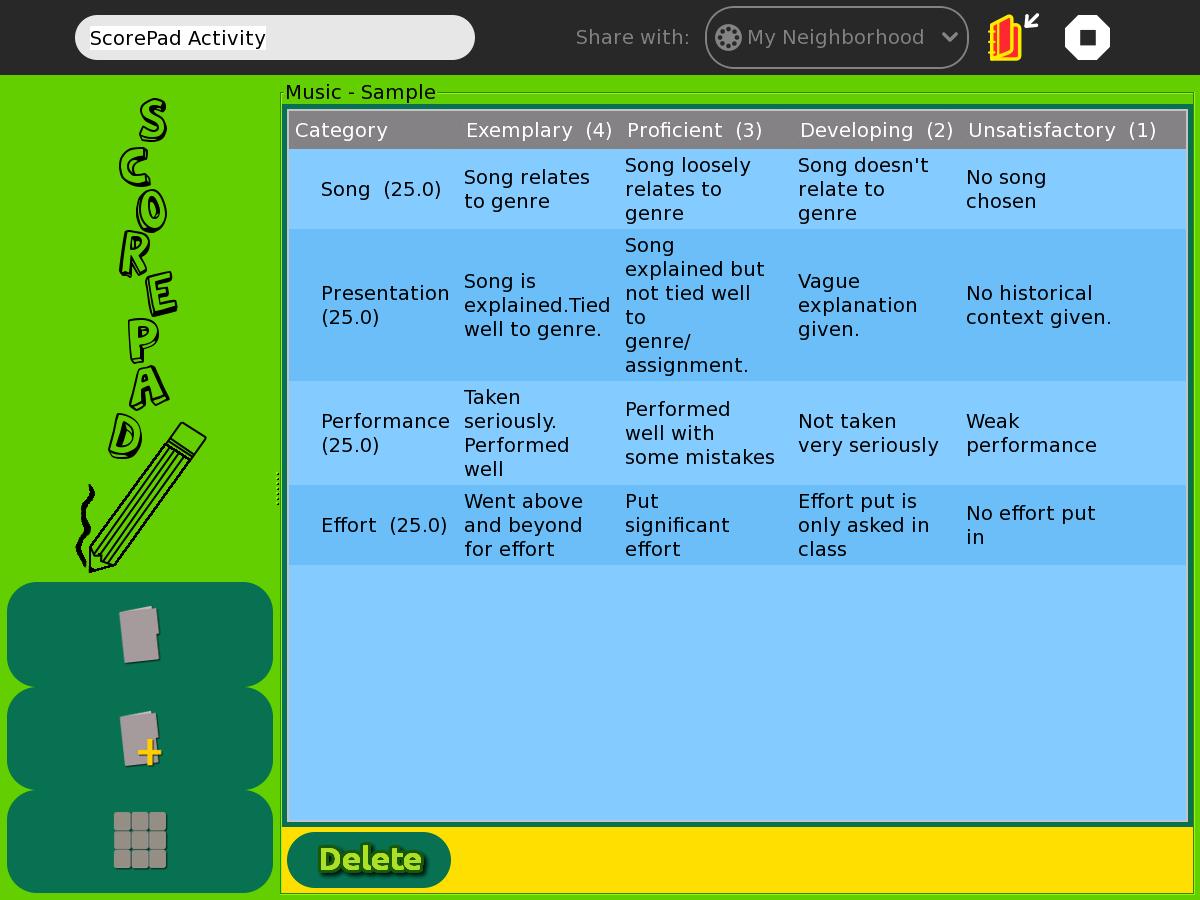
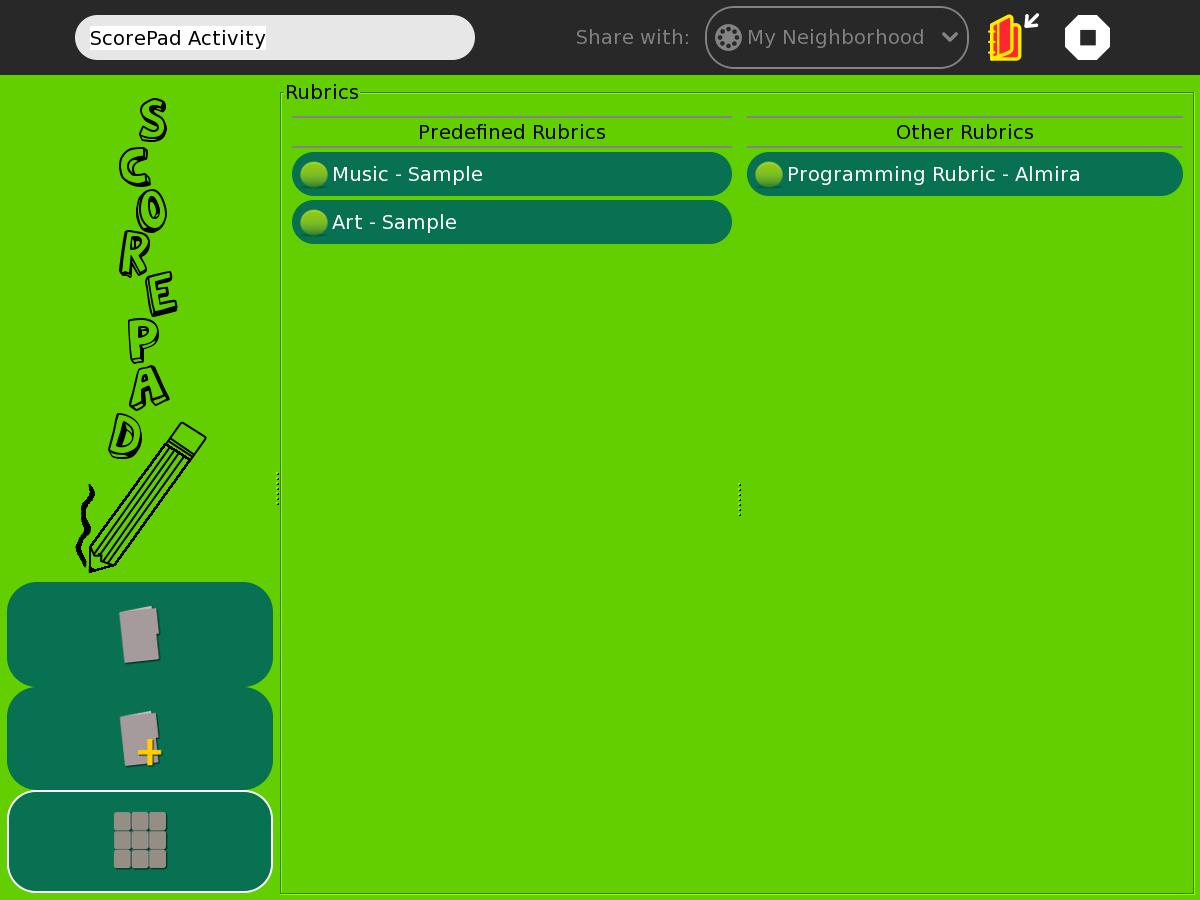
| 16:55, 17 May 2012 | Figure7.jpeg (file) |  |
66 KB | The rubrics used in the projects of ScorePad activity can be seen by selecting the 3rd icon at the lower left side of the page in Figure 7. These will list all of the pre-defined and rubrics imported to the ScorePad activity (sent by the YardStick activit | 1 |
| 16:53, 17 May 2012 | Figure6.jpeg (file) |  |
86 KB | The same process is used to delete a project. Simply select the project on the project list and click on the delete button. The activity will ask the user if he/she is sure in deleting the project. After clicking on the yes button, it will permanently del | 1 |
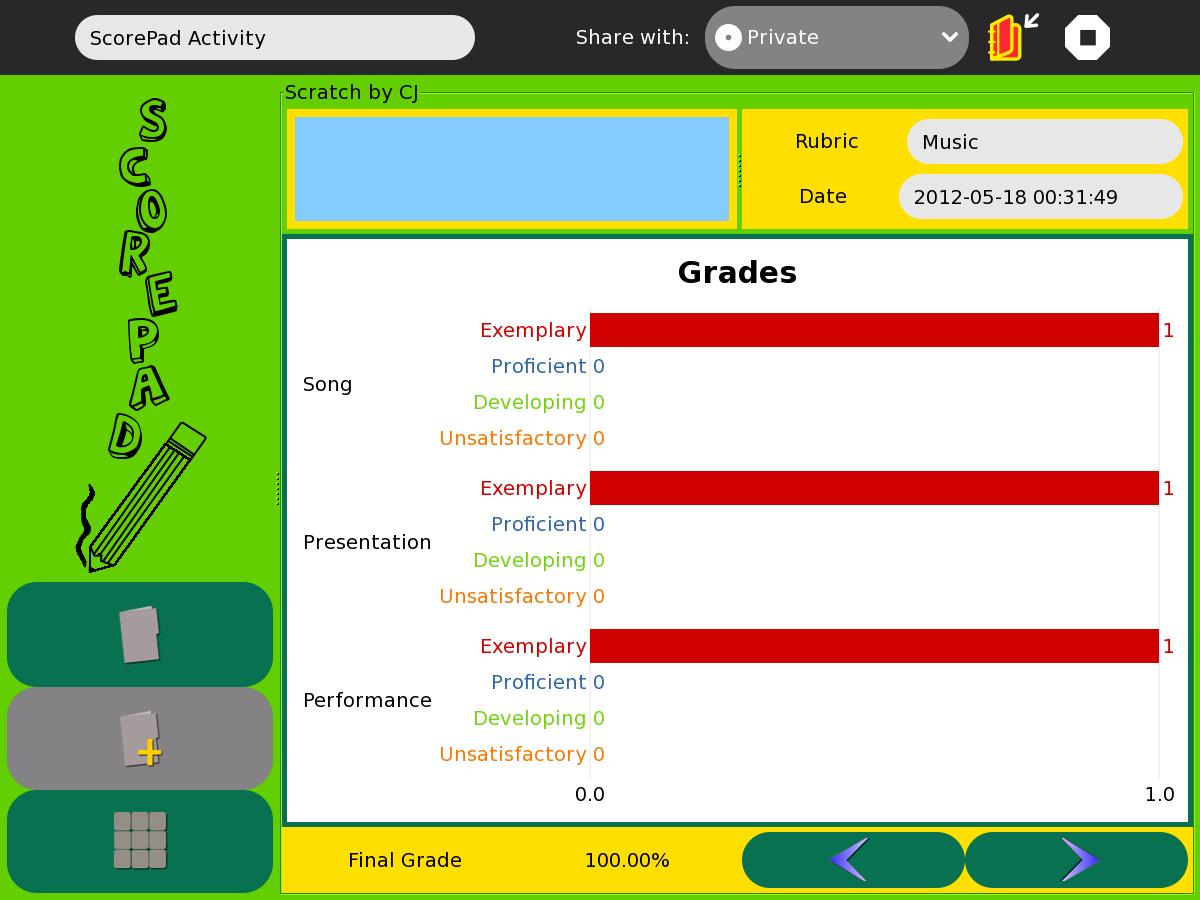
| 16:50, 17 May 2012 | Figure5.jpeg (file) |  |
104 KB | To view the grades of a project, simply use the grades button seen in Figure 1. A user cannot view another friend’s project. | 1 |
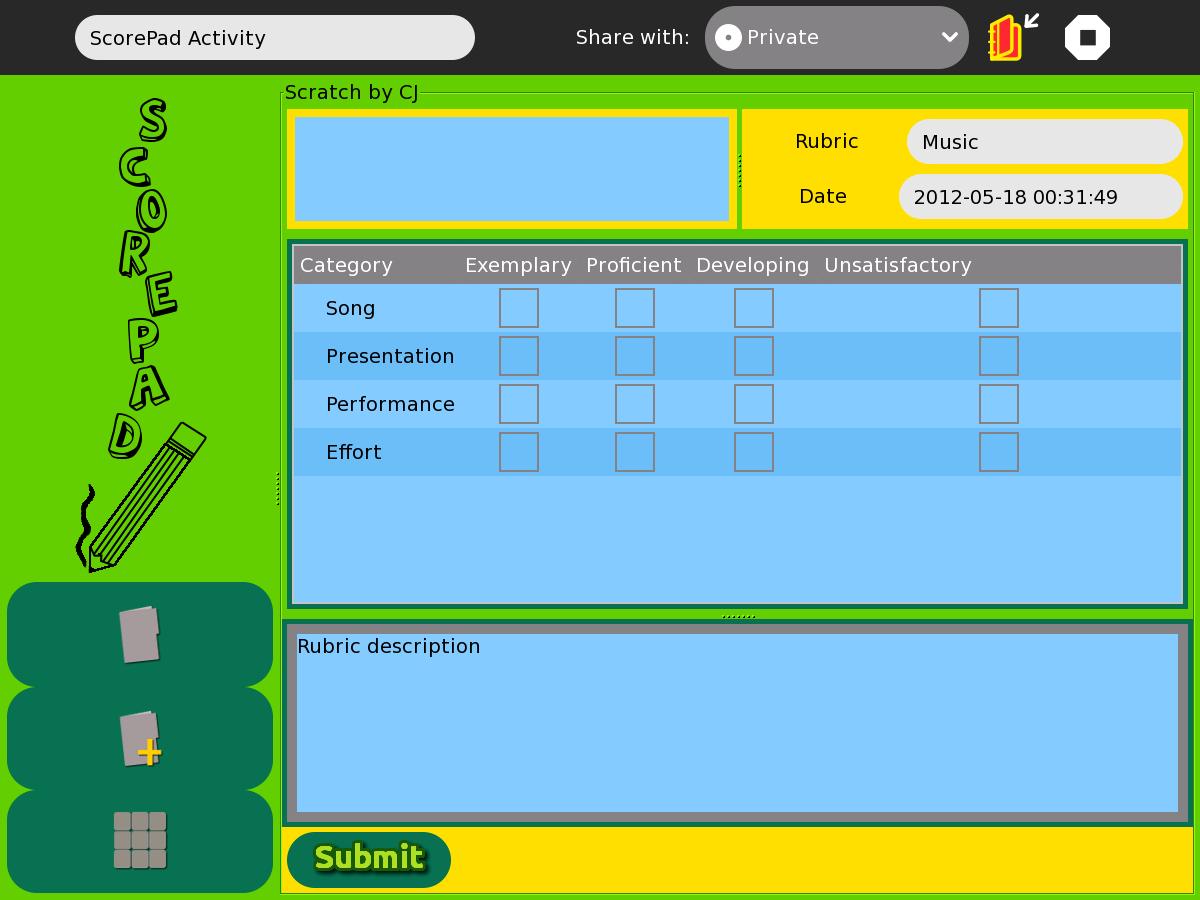
| 16:49, 17 May 2012 | Figure4.jpeg (file) |  |
101 KB | In evaluating a project, simply select the project from the project list then select on the evaluate button(in Figure 1). After that, the page will redirect to the page in Figure 4. To evaluate a project, use the check boxes to check the that corresponds | 1 |
| 16:24, 17 May 2012 | Figure3.jpeg (file) |  |
85 KB | Figure 3 shows the page when the edit button in the Figure 1 is clicked. To edit a project, simply double click the project in the project list then select the edit button. This will direct the page to Figure 3. The new information should be entered and s | 1 |
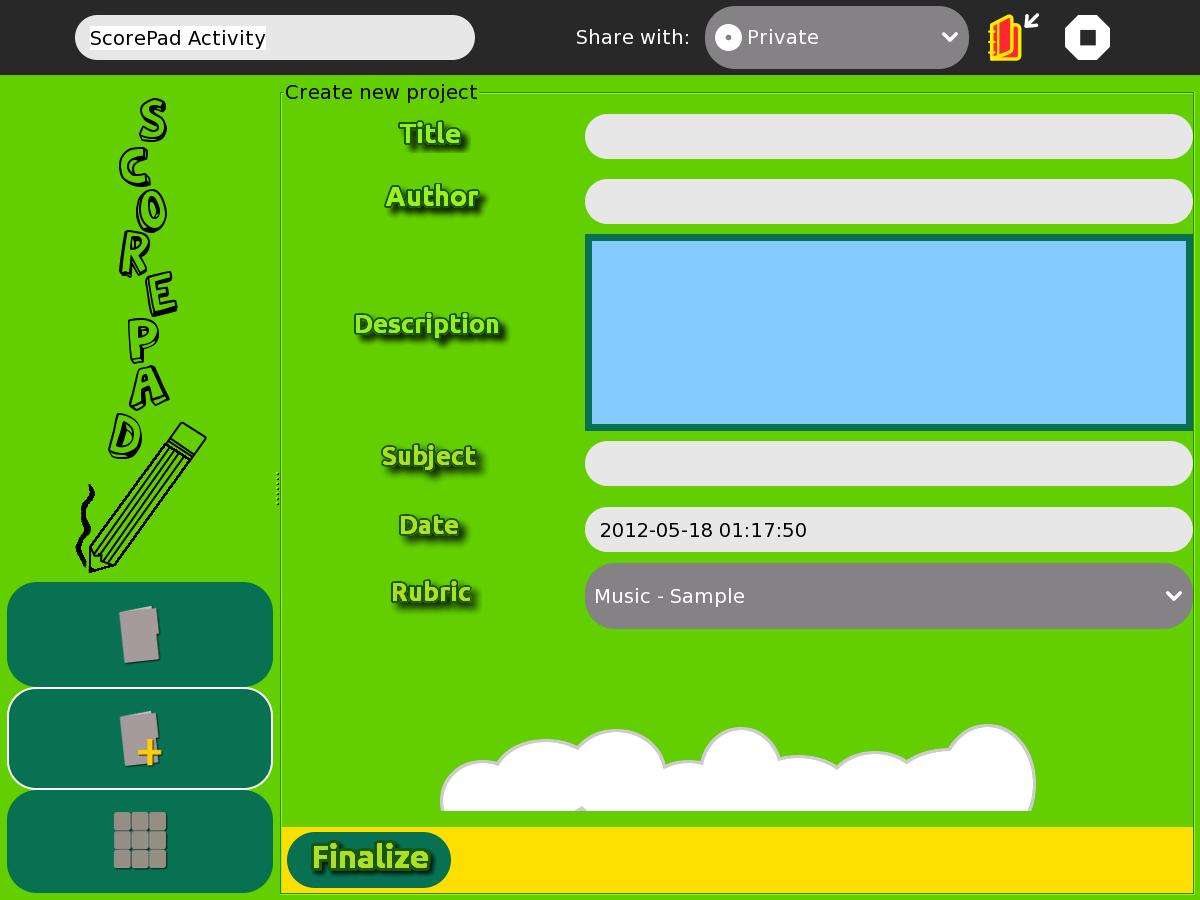
| 16:23, 17 May 2012 | Figure2.jpeg (file) |  |
86 KB | Figure 2 shows the page when adding a project. To add a project, simply click the second icon (the folder with a plus sign) at the lower left-hand side of the screen. Then the details of the project should be entered. The rubric that is selected in a proj | 1 |
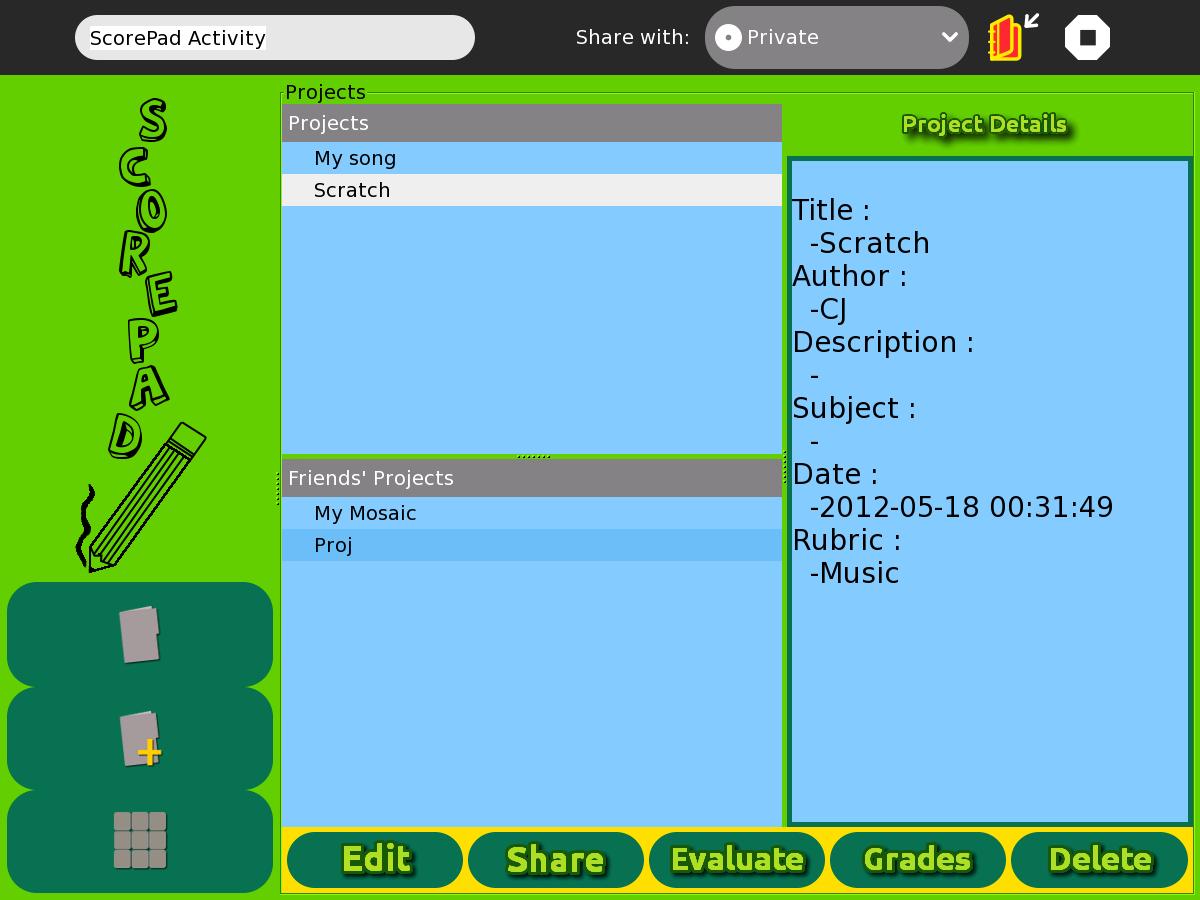
| 15:39, 17 May 2012 | Figure1.jpeg (file) |  |
95 KB | Figure1 shows the list of the project available in the ScorePad activity. The list is divided into two. The first list is the list of the projects owned by the user of the activity. The other list is the list of projects sent to him/her by other users. In | 1 |