Homepage | Activities | Events | Lists | Development | Translate | Contact
Difference between revisions of "Activities/Turtle Art/Getting started"
< Activities | Turtle Art
Jump to navigation
Jump to search
Tonyforster (talk | contribs) |
Tonyforster (talk | contribs) |
||
| Line 18: | Line 18: | ||
<gallery> | <gallery> | ||
File:turtlesquare.jpg|Use the repeat block to draw shapes | File:turtlesquare.jpg|Use the repeat block to draw shapes | ||
| − | File:Turtlepolygon.jpg|This can be generalised to n sided polygons, store n in | + | File:Turtlepolygon.jpg|This can be generalised to n sided polygons, store n in box1 |
File:Turtlefilledtriangle.jpg|Use 'start fill' and 'end fill' to draw filled shapes | File:Turtlefilledtriangle.jpg|Use 'start fill' and 'end fill' to draw filled shapes | ||
</gallery> | </gallery> | ||
Revision as of 02:18, 1 March 2011
Getting Started
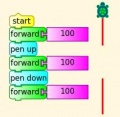
Start by clicking on (or dragging) blocks from the Turtle palette. Use multiple blocks to create drawings; as the turtle moves under your control, colorful lines are drawn.
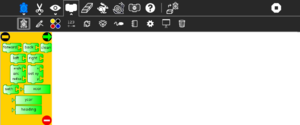
You add blocks to your program by clicking on or dragging them from the palette to the main area. You can delete a block by dragging it back onto the palette. Click anywhere on a "stack" of blocks to start executing that stack or by clicking in the Rabbit (fast) , Turtle (slow) or Bug (debug) buttons ![]() on the Project Toolbar.
on the Project Toolbar.
The basics
Drawing shapes
Boxes, Stacks and the Heap
(aka variables, subroutines and the stack)


