Homepage | Activities | Events | Lists | Development | Translate | Contact
Difference between revisions of "Documentation Team/User Manual/Connecting to the Internet/lang-es"
| Line 2: | Line 2: | ||
| [[Connecting_to_the_Internet|english]] | [[Connecting_to_the_Internet/lang-es|español]] }} | | [[Connecting_to_the_Internet|english]] | [[Connecting_to_the_Internet/lang-es|español]] }} | ||
| − | Puede hacer su | + | Puede hacer su conexión a internet a traves de la vista de Vecindario. Su estado de conexión actual se muestra en la vista hogar. (La XO fue diseñada para acceder por wireless porque en el mundo desarrollado, la wireless es más rápida, mas confiable y la manera menos costosa de conexión. |
{{ Translated text| | {{ Translated text| | ||
Revision as of 16:43, 25 July 2008
Puede hacer su conexión a internet a traves de la vista de Vecindario. Su estado de conexión actual se muestra en la vista hogar. (La XO fue diseñada para acceder por wireless porque en el mundo desarrollado, la wireless es más rápida, mas confiable y la manera menos costosa de conexión.
Paso 1: Vaya a la vista de Vecindario
Haga click sobre el botos de Vecindario ![]() (Un circulo con 8 puntos), lo encuentra en la esquina superior derecha del teclado, para ir a la vista de Vecindario. Desde aqui puede conectarse a un punto de acceso wifi y ver, si esta conectado a una red mesh o Jabber o si hay otros usuarios Sugar.
(Un circulo con 8 puntos), lo encuentra en la esquina superior derecha del teclado, para ir a la vista de Vecindario. Desde aqui puede conectarse a un punto de acceso wifi y ver, si esta conectado a una red mesh o Jabber o si hay otros usuarios Sugar.
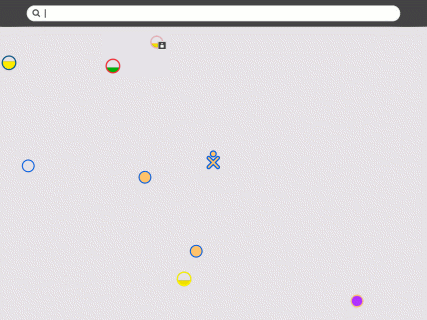
Vera esta pantalla
 .
Su usuario Sugar se representa con el Icono XO, en el centro de la pantalla.
Paso 2: Seleccione un punto de acceso
Su arbol de redes XO (puntos portal) estan representados por circulos del mismo color que su usuario Sugar. Las redes (Puntos de acceso) son representadas por circulos de otros colores.
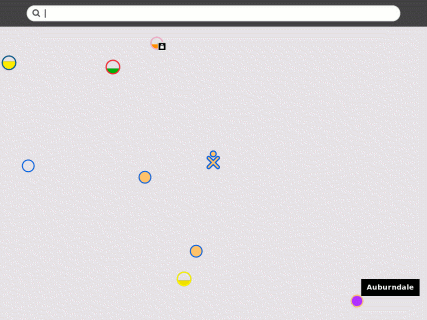
Al apuntar a los circulos copn el mouse se abre una ventana que identifica la red: Un punto de acceso es identificado por su nombre (ESSID); un punto portal es identificado por el numero de canal (1, 6 o 11). Tambien puede buscar un punto de acceso por el nombre en la barra de busqueda que esta en la parte superior de la pantalla.
La intensidad de la seNal se indica por el nivel de llenado del circulo. Las redes que son cerradas y requieren contraseNa para ingresar se identifican con un candado en la parte inferior del circulo.
Step 3: Activate a connection
To activate a network or mesh connection, position your mouse inside the circle that corresponds to your chosen access point and click. (To “click”, press once on the left-hand touchpad button—the button with the × symbol at the front of the touchpad.) While the XO is trying to establish the connection, the inside of the circle will blink. Once the connection is established, the outside of the circle will turn white. If for some reason the connection failed, the circle will stop blinking and the outside edge will keep its original color. Sometimes it is necessary to try several times before the connection is established.
If you don't specify a network, Sugar will attempt to join a simple mesh network, enabling you to collaborate with other Sugar users, but not access the Internet.
If the access point requires a key, you will be prompted. Note that different types of access points require different types of keys: be sure to select the correct type from the pull-down menu that is presented.
- Some access points (such as the Apple Extreme®) will only work with a hexadecimal value. If you have a password or passphrase, go to Hex Converter to get the hex key.
- If you are using and Apple Extreme you need to set “shared key”. Most other access points prefer the “open key” setting when using WEP.
Step 4: Checking the connection
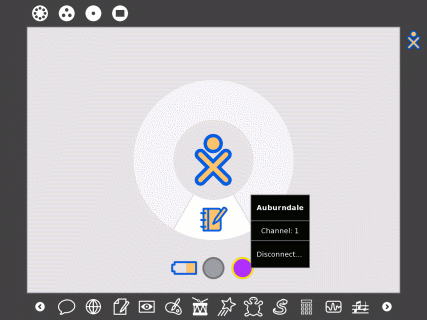
Click on the Home symbol ![]() (a circle with a center dot), found in the upper-left corner of the keyboard, to go to the Home view to check your wireless connection.
(a circle with a center dot), found in the upper-left corner of the keyboard, to go to the Home view to check your wireless connection.
By hovering over the circle icon, you will find details about your connection status.
For more information about connecting, please see the Support page in the OLPC wiki.

