Homepage | Activities | Events | Lists | Development | Translate | Contact
Difference between revisions of "User:Walter/sandbox/Connecting"
< User:Walter | sandbox
Jump to navigation
Jump to search
| Line 30: | Line 30: | ||
|[[Image:Neighborhood-view-selecting-AP.png | thumb | center | 600px | | |[[Image:Neighborhood-view-selecting-AP.png | thumb | center | 600px | | ||
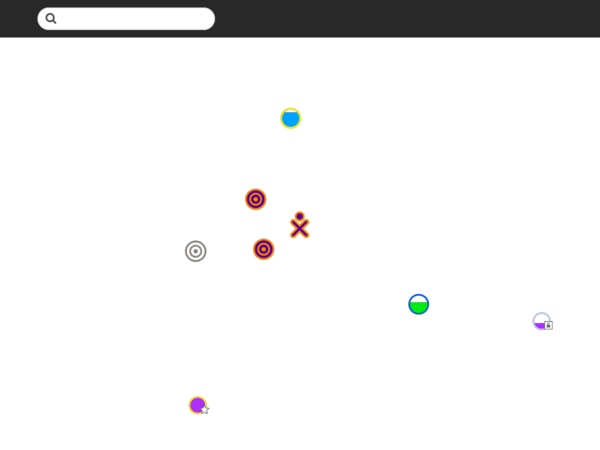
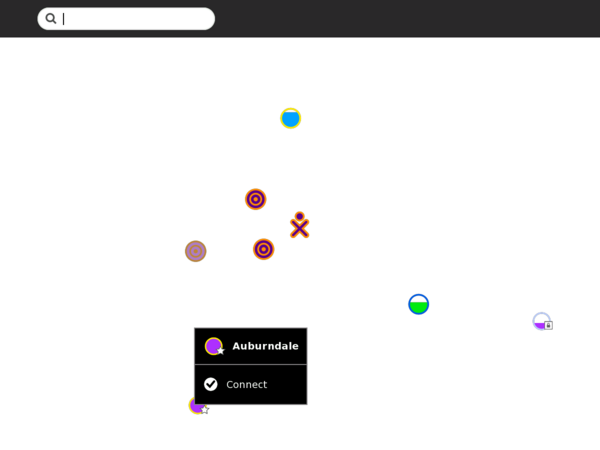
| − | Networks (access points) are represented by circles on the Neighborhood view. Networks can be identified by hovering over the circles: an access point is identified by its name (ESSID); a mesh-portal point—represented by a series of concentric circles—is identified by its channel number (1, 6, or 11). You can also search for an access point by name in the search bar at the top of the page. <br/> | + | Networks (access points) are represented by circles on the Neighborhood view. Networks can be identified by hovering over the circles: an access point is identified by its name (ESSID); a mesh-portal point—represented by a series of concentric circles—is identified by its channel number (1, 6, or 11). You can also search for an access point by name in the search bar at the top of the page. <br/> <br/> |
| − | Signal strength is indicated by the fill-level of the circle. The color of the circle is based upon the name of the access point. Networks that are locked are identified by a badge. Access points that have been previously used (favorites) are identified by a star. <br/> | + | Signal strength is indicated by the fill-level of the circle. The color of the circle is based upon the name of the access point. Networks that are locked are identified by a badge. Access points that have been previously used (favorites) are identified by a star. <br/> <br/> |
| − | To select an access point, click on its icon or the Connect option in the hover menu. | + | To select an access point, click on its icon or the ✔ Connect option in the hover menu. |
]] | ]] | ||
|} | |} | ||
Revision as of 11:15, 16 June 2008
Wiki-based Getting Started Guide (based on Joyride 2037)
Getting Connected
There are multiple ways to connect to the Internet:
- wireless access point (WiFi hotspot);
- “School Server” mesh network;
- “simple” mesh network, which lets you collaborate directly with other XOs;
- wired network (may require an external adapter—e.g., see USB Ethernet adaptors).
You make your connection from the Neighborhood view. Your current connection status is shown on the Frame.
Step 1: Go to the Neighborhood view
back | next
| Hint: The Neighborhood view is accessed by clicking on the Neighborhood icon on the Frame or by pressing the F1 key (OLPC-XO-1-specific hint) |

