User:Michael Jin
Create SoaS F17 LiveUSB for Windows
This is a guide on LiveUSB with SoaS (Sugar on a Stick).
Getting Started
Live-USB Creator for Windows (here)
Sugar LiveCD/USB .ISO files (http://wiki.sugarlabs.org/go/Sugar_on_a_Stick/Downloads here)
Please prepare a hard drive (Backup any important data!) for SoaS, the liveinst will probably format the entire hard drive.
USB flash drive (2GB+ free and backup any important data)
Installing Live-USB Creator
Open "liveusb-creator-3.11.7-setup.exe", it should open to a new window.
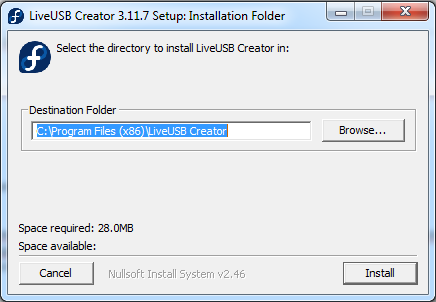
The installation size (not the .ISO file) only needs 28MB, if the "Space Available:" is less than 600 MB and you haven't downloaded one of the .ISO files, please consider freeing some space on your hard drive. Then click the "Install" button.
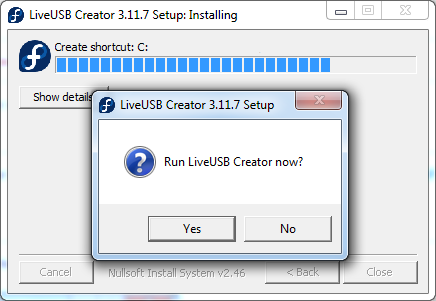
After the installer tries to create a shortcut, a new window should popup. Click the "Yes" button.
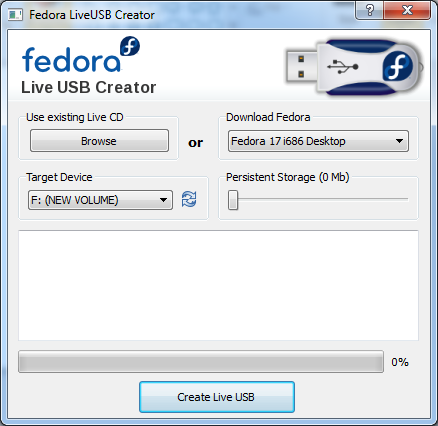
By now, the following window should popup. Click the "Browse" button to look for the .ISO file you've recently downloaded.
Since the version I downloaded was i686, I'm going to select "Fedora-17-i686-Live-SoaS.iso" and click the "Open" button.
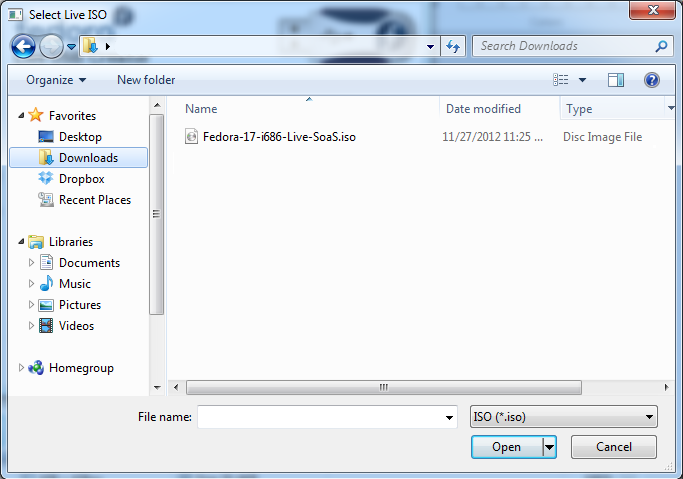
Make sure you selected the right .iso file, the window should now say "*filename* selected".
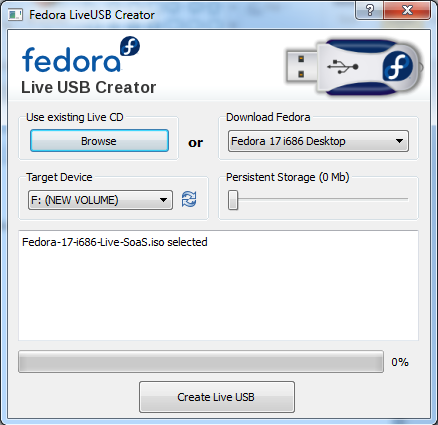
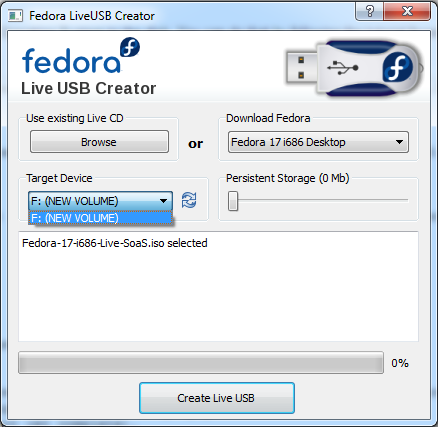
Click on your "Target Device" to check whether you've selected the corresponding Drive Letter ("F:") or name ("NEW VOLUME") for the USB flash drive and make sure you've made a copy of any important files that maybe on that USB flash drive. Then click the "Create Live USB" button.
If your "Persistent Storage" slider can't be moved. Check if your USB flash drive has more than 1.8GB or it will fail.
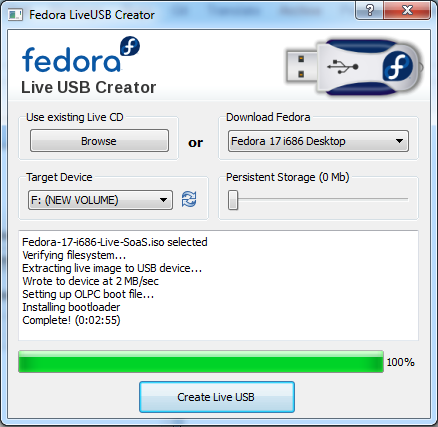
When your LiveUSB is ready, the window should say:
Fedora-17-i686-Live-SoaS.iso selected
Verifying filesystem...
Extracting live image to USB device...
Wrote to device at X MB/sec<br>
Setting up OLPC boot file...
Installing bootloader
Complete!
If it gives errors, please read below for further instructions [1].
Congratulations, you've got a LiveUSB with SoaS!
Running SoaS (LiveUSB) on your computer
Make sure that you've turned off your computer (any hard drive that needs to be swapped should be swapped), you have to boot into the USB through the boot menu (you should see an option when you turn the computer on).
You should now see the following boot screen.
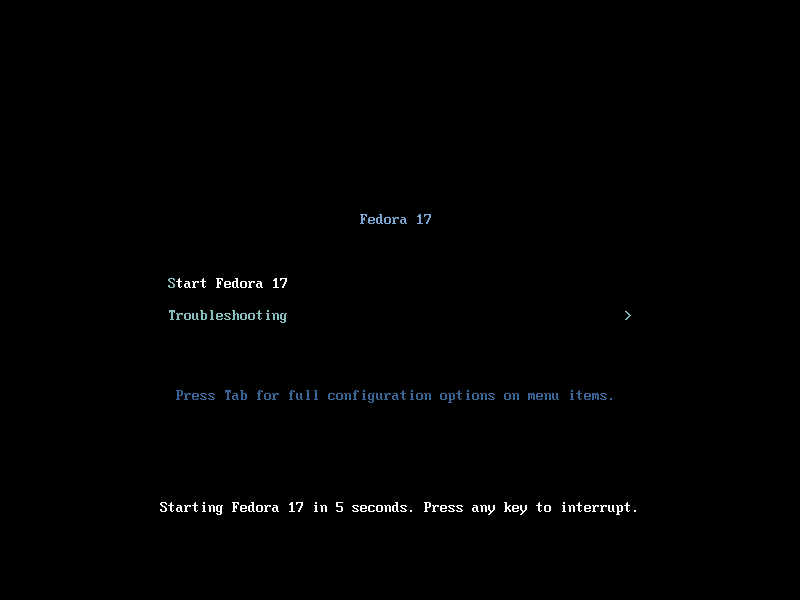
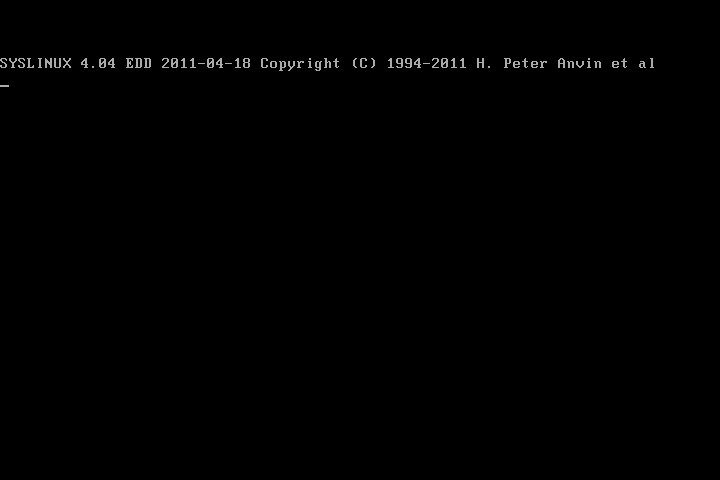
When you hit the "Enter" key on your keyboard or it started automatically, you should briefly see this on your screen.
Please note the difference between LiveCD and LiveUSB is the ISOLinux and SYSLinux. You should see SYSLinux.
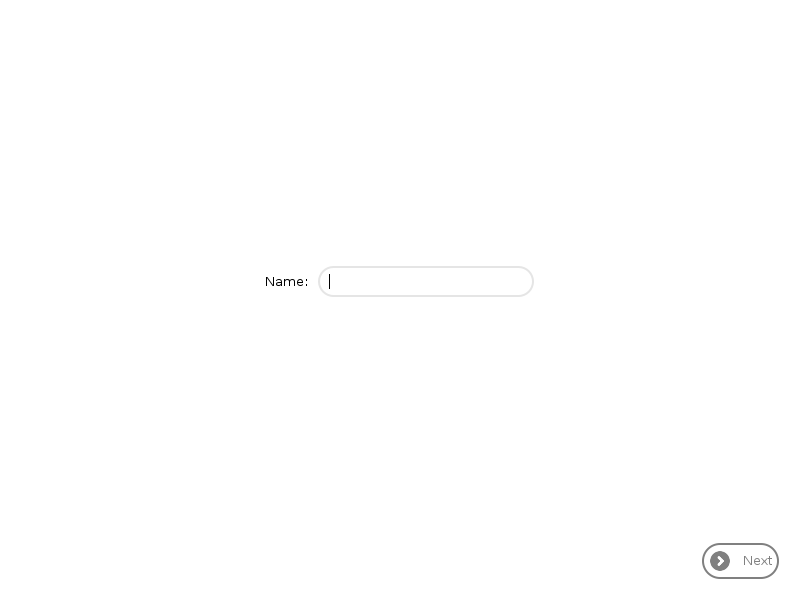
After the loading bar reaches the end, you should see this screen below, type your username into the box and click "Next".
Select your color (optional) and click "Done".

If you see the following, then you've successfully entered Sugar with a LiveUSB.
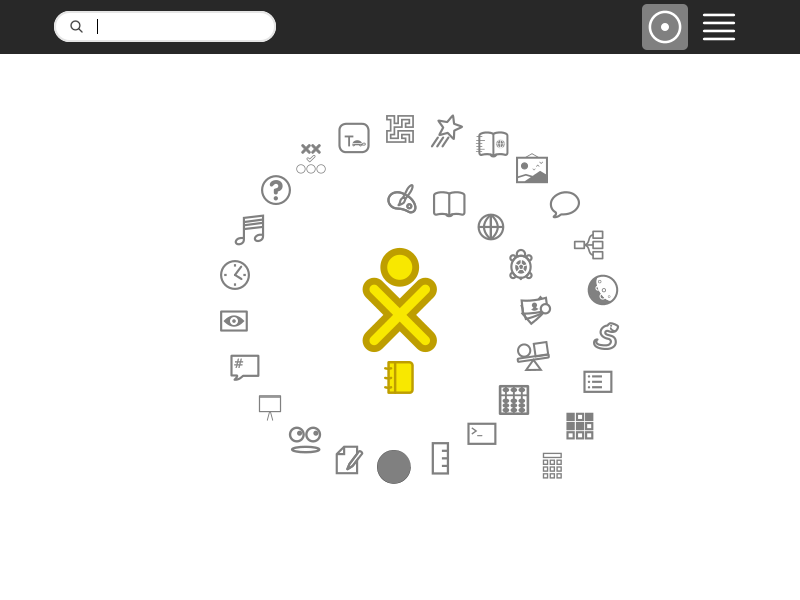
Congratulations, you now have to install the Operating System to the disk. You can do that by following the tutorial found here.
[1] - If your can't create a working LiveUSB, hold CTRL+ALT+DEL to go to Task Manager. Go to File >> New Task, copy and paste
64-bit
"C:\Program Files (x86)\LiveUSB Creator\liveusb-creator.exe" --reset-mbr
32-bit
"C:\Program Files \LiveUSB Creator\liveusb-creator.exe"--reset-mbr
Make sure you USB flash drive is connected, click the "OK" button and the the LiveUSB window should popup.
[*] The USB flash drive needs to be MBR formatted (Master Boot Record) and its boot flag enabled.
VMPlayer in Windows - Installing SoaS in a VM
This is a guide to setup Sugar as a VM on your computer.
Getting Started
VMware Player (here)
Sugar LiveCD/USB (http://wiki.sugarlabs.org/go/Sugar_on_a_Stick/Downloads here)
VirtualBox Instructions (not yet complete).
VMware Player
Running your VM for the first time
Please install VMware Player (here) first.
Then run VMware Player for the first time.
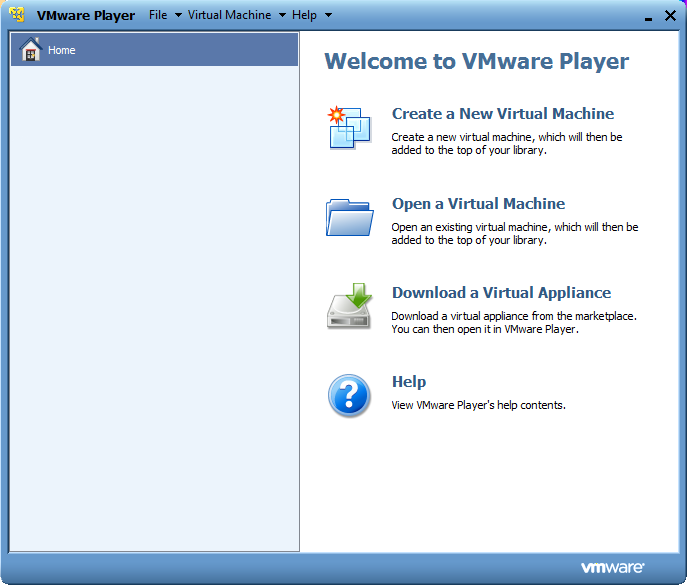
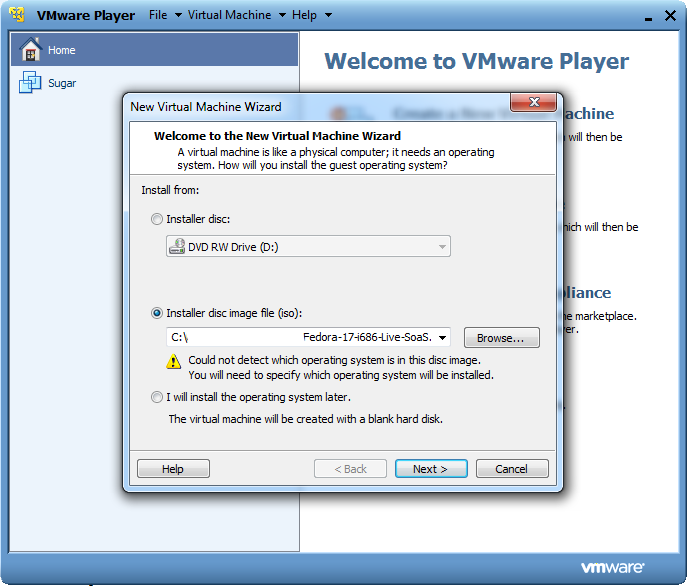
Click the "Browse" button to search for the .ISO file you downloaded in "Getting Started". Then, click the "Next >" button.
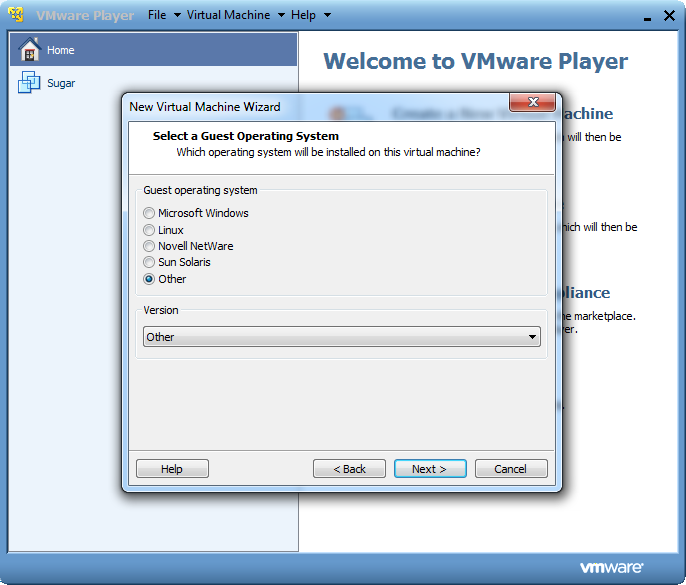
Select "Other" for both "Guest Operating System" and "Version", and click the "Next >" button.
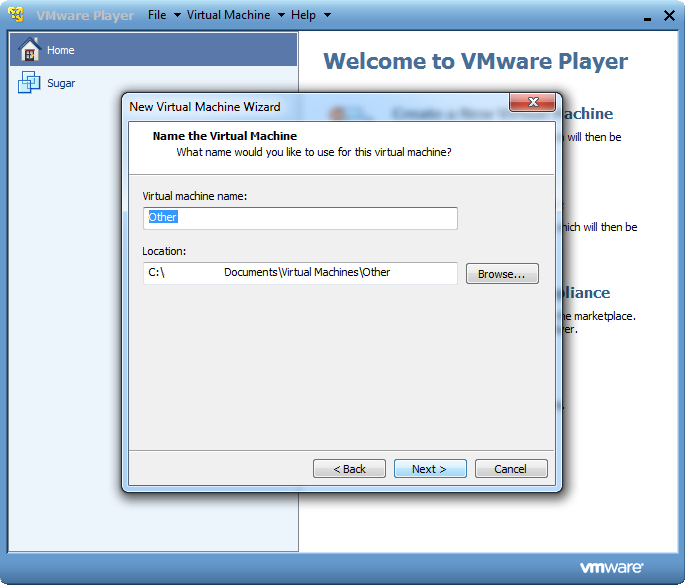
You are free to rename Other to something different (I chose Sugar) and click the "Next >" button.
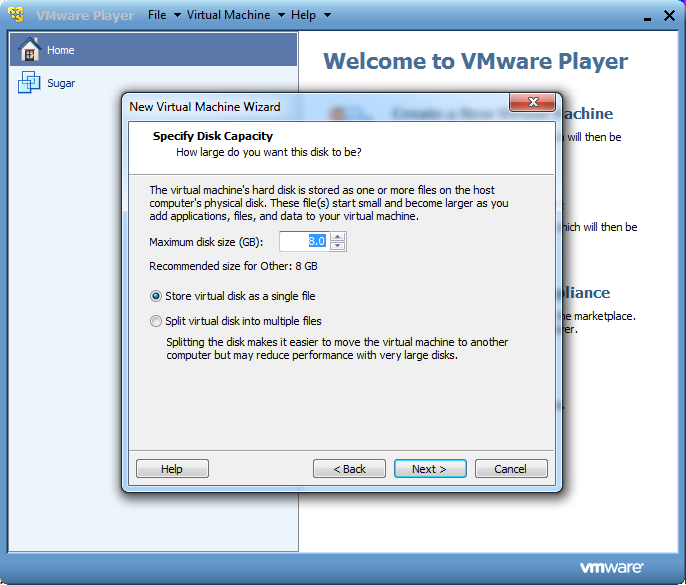
By default, VMware Player will try to make the disk size of the VM 8GB. If this seems to be too much for you, lower it and just make sure you have 4GB+ set for the disk size.
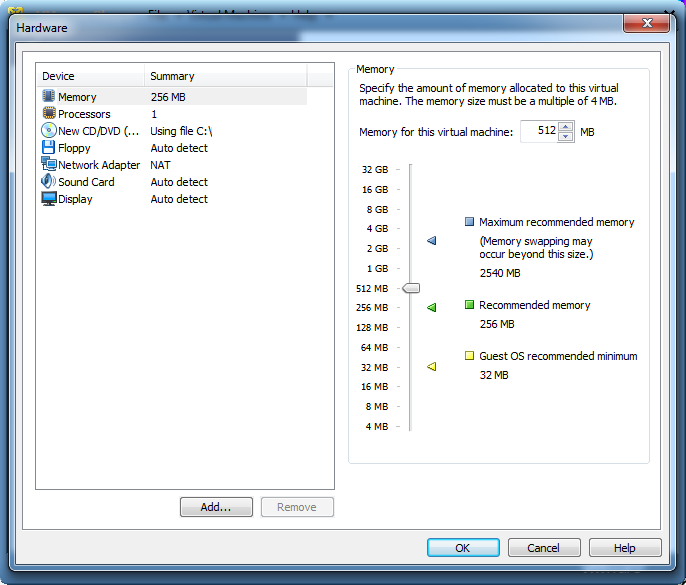
Click "Customize Hardware", we need to increase the memory.
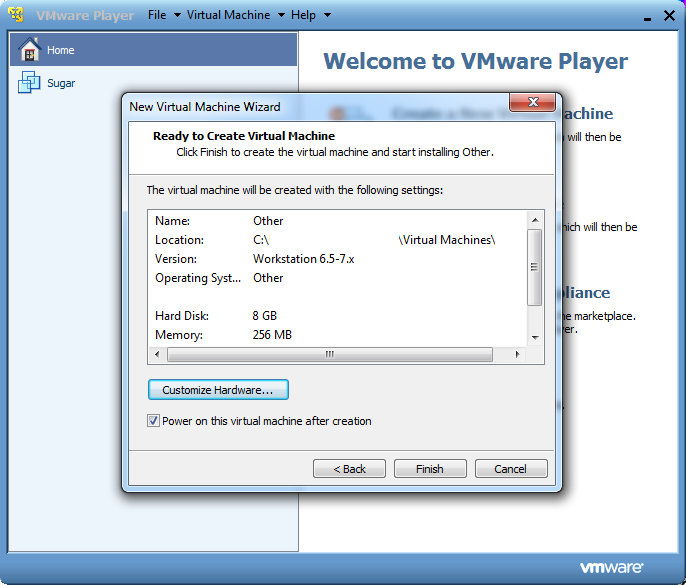
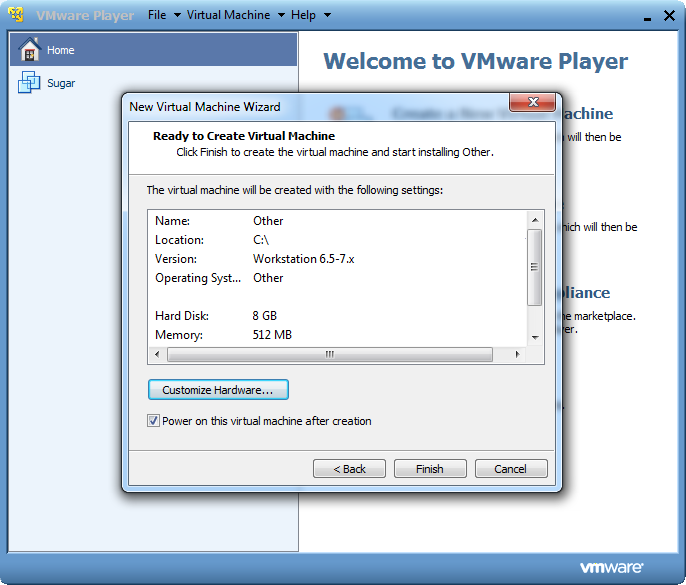
Set the memory to 512MB+ (more than 512MB if your computer has memory to spare).
Click the "Finish" button to complete the setup of your VM.
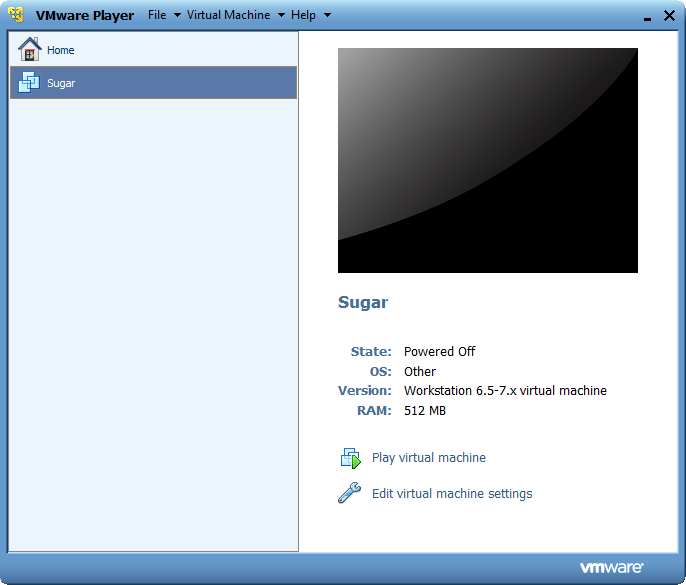
Now select your VM (I named mine Sugar earlier), you can now click "Play virtual machine".
You should now see the following boot screen.

When you hit the "Enter" key on your keyboard or it started automatically, you should briefly see this on your screen.
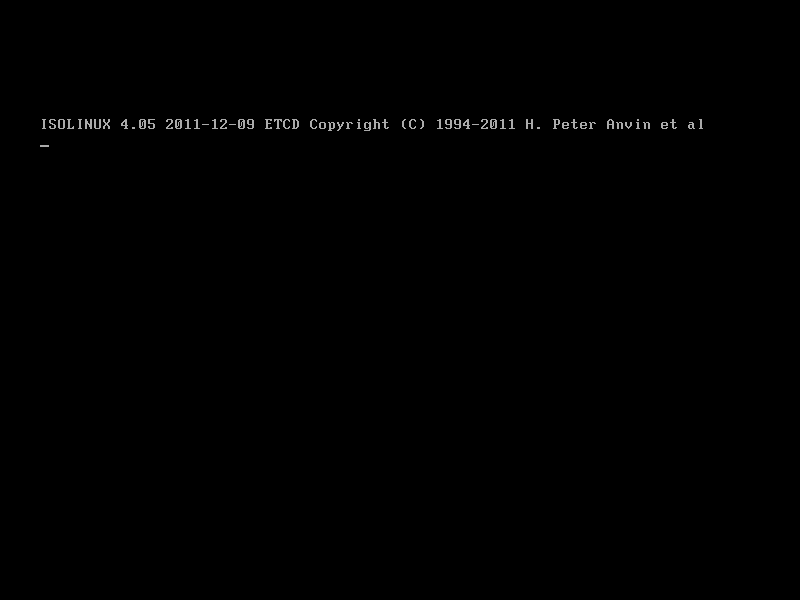
The load bar should look like this.

After the loading bar reaches the end, you should see this screen below, type your username into the box and click "Next".

Select your color (optional) and click "Done".

If you see the following, then you've successfully entered Sugar in a VM.

Congratulations, you now have to install the Operating System to the disk. You can do that by following the tutorial found here.