Tutorials/Installation/Install SoaS in VirtualBox: Difference between revisions
Appearance
mNo edit summary |
No edit summary |
||
| (13 intermediate revisions by 2 users not shown) | |||
| Line 1: | Line 1: | ||
= | <noinclude>[[Category:Tutorial|Install]]</noinclude>__TOC__ | ||
=== | |||
: | <span style="font-size: 1.6em;">VirtualBox SoaS v7 install</span> | ||
: | ; For Fedora 18 install see; [[Tutorials/Installation/Install_SoaS_in_VirtualBox-f18#Install_with_Anaconda_f18_in_VirtualBox|'''Install with Fedora 18''']] | ||
[[File:Soas-v7-VB.png| | * A brief annotated tutorial showing screenshots of a successful VirtualBox install of SoaS v7. | ||
=== | *'''NOTE: click on any of the following screen shots to enlarge it; hit the <= arrow (on the browser top bar) to return to this tutorial''' | ||
[[File:Soas-V7-2.png]] | |||
=== liveinst | ===VirtualBox Settings..Storage === | ||
:starts Anaconda | : '''Used to select and deselect the SoaS v7.iso file.''' | ||
[[File:Soas-v7-3.png ]] | :: '''Choose a virtual CD/DVD disk file...''' (top of drop-down menu) | ||
: This is necessary to do after successful install (see last screenshot below) | |||
:: '''Remove disk from virtual drive''' (bottom of drop-down menu) | |||
[[File:Soas-v7-VB.png|640px]] | |||
=== Home view of Sugar=== | |||
:<big>Showing the Terminal Activity icon</big> | |||
* If you are new to Sugar, see this [[Tutorials/Introduction_to_the_Sugar_Interface|introduction to the Sugar interface]]. | |||
[[File:Soas-V7-2.png|640px]] | |||
=== [[Tutorials/Installation/Install with liveinst|'''liveinst''']] === | |||
: The root Sugar Terminal command that starts the Fedora Live Installer (Anaconda) | |||
[[File:Soas-v7-3.png|640px]] | |||
===Language and keyboard settings=== | ===Language and keyboard settings=== | ||
[[File:Soas-v7-4.png]] | :First screen of the Fedora Live Installer (Anaconda) | ||
[[File:Soas-v7-4.png|640px]] | |||
===Install options=== | |||
* A sequence of screens to set up the install. | |||
: Only critical steps are shown. | |||
[[File:Soas-v7-5.png|640px]] | |||
[[File:Soas-v7-6.png|640px]] | |||
[[File:Soas-v7-7png.png|640px]] | |||
[[File:Soas-v7-10.png|640px]] | |||
* Deselect '𐀀 Use LVM' (highlighted in screenshot). | |||
[[File:Soas-v7- | ===Copy Live CD to hard drive=== | ||
[[File:Soas-v7-12.png|640px]] | |||
===Reboot=== | |||
: '''Be sure to remove disk from virtual drive in VirtualBox Settings..Storage before restarting.''' | |||
: See the first screenshot in this tutorial | |||
: Necessary to do after successful install | |||
:: Choose a virtual CD/DVD disk file... (top of drop-down menu) | |||
:: '''Remove disk from virtual drive''' (bottom of drop-down menu) | |||
[[File:Soas-v7- | [[File:Soas-v7-congrats.png|640px]] | ||
[[ | ===[[Tutorials|More tutorials]]=== | ||
Latest revision as of 17:57, 28 November 2012
VirtualBox SoaS v7 install
- For Fedora 18 install see; Install with Fedora 18
- A brief annotated tutorial showing screenshots of a successful VirtualBox install of SoaS v7.
- NOTE: click on any of the following screen shots to enlarge it; hit the <= arrow (on the browser top bar) to return to this tutorial
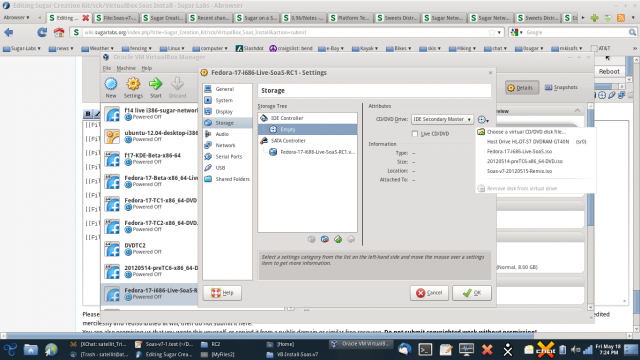
VirtualBox Settings..Storage
- Used to select and deselect the SoaS v7.iso file.
- Choose a virtual CD/DVD disk file... (top of drop-down menu)
- This is necessary to do after successful install (see last screenshot below)
- Remove disk from virtual drive (bottom of drop-down menu)
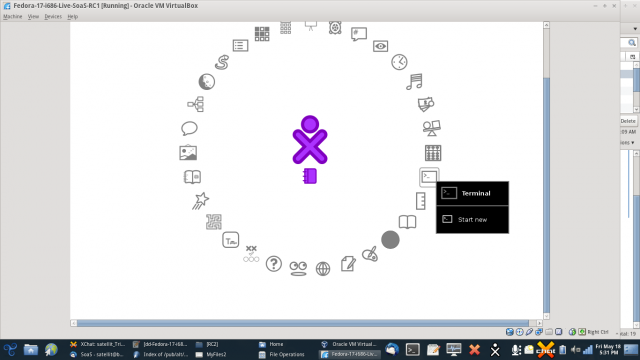
Home view of Sugar
- Showing the Terminal Activity icon
- If you are new to Sugar, see this introduction to the Sugar interface.
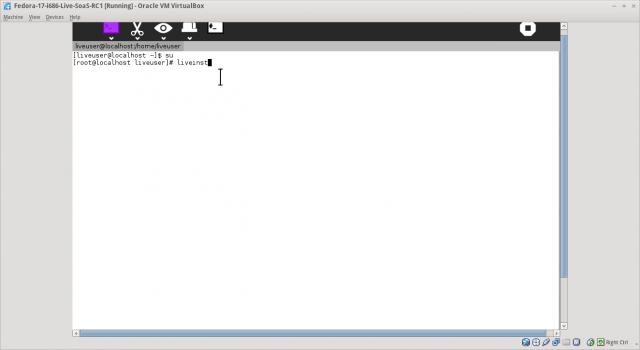
liveinst
- The root Sugar Terminal command that starts the Fedora Live Installer (Anaconda)
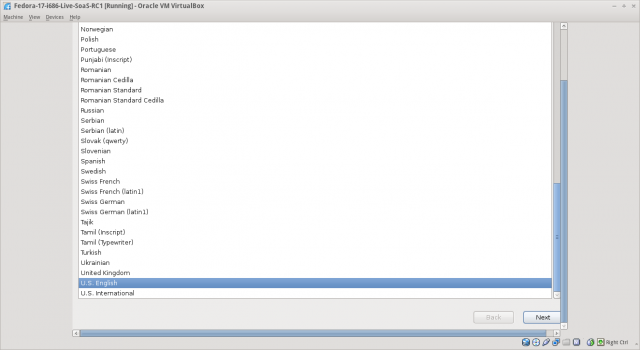
Language and keyboard settings
- First screen of the Fedora Live Installer (Anaconda)
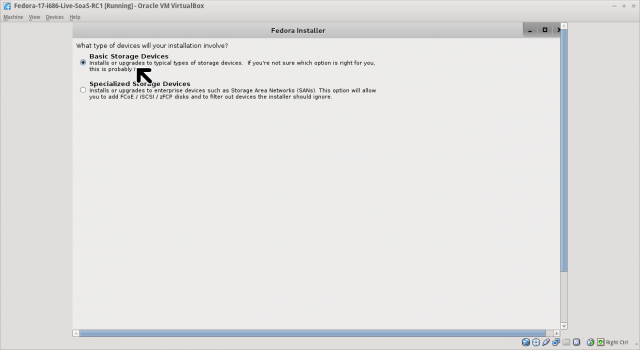
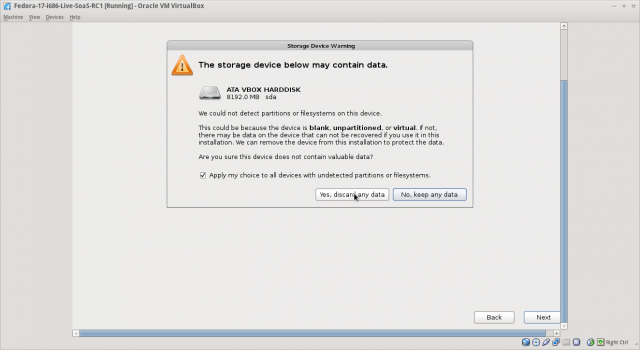
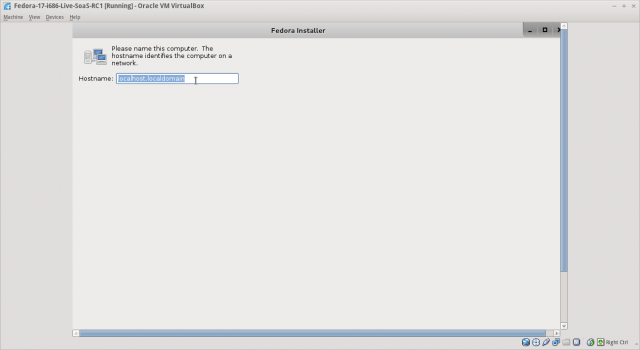
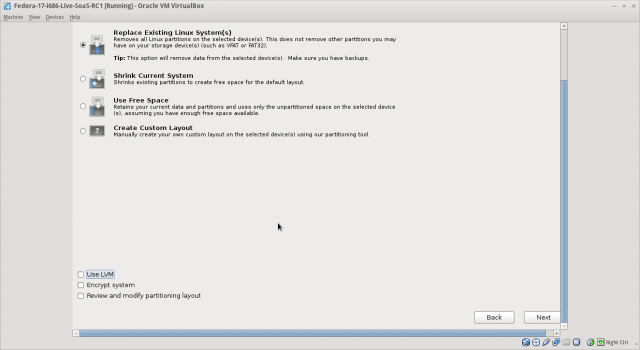
Install options
- A sequence of screens to set up the install.
- Only critical steps are shown.
- Deselect '𐀀 Use LVM' (highlighted in screenshot).
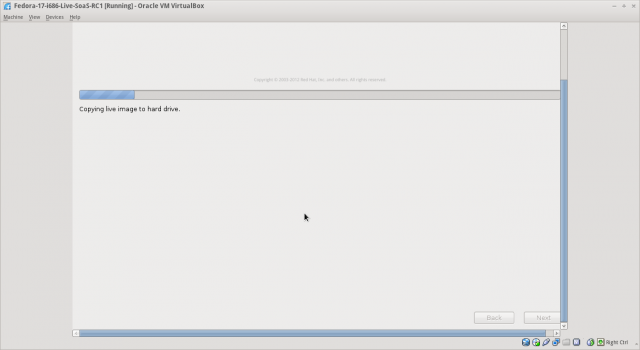
Copy Live CD to hard drive
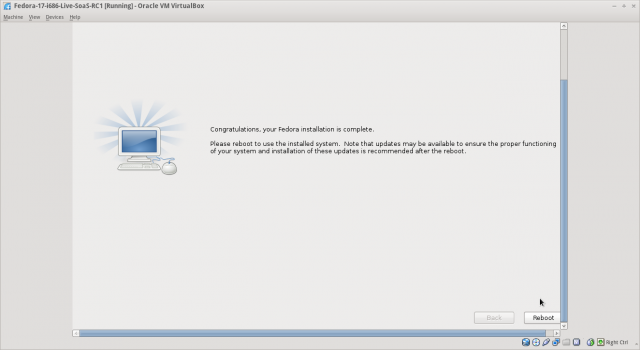
Reboot
- Be sure to remove disk from virtual drive in VirtualBox Settings..Storage before restarting.
- See the first screenshot in this tutorial
- Necessary to do after successful install
- Choose a virtual CD/DVD disk file... (top of drop-down menu)
- Remove disk from virtual drive (bottom of drop-down menu)
