Difference between revisions of "Activities/Turtle Art/Using Turtle Art Sensors"
Tonyforster (talk | contribs) |
Tonyforster (talk | contribs) |
||
| Line 4: | Line 4: | ||
The OLPC XO can measure external inputs with its microphone jack. | The OLPC XO can measure external inputs with its microphone jack. | ||
| + | |||
| + | [[File:Measure tut 1 24.jpg|150px] | ||
Standard 3.5mm 2-pin switched mono microphone jack; selectable 2V DC bias; selectable sensor-input mode (DC or AC coupled); selectable +20dB boost. | Standard 3.5mm 2-pin switched mono microphone jack; selectable 2V DC bias; selectable sensor-input mode (DC or AC coupled); selectable +20dB boost. | ||
Revision as of 06:40, 10 November 2010
CAUTION. APPLYING EXTERNAL POWER SOURCES TO THE XO LAPTOP'S MICROPHONE INPUT CAN CAUSE PERMANENT DAMAGE. BE SURE YOU READ AND UNDERSTAND THE FOLLOWING BEFORE CONNECTING POWER SOURCES TO YOUR LAPTOP. DO NOT CONNECT TO HAZARDOUS VOLTAGES
Specifications
The OLPC XO can measure external inputs with its microphone jack.
[[File:Measure tut 1 24.jpg|150px]
Standard 3.5mm 2-pin switched mono microphone jack; selectable 2V DC bias; selectable sensor-input mode (DC or AC coupled); selectable +20dB boost.
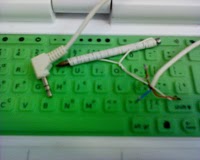
If using a stereo plug it is the tip (usually the red wire) plus the earth.
It is protected at the input by a 5V zener diode. The allowable input is -0.5V to 5V. Inputs outside this range will cause excessive current and damage. Even a single 1.5V battery can cause damage if connected reverse polarity.
For the XO1, the addition of a 150k ohm series resistor would (I expect, no guarantee) give a reduced sensitivity in voltage mode (0-4V) but allow inputs to +- 100V without damage. Input impedance in resistance, volume and pitch modes is much lower but a 1k ohm series resistor should still allow inputs to +-12V.
If applying an external voltage, it is highly recommended that test leads be made up with a microphone plug and an inbuilt series resistor.
Voltage Mode
XO1
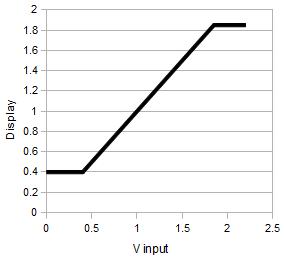
Measurement range is DC 0.4V to 1.85V. Voltages less than 0.4V report as 0.4V, voltages greater than 1.85V report as 1.85V. Accuracy is around 3% of full scale.
XO1.5
to be advised, 0-3V
Resistance Mode
XO1
Measurement range is 750 ohms to 14k ohms, resistances less than 700 ohms report as 700 ohms, greater than 14k ohms report as 14k ohms. Accuracy is around 5% with respect to the full scale voltage measured across the resistor, this translates to round 50 ohms at bottom scale and 2k ohms at top scale. (A series protection resistor of around 700 ohms would give a measurement range of 0 - 13k ohms and protection against +-8V inputs.)
XO1.5
to be advised, 2k ohms to 400M ohms
Pitch Mode
Pitch Mode is set up for the internal microphone but can also be accessed through the microphone jack, 2V DC bias is on, AC coupled, +20dB boost is on. The frequency of the strongest component is reported in Hz. The resolution is +-8Hz
Sound Mode
Raw data ranging -32000 to 32000, set up is for microphone, AC coupled, Bias on, Boost on. Sensitivity is 2uV per unit or 16mV full scale, so sine wave clipping sets in at round 10mV RMS.
Volume Mode
Ranging 0 to 32000, set up is for microphone, AC coupled, Bias on, Boost on. Volume is the rectified average of Sound, ie. volume=average(abs(sound))
Graphing the output
Source file as doc File:Oscillo.doc
Measuring Temperature
(For instructions on using the LM35 sensor, see http://wiki.laptop.org/go/Making_XO_sensors/Making_a_Temperature_Sensor)
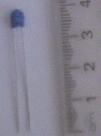
Connect the TDC05C247 thermistor, Specifications:
- NTC (Negative Temperature Coefficient) Thermistor
- Operating temperature range: -20 Celsius ~ +125 Celsius
- Maximum power rating: 500mW
- Nominal resistance at 25 Celsius 4.7k ohms
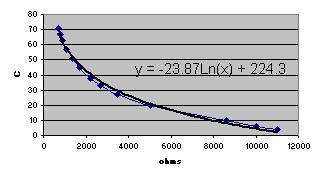
Left, the resistance was plotted against temperature and the curve of best calculated. Right the blocks convert from resistance to temperature C.
Teaching ideas:
- measure resistance and temperature with a thermometer
- construct your own calibration function
- exponential decay
- diurnal temperature
- heat of reaction, weak acid and base
Measuring Soil Moisture
Two probes into the soil measured in resistance mode. Only a few cm of wire are required to bring soil within the resistance range of 700 ohms to 14k ohms
Measuring Water Salinity
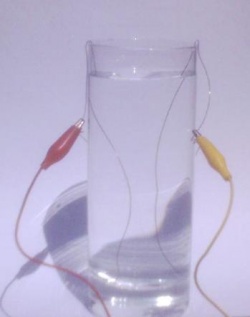
Place two copper wires into a glass of water. Experiment with your water and wire diameter, I was able to get a measurement of 5k ohms with 12cm of wire in tank water.
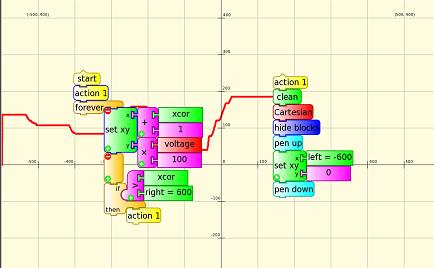
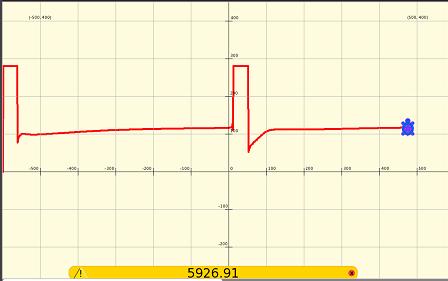
Use the graphing software shown previously but set the turtle y to resistance/50 to scale to the screen size, each 100 on the vertical scale corresponds then to 5000 ohms.
The graph shows first an unconnected circuit (14k ohms) then the circuit is connected. Note how the resistance slowly rises. The terminals are reversed mid screen, the sudden dip and gradual rise are more pronounced. Why is this? Electrolysis products (microscopic bubbles of hydrogen and oxygen for pure water) build up near the electrodes.
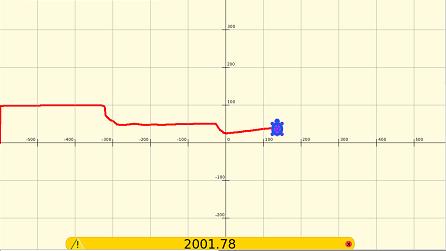
Small amounts of salt are added to tank water, bringing the resistance down from 5k ohms to 2k ohms. Salt added on two occasions
Generating Electricity from a Changing Magnetic Field
Requires a refrigerator magnet, often given away free with advertising on it.
Wrap 50 turns of insulated wire onto a nail and connect the two ends to a phono plug as shown (if it is a stereo plug, probably the red wire and the copper shield). Connect the phono plug to the microphone input. Graph the Sound or Volume block.
- Wipe the sharp end rapidly over the back of the fridge magnet, try both directions.
- Try a different number of turns of wire
- Try moving the nail more slowly, what happens?
- What is happening?
- Why does it work better on one axis of the magnet? (hint rub 2 magnets together)
- Graph pitch. Explain the result.
Carbon Microphone
Required:
- charcoal
- aluminium foil
- plastic lid
- wire
- rubber band
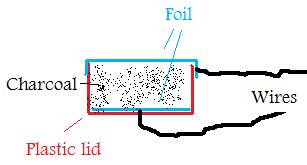
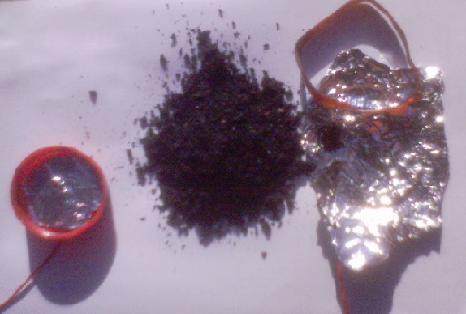
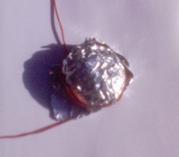
Crush the charcoal to a fine powder. Make a hole in the centre of the lid. Strip a small amount of insulation from the wire, pass the wire through the hole. Then place a piece of foil against the wire. Fill the lid with crushed charcoal. Place foil over the charcoal and secure with a rubber band. Connect a wire to this foil. Try to get the foil under tension.
Experiment with the fineness of the crushed charcoal and the tension in the foil. The more squashed the charcoal is, the lower the resistance. With the XO1, aim for a resistance of around 3k ohms and definitely 700 ohms < resistance < 14k ohms.
Graph the resistance, pressing on the foil changes the resistance. You have built a pressure sensor. It can also sense air pressure. You have built a microphone. Change to Sound sensing. On my first try I was able to sense clapping.
Lemon battery
See http://en.wikipedia.org/wiki/Lemon_battery
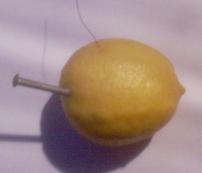
With a copper wire and galvanised nail, the measured voltage is 0.93V, comfortably within the measurement range of the XO1 laptop. The laptop produced negligible loading on the open circuit voltage. With copper wire and an ungalvanised nail the voltage was 0.49V.
Experiment with different materials. Try lemon cells in series.
Door bell / Burglar alarm
Visitors touch the two wires together to ring your door bell. Alternatively, arrange two wires to touch as your door opens.
Here are the Turtle blocks:
The Python Code Block ![]() is used to sound an alarm in your loudspeakers.
is used to sound an alarm in your loudspeakers.
You need to type the following into Pippy and save to the Journal. Type it exactly as shown, the indents on the last 3 lines are important, for the characters '-l 1' the first is an 'el' and the second a 'one'.
Then in Turtle Art, load the Pippy code  into the Python Code Block
 ![]() , then run your program.
, then run your program.
Two-tone alarm
Use the following Turtle blocks and Pippy code for a warbling alarm
How it works: the 1000 and 1100 blocks are input x in the Python code. The -f option in speaker-test is the frequency, {0} gets replaced by x which in turn is replaced by 1000 or 1100 so speaker-test is sent either -f 1000 or -f 1100 giving frequencies of 1000 Hz or 1100 Hz.
