Difference between revisions of "Sugar on a Stick"
(add beta release) |
m (fix version number) |
||
| Line 37: | Line 37: | ||
| SoaS ''Snapshot'' || varying quality || {{SoaS-2 path}} | | SoaS ''Snapshot'' || varying quality || {{SoaS-2 path}} | ||
|- | |- | ||
| − | | SoaS | + | | SoaS ''Virtual Appliance'' || alpha quality || {{SoaS-2 app-path}} |
|- | |- | ||
|} | |} | ||
Revision as of 08:20, 8 April 2009
Introduction
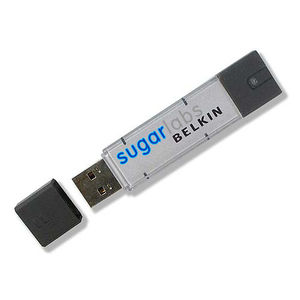
Sugar Labs offers ubiquitous access to Sugar in a USB (Universal Serial Bus) flash memory drive (stick). The Sugar on a Stick project (still in Beta) gives children access to their Sugar on any computer in their environment with just a USB memory stick. Taking advantage of the Fedora LiveUSB, it's possible to store everything you need to run Sugar on a single USB memory stick (minimum size 1GB). This small USB device can boot into the Sugar learning platform on different computers at home, at school, or at an after school program, bypassing the software on the those computers. In fact, Sugar on a Stick will work even if the computer does not have a hard-drive. With Sugar on a Stick, the learning experience is the same on any computer: at school, at home, at the library, or an after-school center.
You can learn more from Walter Bender's interview with Xconomy, Wayan Vota's video and Mike Lee's pictures.
What's exactly on the Stick: The Fedora version contains a compressed copy of Fedora 11's beta release that will boot, run in memory and maintain changes on a USB flash drive with a standard FAT16 or FAT32 partition. The files coexist with other files the user may have or put on the disk. Different types of configurations are being designed to offer the options to run virtualizations or emulations and to use virtual machines on existing computers saving the Sugar Home folder (user's work) on the Stick for use at another workstation. See our resources for more information.
Project Goals
- Sugar on a Stick as 1-to-1 computing in an elementary school
- Sugar on a Stick to empower middle- and high-school students to help test
- Sugar on a Stick for conferences to let people try Sugar and collaborate with other conference participants
Getting Sugar on a Stick (beta)
We are currently working towards the first SoaS-2 release, with a hard launch date of April 10th, 2009 (we plan to premiere and distribute SoaS at FOSSVT). What this means is that the current snapshots are still unstable and in testing, and that if you download and try out this software, it might not work yet. Please download, test (see Smoke test), and give feedback (on sugar-devel@lists.sugarlab.org and Sugar on a Stick/Getting Involved) – we need your help to make our launch date – please follow the instructions below (for SoaS-2) to download a copy!
Downloads
Depending on what you want to do with your SoaS copy, we've several options available for testing.
Note: With the upcoming beta release of SoaS, older images based on F10 can be considered obsolete and have been removed from promotion here.
Note: The SoaS beta release has been listed below!
| available solution | current state | download location |
| SoaS Beta | beta quality | http://download.sugarlabs.org/soas/releases/soas-beta.iso |
| SoaS Snapshot | varying quality | http://download.sugarlabs.org/soas/snapshots/2/Soas2-200906221314.iso |
| SoaS Virtual Appliance | alpha quality | http://download.sugarlabs.org/soas/appliances/soas2-20090603.zip |
Previous snapshots are provided in the subsequent directories on http://download.sugarlabs.org/soas/.
Creating your stick
The basics of creating and using a bootable Sugar on a Stick are:
- Download a .iso image file containing Sugar on a Stick.
- Use a Bootable USB creator program to copy the image file to a USB stick.
- Configure the target computer to boot from USB.
Please see the installation instructions for more information, for example regarding multiple platforms.
Booting your stick
Once you have created your USB stick, you still need to set your target computer to boot from USB.
The trick is to set the target computer's BIOS to boot from USB. Unfortunately this is slightly different on each computer. Explore the setup screen for your system (press Esc or F1 while the computer is booting). If you can't figure it out, search Google for information on your computer model's BIOS.
If you have an older machine unable to boot from USB, you can burn a "Boot Helper" CD using the .iso below. This will start the boot from the CD, then read files from the USB stick:
Fedora boot CD image:
You can also use the "PLoP Boot Manager" to create a boot floppy for machines without the ability to boot from CD or USB, see:
Using your stick
Once your stick boots, you'll find yourself in your own Sugar environment, ready to play and learn.
For a guide on how to use Sugar, see the FLOSSmanuals Sugar Users Guide. olpc:Keyboard_shortcuts lists some of the Sugar keyboard shortcuts on a PC keyboard.
Help the project
Please keep notes on which version of Sugar on a Stick you have downloaded when reporting issues.
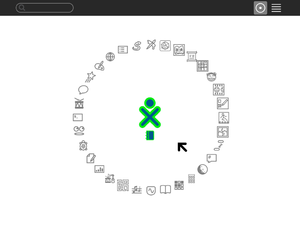
- When booting SoaS, you'll see for a short time a screen showing a kind of solar system.
- Press the "Escape" button here and you'll get to the boot menu.
- There, you should find the images name in the following structure: Soas{version number}-{date of creation}
Alternatively, you can also refer to the name of the .iso file, if you still have it around.
To find out which version of Sugar you are using you can look it up in the 'About my Computer' Section in the Control Panel.
Report bugs to http://dev.sugarlabs.org/. Use the "SoaS" component when entering new bugs.
Testing
For testing SoaS, you might want to follow the Sugar Smoke Test procedures. See /Getting Involved.
Join the development effort
- We are experimenting with the Sugar Labs Moodle system to help in coordinating deployment work on this project.
- Development discussions take place on the Sugar-Devel email list, http://lists.sugarlabs.org/listinfo/sugar-devel.
- Real-time development chat is at irc://irc.freenode.net#sugar Mibbit: #sugar
- Gitorius SoaS home
Roadmap
Review and contribute to plans and schedules on the Project roadmap page.
See Also
- OLPC:Rawhide-XO for the closely related development of Sugar for the XO-1 laptop on Fedora 11.
- Deployment Team/School_Key Information on various Sugar on a Stick deployments.
- Sugar on a Stick Ubuntu An alternate version of Sugar on a Stick which uses Ubuntu as the base system.
- Sugar on a Stick VirtualBox Instructions for using a preconfigured VirtualBox disk image with Sugar on a Stick.

