Development Team/Arduino: Difference between revisions
m moved Anal bleaching 15/Arduino to Development Team/Arduino over redirect: revert |
|||
| (5 intermediate revisions by 4 users not shown) | |||
| Line 82: | Line 82: | ||
==Turtle Art== | ==Turtle Blocks (Turtle Art) with Arduino Plugin== | ||
[[File:turtleart-arduino-palette.png|800px]] | |||
The | |||
There are several efforts to develop Turtle Art support for Arduino. | |||
This implementation uses the same [http://www.firmata.org firmata] protocol that the arduino-squeak connection uses. | |||
* [http://tonyforster.blogspot.com/2010/10/arduino-fork-of-turtle-art.html Setting up Turtle Arduino] | |||
* [http://tonyforster.blogspot.com/2010/10/turtle-arduino-display-inputs.html Read digital inputs] [[File:Ard.ta]] | |||
* [http://tonyforster.blogspot.com/2010/10/turtle-arduino-digital-write.html Arduino write output] [[File:Turtle Art Activity ardout.ta]] [[File:Tamyblock mouse.odt]] | |||
* [http://tonyforster.blogspot.com/2012/01/arduino-and-xo-laptop.html The Freetronics Leostick] | |||
The Arduino functionality was corrected from previous versions: | |||
* Analog and digital reading now works correctly | |||
* Auto detection of ttyUSBx port for FTDI device (Arduino board uses this for USB) | |||
It requires the Firmata protocol to be uploaded to the Arduino board. | |||
Use the latest Firmata version (2.1 as of now) downloaded from the Firmata page (firmata.org) | |||
The Firmata version included with the Arduino IDE has some inconsistencies. | |||
This version has english and spanish translations. | |||
=== | ===Screenshots=== | ||
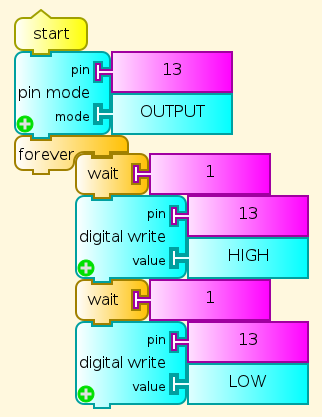
[[File:turtleart-arduino-example1.png]] | |||
=== Source Code === | |||
You can see all code in: [http://git.sugarlabs.org/arduino arduino_plugin GIT] | |||
=== | ===Downloads=== | ||
The plugin file can be downloaded from [[File:arduino.tar.gz]]. | |||
== Spanish Version == | == Spanish Version == | ||
Latest revision as of 02:53, 17 March 2012
There are different options to connect your arduino board to Sugar (trough sugar-capable activities)
Squeak
Thanks to the great work found on Gira
We can download an squeak project and install it on our Sugar. This script can help in the process.
#/bin/bash
echo "Downloading.."
echo ""
curl -o Arduino.zip  http://tecnodacta.com.ar/gira/Arduino.7.zip
unzip Arduino.zip
echo "Executing.."
echo ""
cd Arduino.7/
./Arduino.sh
Note that on an XO laptop you have to tweak some your Arduino.sh script in these or similar ways
#!/bin/sh
APP=`dirname $0`
EXE="$APP/Contents/Linux686"
RES="$APP/Contents/Resources"
exec "/usr/bin/squeak" \
-plugins "$EXE" \
-encoding latin1 \
-vm-display-X11  \
"$RES/Arduino.2.image"
Installation and use procedure
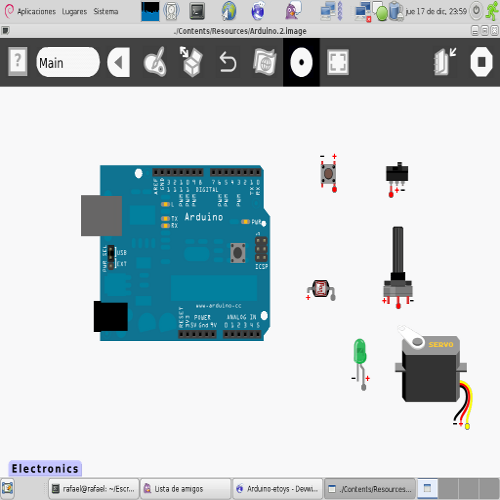
Having executed our initiation script we have an squeak project with essential particularities in order to run our Arduino. Inside Electronics flaps we can find different tools.
But first we have to connect our arduino board, this is done in the following way,
- 1) Connect the board to the USB port.
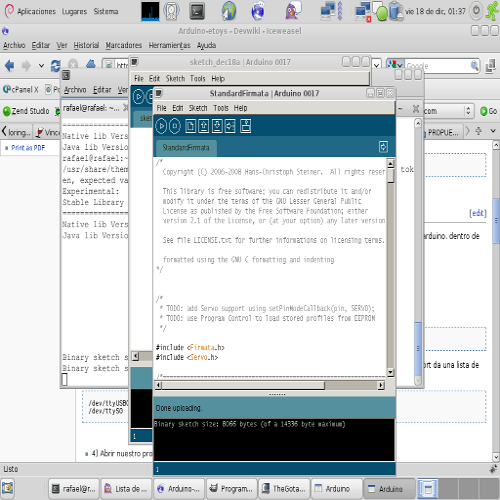
- 2) If the board doesn't have Firmata we have to upload it form Arduino IDE.
- 3) To find out the serial port to which the board belongs we can go to Tools->Serial Port of a list we can always find the following:
/dev/ttyUSB0
/dev/ttyS0
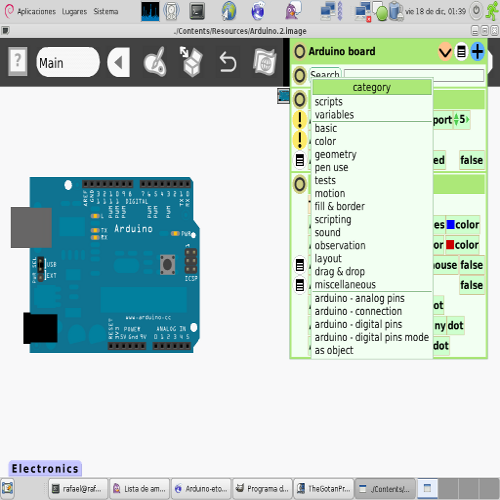
- 4) Get an "Arduino board" from the Electronics flap, open its halo by right-clicking it, then open the Viewer by clicking the button that looks like an eye, and then find "arduino - connection" category
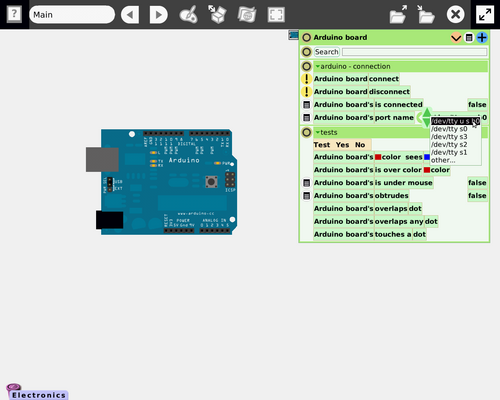
- 5) Select the desired port (i.e. "/dev/ttyUSB0")
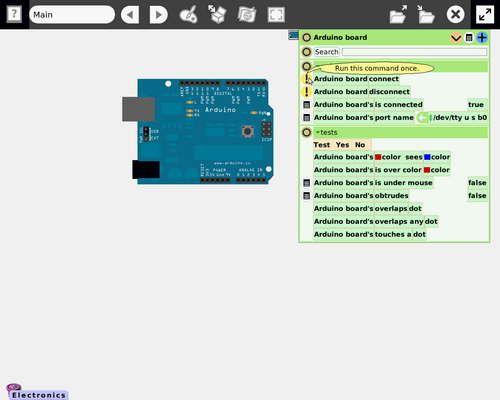
- 6) Execute "Arduino board - connect"
- 7) Wait more or less two seconds an then the slot "is connected" have to change to true.
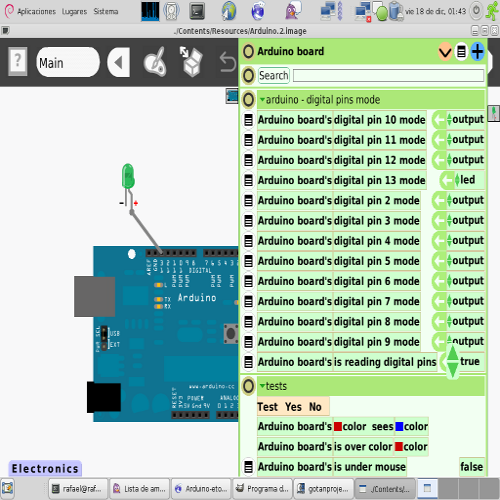
- 8) After searching "arduino - digital pins mode" category and resetting the value of "arduino board - is reading digital pins" (going from false to true). That's how the digital inputs are set.
- 9) Now we are ready to use it!.
Turtle Blocks (Turtle Art) with Arduino Plugin
There are several efforts to develop Turtle Art support for Arduino. This implementation uses the same firmata protocol that the arduino-squeak connection uses.
- Setting up Turtle Arduino
- Read digital inputs File:Ard.ta
- Arduino write output File:Turtle Art Activity ardout.ta File:Tamyblock mouse.odt
- The Freetronics Leostick
The Arduino functionality was corrected from previous versions:
- Analog and digital reading now works correctly
- Auto detection of ttyUSBx port for FTDI device (Arduino board uses this for USB)
It requires the Firmata protocol to be uploaded to the Arduino board. Use the latest Firmata version (2.1 as of now) downloaded from the Firmata page (firmata.org) The Firmata version included with the Arduino IDE has some inconsistencies.
This version has english and spanish translations.
Screenshots
Source Code
You can see all code in: arduino_plugin GIT
Downloads
The plugin file can be downloaded from File:Arduino.tar.gz.
Spanish Version
Please go to
