Homepage | Activities | Events | Lists | Development | Translate | Contact
Difference between revisions of "Talk:Tutorials/Copy with drag & drop"
Jump to navigation
Jump to search
m (Library of Screen-shots (moved)) |
|||
| Line 1: | Line 1: | ||
| + | ==How to Make screen-shots on a Mac== | ||
| + | go to applications/utilities on Mac OSX | ||
| + | start grab | ||
| + | (grab only appears as a top bar menu) | ||
| + | Preferences - pick Pointer type | ||
| + | Capture/Window/ (choose window) | ||
| + | Click on the window on the desktop - screen shot appears on desktop | ||
| + | File save as [ name ] ''''grab only saves as a .tiff file''' | ||
| + | Open browser and go to http:www.go2convert.com/uploaded/ (This application will convert .tiff to .jpg files.) | ||
| + | |||
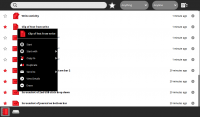
===Library of Screen-shots=== | ===Library of Screen-shots=== | ||
[[File:Screenshot_of_f3_Drop-Down.png|200px]] | [[File:Screenshot_of_f3_Drop-Down.png|200px]] | ||
Revision as of 21:51, 18 December 2011
How to Make screen-shots on a Mac
go to applications/utilities on Mac OSX
start grab
(grab only appears as a top bar menu)
Preferences - pick Pointer type
Capture/Window/ (choose window)
Click on the window on the desktop - screen shot appears on desktop
File save as [ name ] 'grab only saves as a .tiff file
Open browser and go to http:www.go2convert.com/uploaded/  (This application will convert .tiff to .jpg files.)
