Tutorials/Introduction to the Sugar Interface: Difference between revisions
Appearance
m →Introduction to the Sugar Interface: add link |
No edit summary |
||
| Line 11: | Line 11: | ||
==Introduction to the Sugar Interface== | ==Introduction to the Sugar Interface== | ||
*You can run Sugar in several ways: | *You can run Sugar in several ways: | ||
:Run | :Run from the Live CD - Burn the .iso file to a CD. | ||
:[[ | :[[Sugar_on_a_Stick/Installation|Load the CD or .iso onto a bootable USB device]] - Sugar-on-a-Stick | ||
::http://fedoraproject.org/wiki/How_to_create_and_use_Live_USB | ::http://fedoraproject.org/wiki/How_to_create_and_use_Live_USB | ||
:[[Sugar_Creation_Kit/sck/liveinst|Install to your Hard Drive]] -Install live CD's to your Hard disk including 8GB or larger USB sticks ; SD and class 10 SDXC Cards | :[[Sugar_Creation_Kit/sck/liveinst|Install to your Hard Drive]] -Install live CD's to your Hard disk including 8GB or larger USB sticks ; SD and class 10 SDXC Cards | ||
Revision as of 10:31, 19 May 2012
- Use the ← left________________________right → links in the colored bar below
- to connect to another part of this Annotated Guide to Sugar
| ← Sugar Creation Kit | Use Blue Bars to Navigate this Tutorial | Connecting to the Internet → |
Introduction to the Sugar Interface
- You can run Sugar in several ways:
- Run from the Live CD - Burn the .iso file to a CD.
- Load the CD or .iso onto a bootable USB device - Sugar-on-a-Stick
- Install to your Hard Drive -Install live CD's to your Hard disk including 8GB or larger USB sticks ; SD and class 10 SDXC Cards
- Use VirtualBox:
- Read the FAQ's on Sugar (Listed on the left-side of all wiki pages.)
- Note:For All Screen-shots:
- Click on Screen-shot to enlarge it
- Use your Browsers <== Back arrow to return here
First Start Screens
- When Sugar is started for the first time it boots to a screen that shows:
- First Screen where you enter a name
- NAME:(_____________)
- _________________________(=>Next)
- Click on (=>Next) and Sugar goes to the
- Second Screen where you choose your XO "Avitar" colors
- _______Click to change color:
- ______________XO
- (<= Back)____________(=>Done)
- (the color of the central XO Avitar changes each time it is clicked.)
- These screens set the name and color of your XO "Avitar" and generate a unique ssh user key for this Sugar Instance
- These screens run only one time and do not repeat on next boot; if there is Persistence (changes can be saved)
- Click on (=>Done) and Sugar goes to the f3 Boot Screen
How to Clear the Keys and users name and color entries
- It is important to not use duplicated SoaS USB-sticks which have not been cleared this way as there will be network collisions caused by the duplicate identities (ssh keys)
Home (or f3) Boot Screen
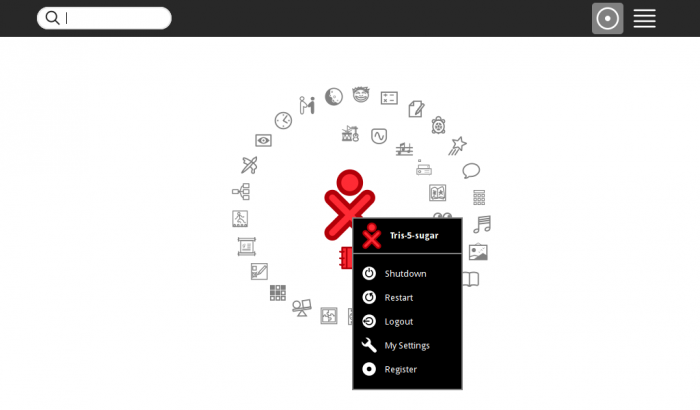
- Sugar boots to this Screen
- It contains a circle of activities
- It becomes a spiral if a large number of Activities are "Favorites"
- and is reached with the Home (or f3) key
- Click on Any of the Activities in the circle and the activity will start
-
- This links to the sugarlabs wiki page listing information and descriptions on most sugar-activities and how to download them.
- Also look at the OLPC Activities List (OLD for reference only)
- You will leave this Introduction if you click these links^
- To return Click the <== Back arrow on your browser.
- If you hover over the round icon, in the top bar, it will show a drop-down menu (Not shown)
- With 2 icons:
- Stack of 3 boxes in a triangle -(changes the activity display to a random one on the desktop-You can drag them into an arrangement you prefer.)
- Circle with dot in center - (Circular/Spiral View)
- Hover over the center XO Avitar and a drop down box appears (Shown Above)
- On the top right bar are 2 icons
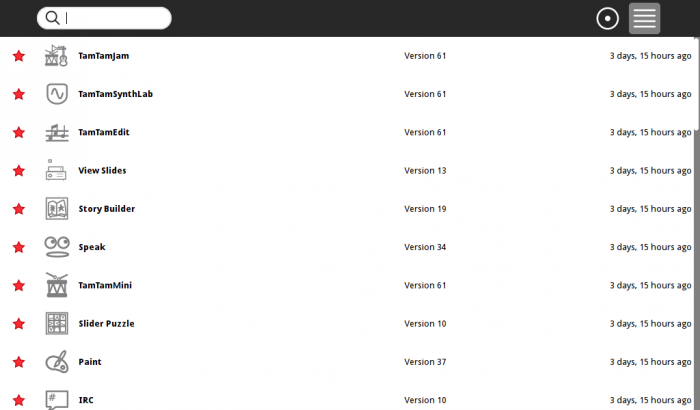
- Click on the one with horizontal lines (The list view)
- Click on Any of the Activities in the list and the activity will start.
-
- click on the "star" to the left of the activity on the list view
- It will alternate as a colored or outlined star.
- If the star is colored, It becomes a "Favorite" and will be listed in the Activity circle/spiral on the other screen for f3
- Click on the circular figure on the top bar
- You switch back to the Home (or f3) circular view
- In the Center is the users XO figure
- Hover over the XO figure and a Drop Down Box Appears
My Settings
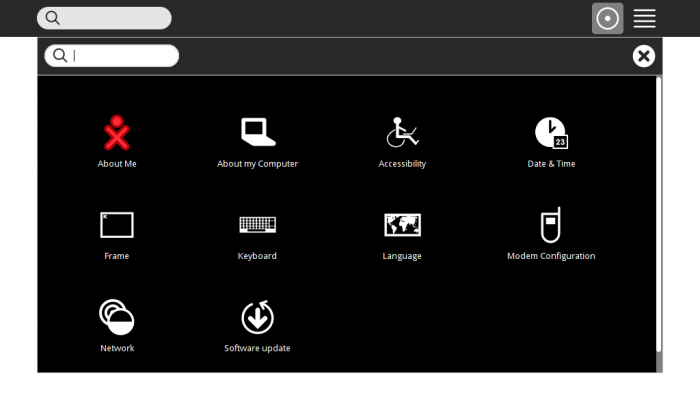
- (a "Control Panel" page where you set the configuration of Sugar)
- Select the "My Settings"
- You switch to the :Control Panel"
- Here you can click on each of the items to make changes to how Sugar Works
- Like Language or Keyboard setting
- Also look at OLPC Sugar Control Panel
- You will leave this Introduction if you click this link^
- To return Click the <== Back arrow on your browser.'
- This is a very complete description-(Important Information)
- Slightly out of dats as it covers an older version of XO-1 OLPC
- RECOMMENDED READING
- Also look at OLPC Sugar Control Panel
About Me
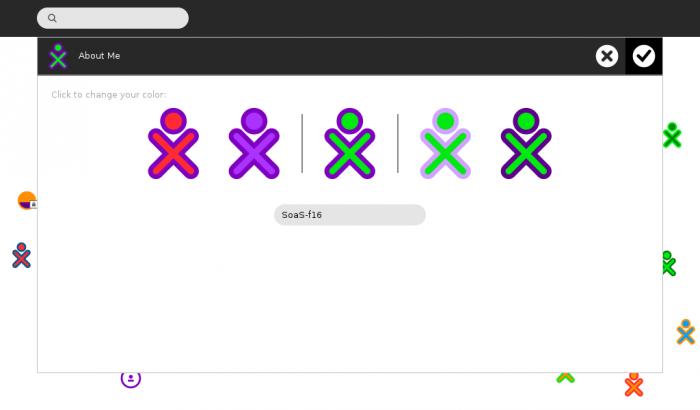
- (From F16 SoaS Pineapple Booted live CD)
- Change the color of your XO identity
- This will vary on the version of sugar you are using
- 5 Avitars:(Click on any version of the XO except the center one -center shows your current colors)
- 1 Avitar:(Click on the XO "Avitar" if there is only one shown)
- Colors change with each click
- Change your name (edit it)
- click ( check mark ); to save ( X ) to escape with no changes
- You will have to restart Sugar after these changes
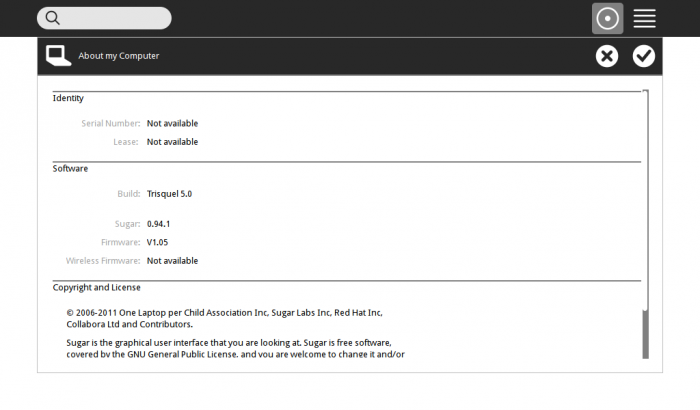
About My Computer
- Shows Sugar Version and Operating system information
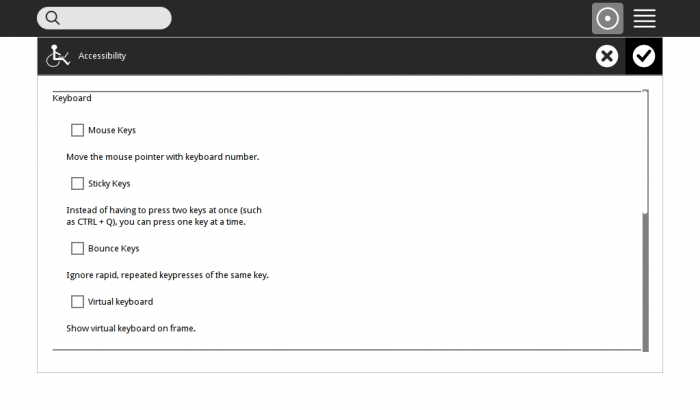
Accessibility
- Not present in most sugar versions
- (This is Trisquel 5.0- which has some Dextrose3 features)
Date & Time
- set your Time Zone
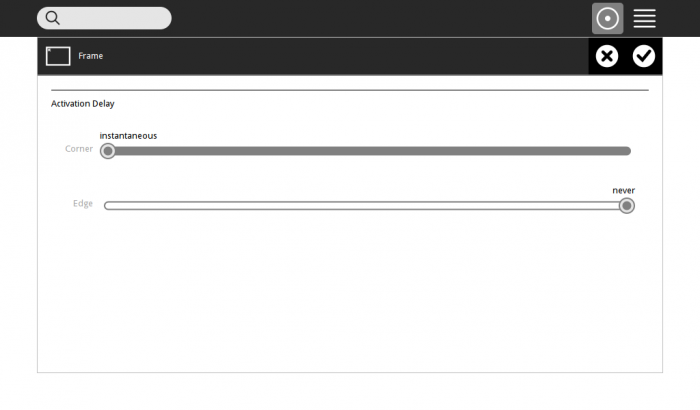
Frame
- sets the corner and edge sensitivity of the frame to the cursor
- Move the bottom slider in the <=== fully left
- This will make extending the frame easier
Keyboard and Language
Language and Keyboard Settings
- Use to set these up in sugar
- Requires a reboot after changes are made
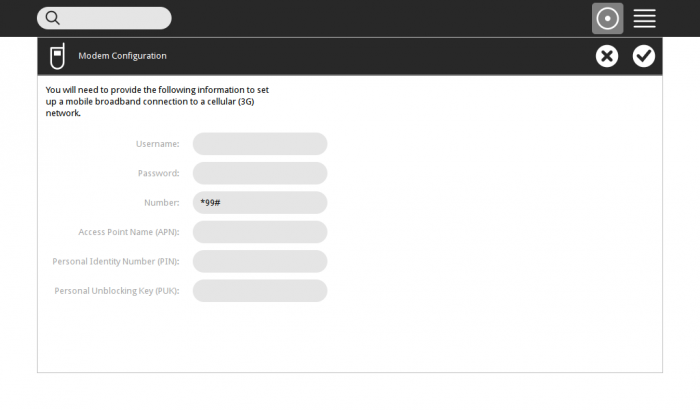
Modem Configuration
- Set up mobile broadband connection to a cellular(3G) network
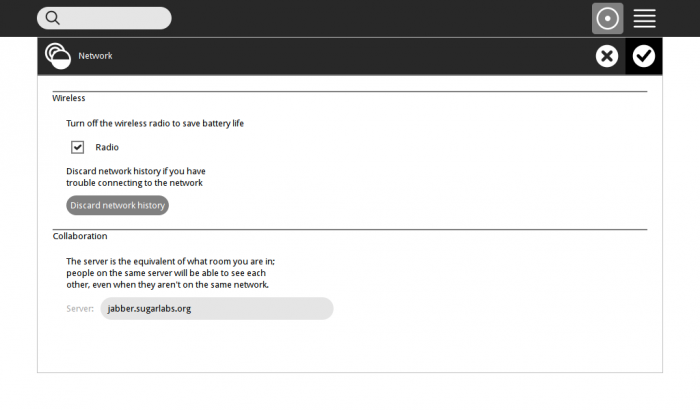
Network
- Shows the Jabber Connection Information
- fill in the field of the jabber server:
- Jabber.sugarlabs.org (default on SoaS)
- This field is blank on OLPC XO-1 and XO-1.5 machines
- Community Jabber Servers Listing of other jabber.servers- (May not be always working)
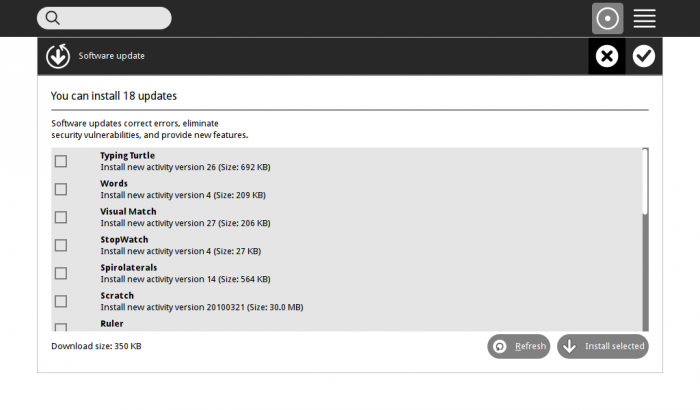
Software Update
- Updates the applications installed in your sugar
- Check the Activities you want to upgrade
- This will only upgrade activities that you have installed
- Or ask to install new ones in some versions of sugar
- This may be customized in deployments with a School server.
- To exit the control-panel hit the (X) or (check mark if it appears :it saves changes) in the frame bar right corner
Network Neighborhood
- Click
 in the frame or Hit F1 key and you switch to the Neighborhood View.
 - Move the mouse pointer to upper right corner of window to expose frame
- (wait for it to appear there is a time delay)
- The delay and sensitivity of this is set in the "Control Panel"
- See the section on the frame discussed above
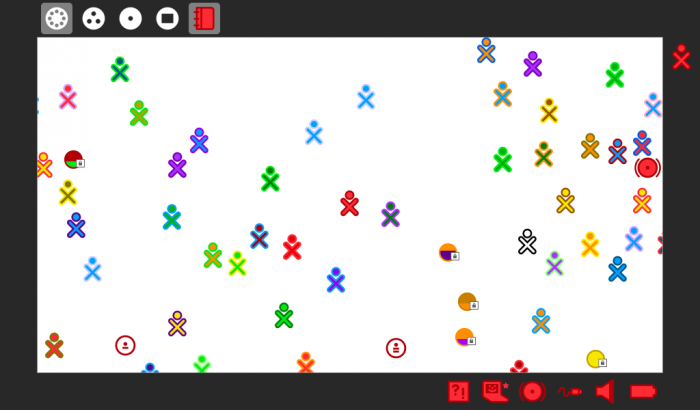
- This is a description of what is showing in this frame:
- Starting in the top Right corner and moving Clockwise ===>
- Right side
- The User's XO Avitar- (the same drop down menu will be shown here as in the f3 home view.
Any other Users you are Collaborating with will be shown below the User's Avitar )
- Bottom
- Battery indicator (% Charge Level)
- Speaker - (Set Volume and Mute)
- Wired Network - (Connection and Speed and IP Address.)
- Wireless or Ad-Hoc Network Connection - (Connected-disconnect Channel IP Adress)
- System Resources- (CPU and Memory Usage in % )-Trisquel and Dextrose3 only
- Feedback - (Submit comments)-Trisquel and Dextrose3 only
- Left Side
- Will contain icons of clippings
- Top
- f-1 Neighborhood-(Jabber View)
- f-2 Group-(See the Avitars of your friends-this screen is not used for much anymore in Sugar)
- f-3 Home View-(Circular and List Views)
- f-4 Activity
- Journal-(Display Journal)-Drop down: Show Contents and xxx MB Free Space
- move mouse pointer to center of window to retract frame.
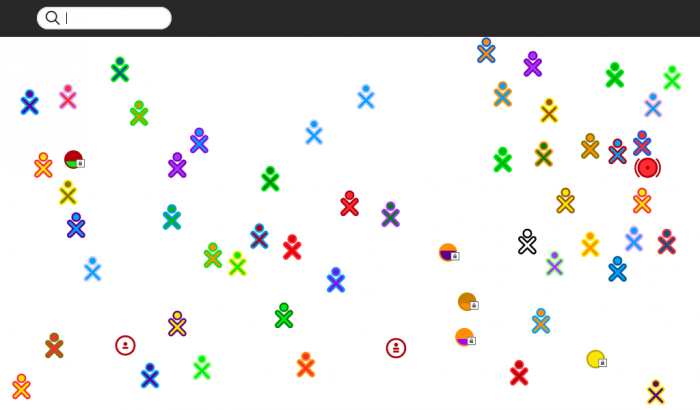
- You are the XO in the center.
- Hover on it and the same drop-down menu will appear as in f3
- All the other XO figures are other users on the jabber network
- Hover the cursor over one of them and a pop up will give their name
- NOTE: icons of Shared activities may appear here.
- Hover over the icon and click "Join" on the drop-down menu to begin Collaboration (working with the other user) in the activity.
- (There are no shared activities shown in the screen-shot)
- hit Home (or f3) and return to the main screen
Shutdown Sugar
- Choose shutdown on the drop down box
-
- Wait until sugar SoaS shuts down completely before removing the USB-stick
- If you just pull it out without waiting after shutdown; you will corrupt the USB-stick' and it will never start again.
- It needs to write information about your journal before it shuts down. (Notice the LED on the USB-stick flashes for a while after shutdown)
Re-login to Trisquel after restart from My Settings
- If you encounter a re-start of the Trisquel 5.0 Sugar live CD
- Caused by a color/name change or other change in My Settings that require a restart
- This is NOT the same as the f3 drop down selection Restart which shuts down the CD and ejects it.
It will come up on a login screen:
- (other) <===Click on it
- [_______]<==Enter trisquel here
- Password: (leave it blank)
- hit (Login)
- Sugar will restart with the changes.
- Use the ← left________________________right → links in the colored bar below
- to connect to another part of this Annotated Guide to Sugar
| ← Sugar Creation Kit | Use Blue Bars to Navigate this Tutorial | Connecting to the Internet → |
