Tutorials/Installation/Install using Anaconda f18 RC1 DVDx86 64
< Tutorials | Installation
Jump to navigation
Jump to search
Install using Anaconda f18 RC1 DVDx86_64
Fedora Draft Install Guide for f18
- http://docs.fedoraproject.org/en-US/Fedora_Draft_Documentation/0.1/html/Installation_Guide/index.html
- Very complete discussion of options
This tutorial uses a booted dd to USB of the DVD.iso
- Updated Jan 06 2013
- This install is used when you want to install a fedora 18 desktop to a hard-disk;
- A similar but simpler installer is entered in booted Live CD's using the command liveinst in root sugar-terminal(su) or other root terminal.
- this differs from the installer on fedora 17 or older versions
- http://wiki.sugarlabs.org/go/Tutorials/Installation/Install_SoaS_in_VirtualBox
- anaconda NuUI installer is NEW and has bugs:
- A major feature of f18 is the development of newUI a new anaconda.
write installer USB with dd
- Insert USB
- Start root terminal in directory where Fedora-18-x86_64-DVD.iso is located
su
password
- determine USB device name:
[root@localhost RC1]#
mount
....
/dev/sdb1 on /run/media/(user)/Fedora 18 x86_64 type iso9660  (ro,nosuid,nodev,relatime,uid=1000,gid=1000,iocharset=utf8,mode=0400,dmode=0500,uhelper=udisks2)
....
- write USB:
[root@localhost RC1]# dd if=Fedora-18-x86_64-DVD.iso of=/dev/sdb bs=2M
2180+0 records in
2180+0 records out
4571791360 bytes (4.6 GB) copied, 1306.78 s, 3.5 MB/s
[root@localhost RC1]#
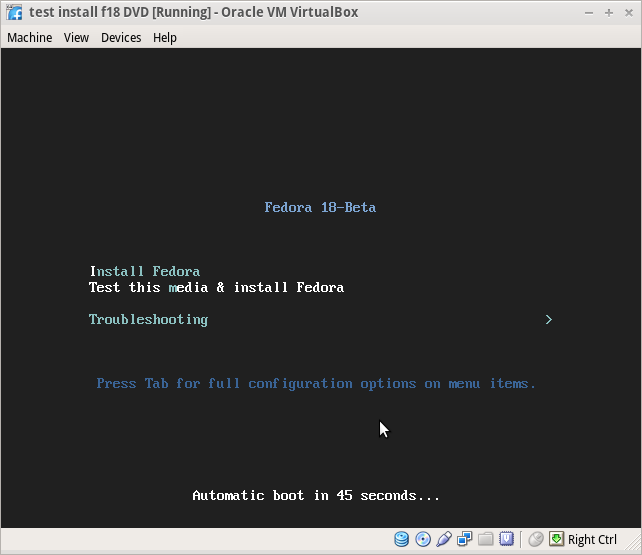
Start Installer
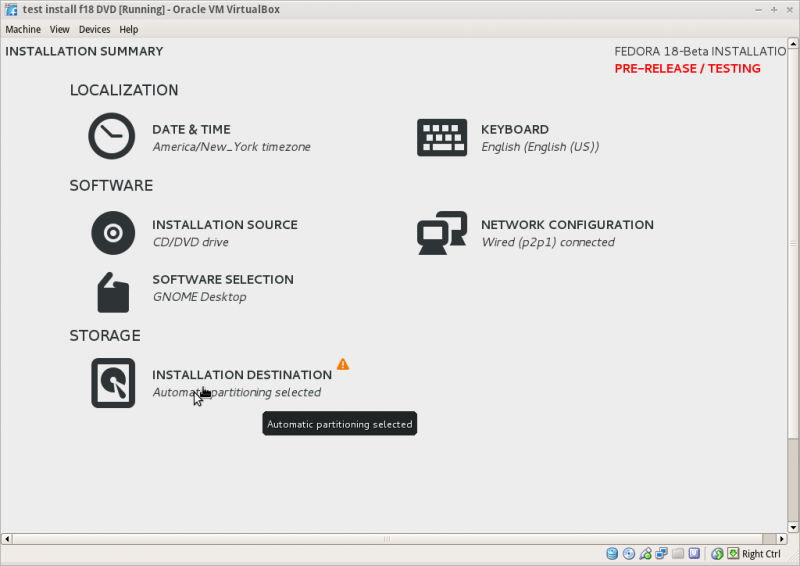
Anaconda main Hub
- When it finishes:
Storage (Disk Selection) then [DONE]
- Select Disk or USB you want to install to (It will change color to blue)
- To format the disk or reclaim space; click on [Continue] in right bottom of installer screen
- NOTE: Disk selection filters out non-selected Disks and makes them invisible to the installer
- A booted dd USB will show on initial selection screen DO NOT Select it.
- If the Install target is empty you can skip the next step; If you want a default LVM install
- Select the Target (changes color (Blue)
- Click [Back}
Reclaim Space
- Used for Custom partitioning
- Click on [Continue] at right bottom of window
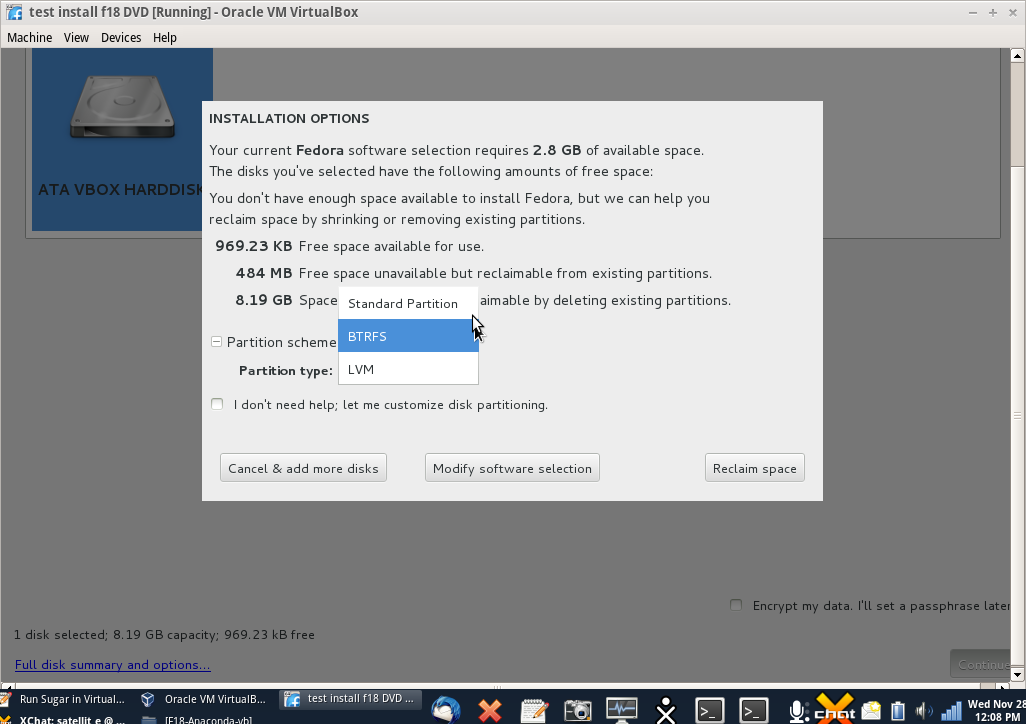
- Select the Partitioning type first
[+] partition scheme drop down box click > [+]
- Standard Partition
- BTRFS
- LVM (default)
[ X ]"I don't not need help: Let me customize disk partitioning"
- Checked
- Takes you to Custom and Raid Partitioning
[ ]"I don't not need help: Let me customize disk partitioning"
- Not Checked
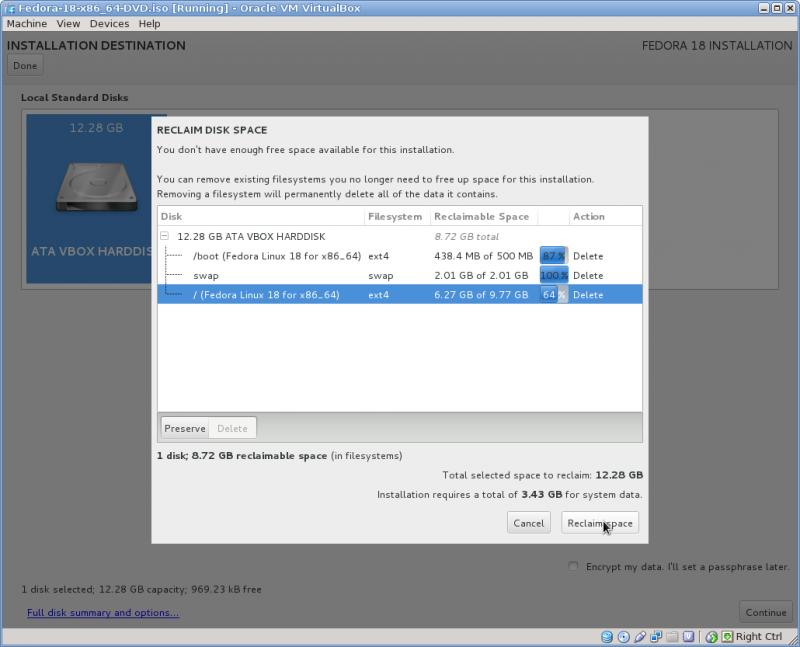
- [Reclaim space]
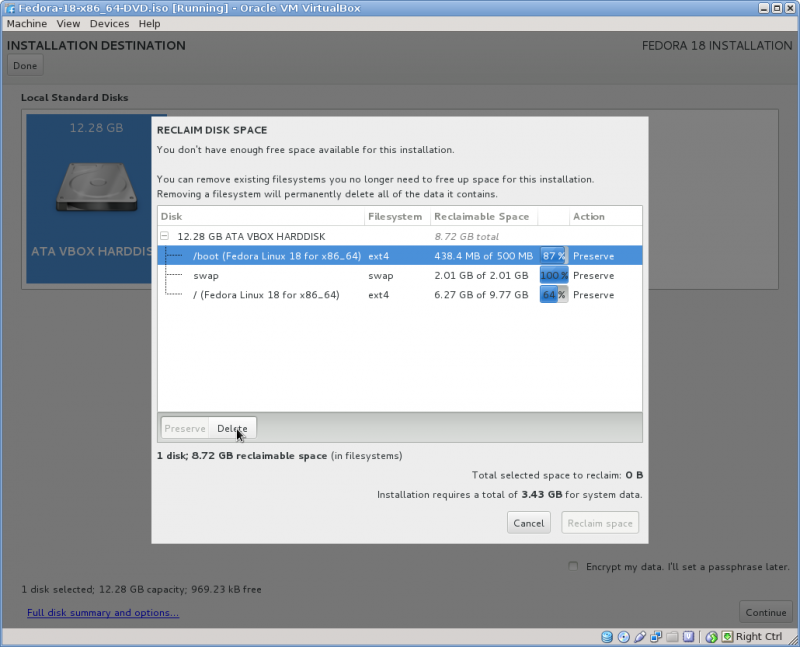
- Reclaim Disk space window
- shows disk partitions with drop down boxes - default is Preserve click on Preserve; get dropdowns Preserve; Delete
- select your choice
- Note in latest anaconda (18.37-10) the selections are now located on the bottom line of the reclaim window.
- http://dl.fedoraproject.org/pub/alt/qa/20130104_f18-smoke14/Fedora-18-smoke14-x86_64-DVD.iso
- When finished [Reclaim space] returns to main Hub
- Click [Done] to return to main hub
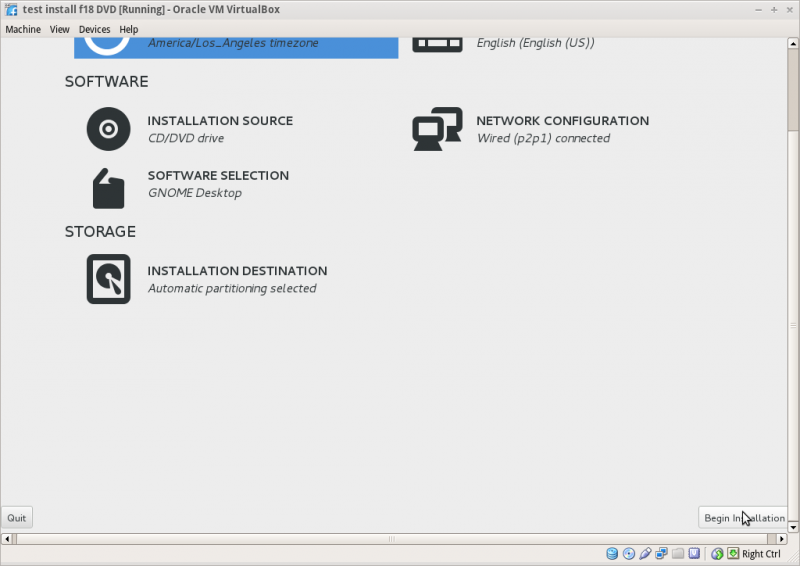
Main Hub
Software Selection and [Done]
- select left column (Environment) and right Column (Add-ons)
- Gnome-desktop is default
- scroll down left column and select the Desktop Environment you want to install
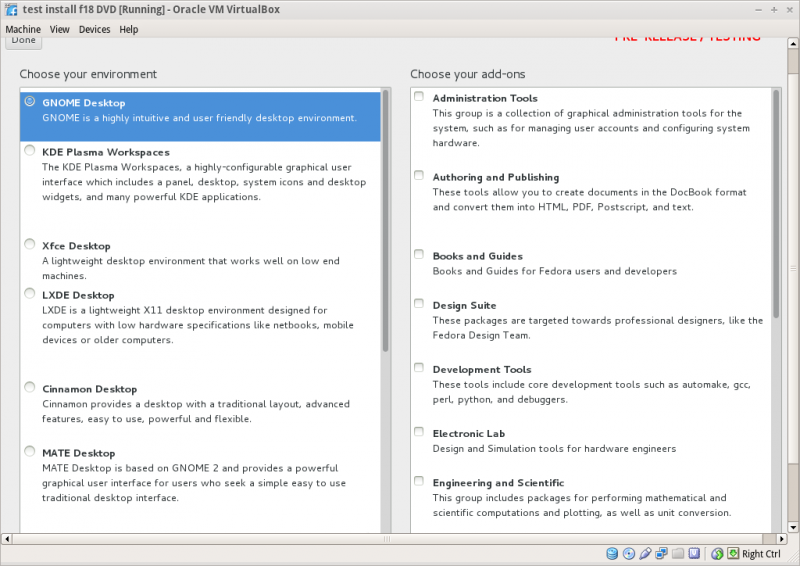
- Wait for Checking software dependencies to finish
Network Configuration and [Done]
- recognizes wired DHCP connections if present
- Wireless will show up if wlan0 is visible and supported
- [Configure] to set up either connection.
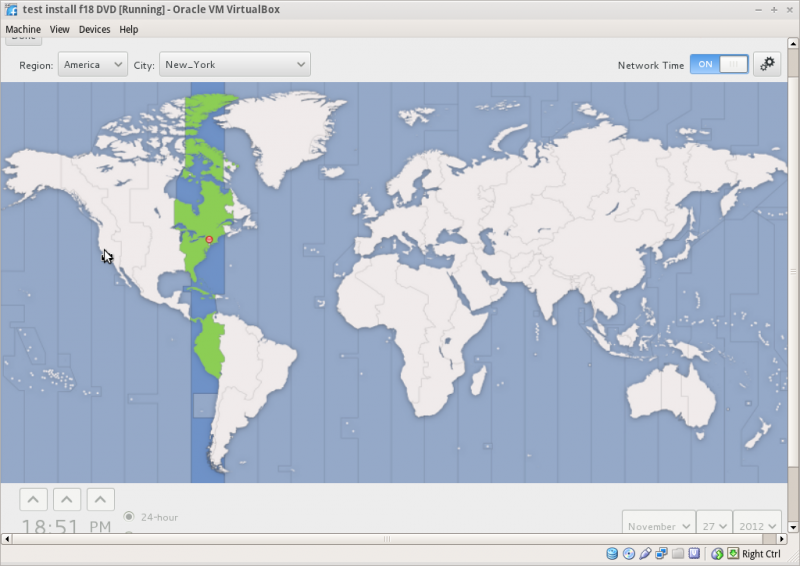
Time Zone select and [Done]
Begin Installation
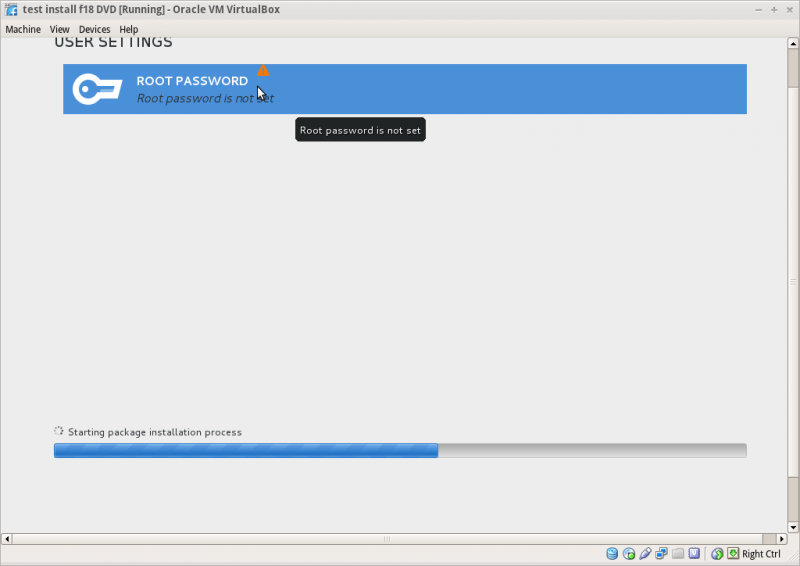
Root Password
- Appears after install begins
- Enter password on both lines and hit [back]
- hit [back] a second time for a weak password.
- If the root password is not entered during install; anaconda will pause at the greyed out [Finish Configuration] until it is entered.
- Once the root password is entered [Finish Configuration] appears and the install will complete.
- Wait for [Reboot], (or [Quit] if live), when install is completed.
More Tutorials
External Tutorial: a-visual-tour-of-fedora-18
hit <== (BACK) in browser to return here.
