Tutorials/Installation/Install SoaS in VirtualBox-f18
< Tutorials | Installation
Jump to navigation
Jump to search
The printable version is no longer supported and may have rendering errors. Please update your browser bookmarks and please use the default browser print function instead.
Install with Anaconda f18 in VirtualBox
- This install is used when you want to install a fedora 18 desktop to a hard-disk; Virtualbox HD or a 8 GB USB.
- A similar but simpler installer is entered in booted Live CD's using the command liveinst in root sugar-terminal(su) or other root terminal.
- this differs from the installer on fedora 17 or older versions
- http://wiki.sugarlabs.org/go/Tutorials/Installation/Install_SoaS_in_VirtualBox
- anaconda NuUI installer is NEW and has bugs:
- A major feature of f18 is the development of newUI a new anaconda.
- Sample Install to Virtualbox 4.2.4 using F18 Beta DVDx86_64


Settings In Virtualbox


Start Installer


Anaconda main Hub
- When it finishes:
- Click on each section (spoke) to change or set
- click [Done] to return to main Hub
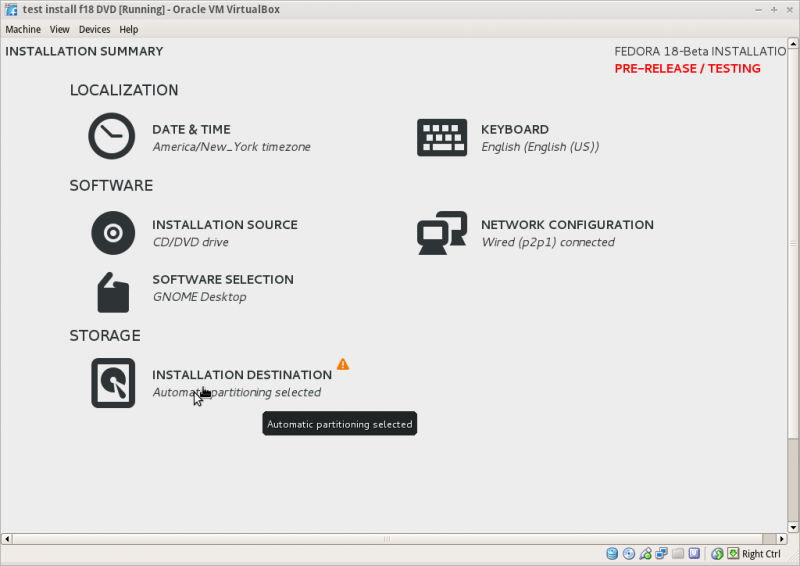

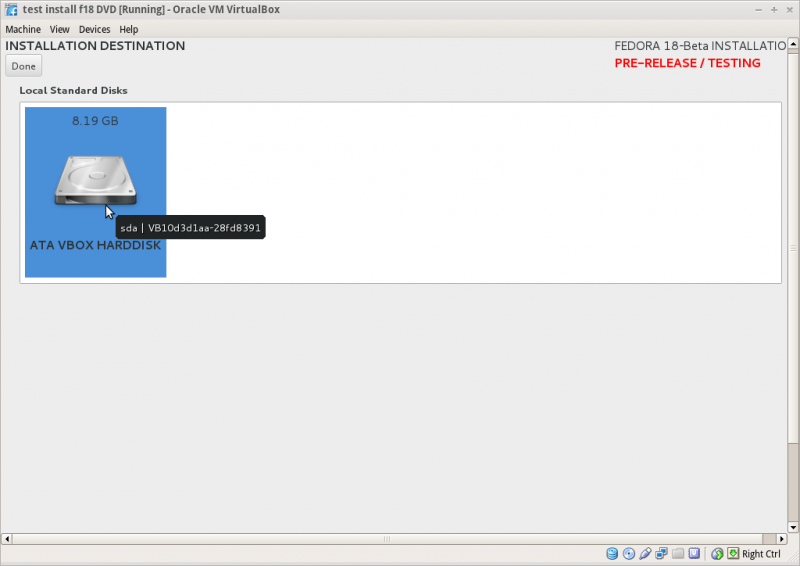
Storage (Disk Selection) then [DONE]
- To format the disk or reclaim space click on [Continue] right bottome to installer
- NOTE: Disk selection filters out non-selected Disks and makes them invisible to the installer
- A booted dd USB will show on initial selection screen DO NOT Select it.
- Example:2 Disk LVM install
SKIP this section if not using 2 Disks
- Error if disk too small (8 GB) for Development and Creative Workstation +

- 2 30 GB disks in VirtualBox
- Select both disks

Reclaim Space
- Seems to necessary to select Partition type first
[+] partition scheme drop down box click > [+]
- Standard Partition
- BTRFS
- LVM (default)

- [ X ]"I don't not need help: Let me customize disk partitioning"
Skip the next section if Customize partitioning is not selected
- Option to let user [+ -] partitions:
Customize partitioning


Raid Partitioning
- Need at least 2 disks selected
- 2 disks selected

- [+]Customize
- Click on small [+] on right gives drop-down
- Select raid

- Raid setup

- [Finish Partitioning]

- Returns directly to Anaconda Main Hub
- Note: bootloader defaults to "first" disk
- Of those disks initially selected
Reclaim Space-continued
- If Customize is not used
- [Reclaim space]
- Reclaim Disk space window
- shows disk partitions with drop down boxes - default is Preserve click on Preserve; get dropdowns Preserve; Shrink; Delete
- select your choice
- Note in latest anaconda (18.34-1) the selections are now located on the bottom line of the reclaim window.
- http://dl.fedoraproject.org/pub/alt/qa/20121201_f18-smoke2/

- Do this for each partition shown.
- When finished [Reclaim space] returns to main Hub

- Click [Done] to return to main hub
Software Selection and [Done]
- select left column (Environment) and right Column (Add-ons)
- Gnome-desktop is default
- scroll down left collumn and select sugar-desktop

- Wait for software checking

Network Configuration and [Done]
- recognizes wired DHCP connections if present
- Wireless will show up if wlan0 is visible and supported
- [Configure] to set up either connection.
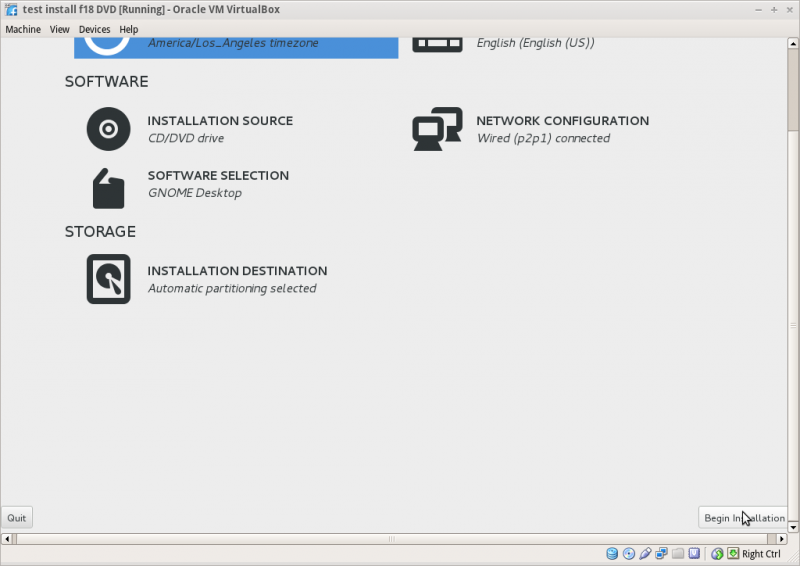
Time Zone select and [Done]

Begin Installation
- Appears when all warnings for unfinished spokes are gone

Root Password
- Appears after install begins

- Enter password on both lines and hit [back]
- hit [back] a second time for a weak password.
- If the root password is not entered during install; anaconda will pause at the greyed out [Finish Configuration] until it is entered.
- Once the root password is entered [Finish Configuration] appears and the install will complete.
- Wait for [Reboot], (or [Quit] if live), when install is completed.
Remove CD/DVD in VirtualBox/Settings/Disk settings and start your Virtual Machine
HINT: export this virtual machine before running it to save it before it runs Firstboot.
- this can be later imported for use by another user.
More Tutorials
External Tutorial: a-visual-tour-of-fedora-18
hit <== (BACK) in browser to return here.