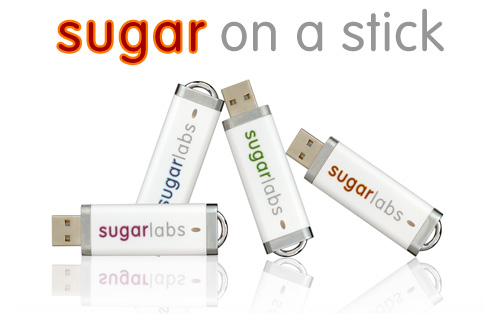
Sugar on a Stick/Strawberry

Sugar on a Stick - Strawberry
Release Notes - last update: 2009/06/24
This document provides instructions for preparing a Sugar on a Stick (SoaS) installation. It also contains a list of known issues and sources of further information. For more detailed information, please check the SoaS wiki page.
The Sugar on a Stick Strawberry release is based Fedora 11 and includes the latest updates as of June 22. It also features the last Sugar desktop environment, namely version 0.84, and additional activities to enrich the user experience. Interested users can download further activities from the Sugar Activity Library. This release is step forward from the beta release; in addition to Fedora updates, it includes supplementary sample content, which is available in the Journal. Apart from the default fructose activities, additional activities are included in this release.
| Fructose Activity | Honey Activity | Honey Activity | |
| Browse | CartoonBuilder | Memorize | |
| Calculate | Colors | Moon | |
| Chat | FlipSticks | Paint | |
| Etoys | FreeCell | Physics | |
| Image Viewer | InfoSlicer | Poll | |
| Jukebox | IRC | Record | |
| Log | JigsawPuzzle | SliderPuzzle | |
| Pippy | JokeMachine | Speak | |
| Read | Labyrinth | StoryBuilder | |
| Terminal | Library | ViewSlides | |
| Turtle Art | |||
| Write |
Get it!
Windows Users
- Download the latest version of Fedora LiveUSB Creator from https://fedorahosted.org/liveusb-creator/ and extract it;
- Plug a target USB key into your computer (minimum 1-gigabyte);
- Use the Format dialog to rename your USB Volume to FEDORA;
- LaunchLiveUSB Creator;
- Select Sugar on a Stick v1 Strawberry in the drop-down menu on the upper-right side of the LiveUSB Creator window;
- Set the Persistent Storage slider to at least 160 MB (use more if you have a key with more space);
- Select your USB key as the target;
- Click the Create Live USB button and then wait for the process to finish (about 5 minutes);
- Eject the USB key using the Safely Remove Hardware dialog.
Linux Users
- Download the SoaS iso image from http://download.sugarlabs.org/soas/releases/soas-strawberry.iso
- Install these three packages: syslinux, isomd5sum, and cryptsetup
- Download this script: http://download.sugarlabs.org/soas/releases/livecd-iso-to-disk.sh
- Plug your target USB key into your computer;
- Unmount the USB key (e.g.,
sudo umount /dev/sdb1); - Execute the script with the following command:
sudo ./livecd-iso-to-disk.sh --overlay-size-mb 300 --home-size-mb 160 --delete-home --unencrypted-home soas-strawberry.iso /dev/sdb
- Note: In this example, your USB device would be sdb! Adjust this before confirming the command, if necessary. Also, you might want to increase the home or overlay size if you have more than 1 GB of space.
Mac Users
Mac users will need to have access to a Linux or Windows machine to prepare their USB key.
- Create your SoaS as described above;
- Download the boot helper disk: http://download.sugarlabs.org/soas/releases/soas-boot.iso
- Put both the CD and the USB key into the machine;
- Turn the Mac on and press at the chime the "C" key;
- It should boot from the CD and continue to use the USB key from this point.
- Note: This is an experimental method to run SoaS on a Mac. Not all hardware configurations might be supported, as it is also noted in the #Known Issues section below. If you run into issues, you might want to consider using a virtual machine.
XO-1 & VMs
The use of SoaS on the OLPC XO-1, as well as in virtual machines, is currently in an experimental state. Instructions for both categories will be provided here at a later time. In the meantime, you might want to refer to the information on the general SoaS wiki page.
For VM see also: http://wiki.sugarlabs.org/go/VMware#Soas-Strawberry.iso_installed_to_VM_Hard_Disk
Boot it!
- Set the option to boot from USB in your machine's BIOS and let it come up
- If your machine doesn't support that, download and burn: http://download.sugarlabs.org/soas/releases/soas-boot.iso
- Make sure to name your USB key FEDORA, as it won't be recognized otherwise
- Put both the CD and the USB key in and let it boot from CD
Use it!
Once you have successfully launched Sugar on a Stick you should explore the Sugar Learning Platform. There is a guide to Sugar and help pages dedicated to most activities. (Try running Sugar on more than one machine so you can enjoy its collaboration features.)
Help Us
Please share your feedback with us; it will help us to improve Sugar in subsequent versions of SoaS. You can always send an e-mail to feedback@sugarlabs.org or join the It's an Education Project mailing list: http://lists.sugarlabs.org/listinfo/iaep
If you encounter any hardware-related issues besides the ones listed below, please consider joining our hardware effort. Please submit the specifications of your hardware so that we work together with 'upstream' to resolve any issues.
Finally, you might also consider submitting bug reports at our bug tracker (you would need to create an account).
Known Issues
Sugar on a Stick Strawberry is based on Fedora 11, the latest release. Consequently, it contains a number of known issues with Fedora images that should be mentioned.
- Recently, problems with ATI graphics hardware, as well as various Mac models have been reported. This was resolved by adding the nomodeset parameter to the kernel arguments.
- If you encounter image flickering or are not able to get past a black screen, it might be worth pressing escape at the blue screen, which appears for a second before the normal boot process starts. You'll be presented a short menu, at which you can directly press tab - just add the nomodeset argument then in the appearing line and boot with enter.
For more information, please refer to the list of common F11 bugs.
Custom Builds
Preliminary instructions how to customize and compose an image can be found here.